A certificate is proof a learner finished. In Learn 360 it is more than a pretty PDF: every certificate carries a unique number that links back to a public verification page, so an employer or registrar can confirm it is genuine in seconds. This guide covers all four parts — turning certificates on, designing them, setting an expiry, and how verification works.
Two ways to hand out a certificate
There are two controls, and they do different jobs. The course setting is the on/off switch. The certificate activity is where you attach a specific design, an expiry, and a signer. You can use the switch on its own, or add the activity when you want more control.
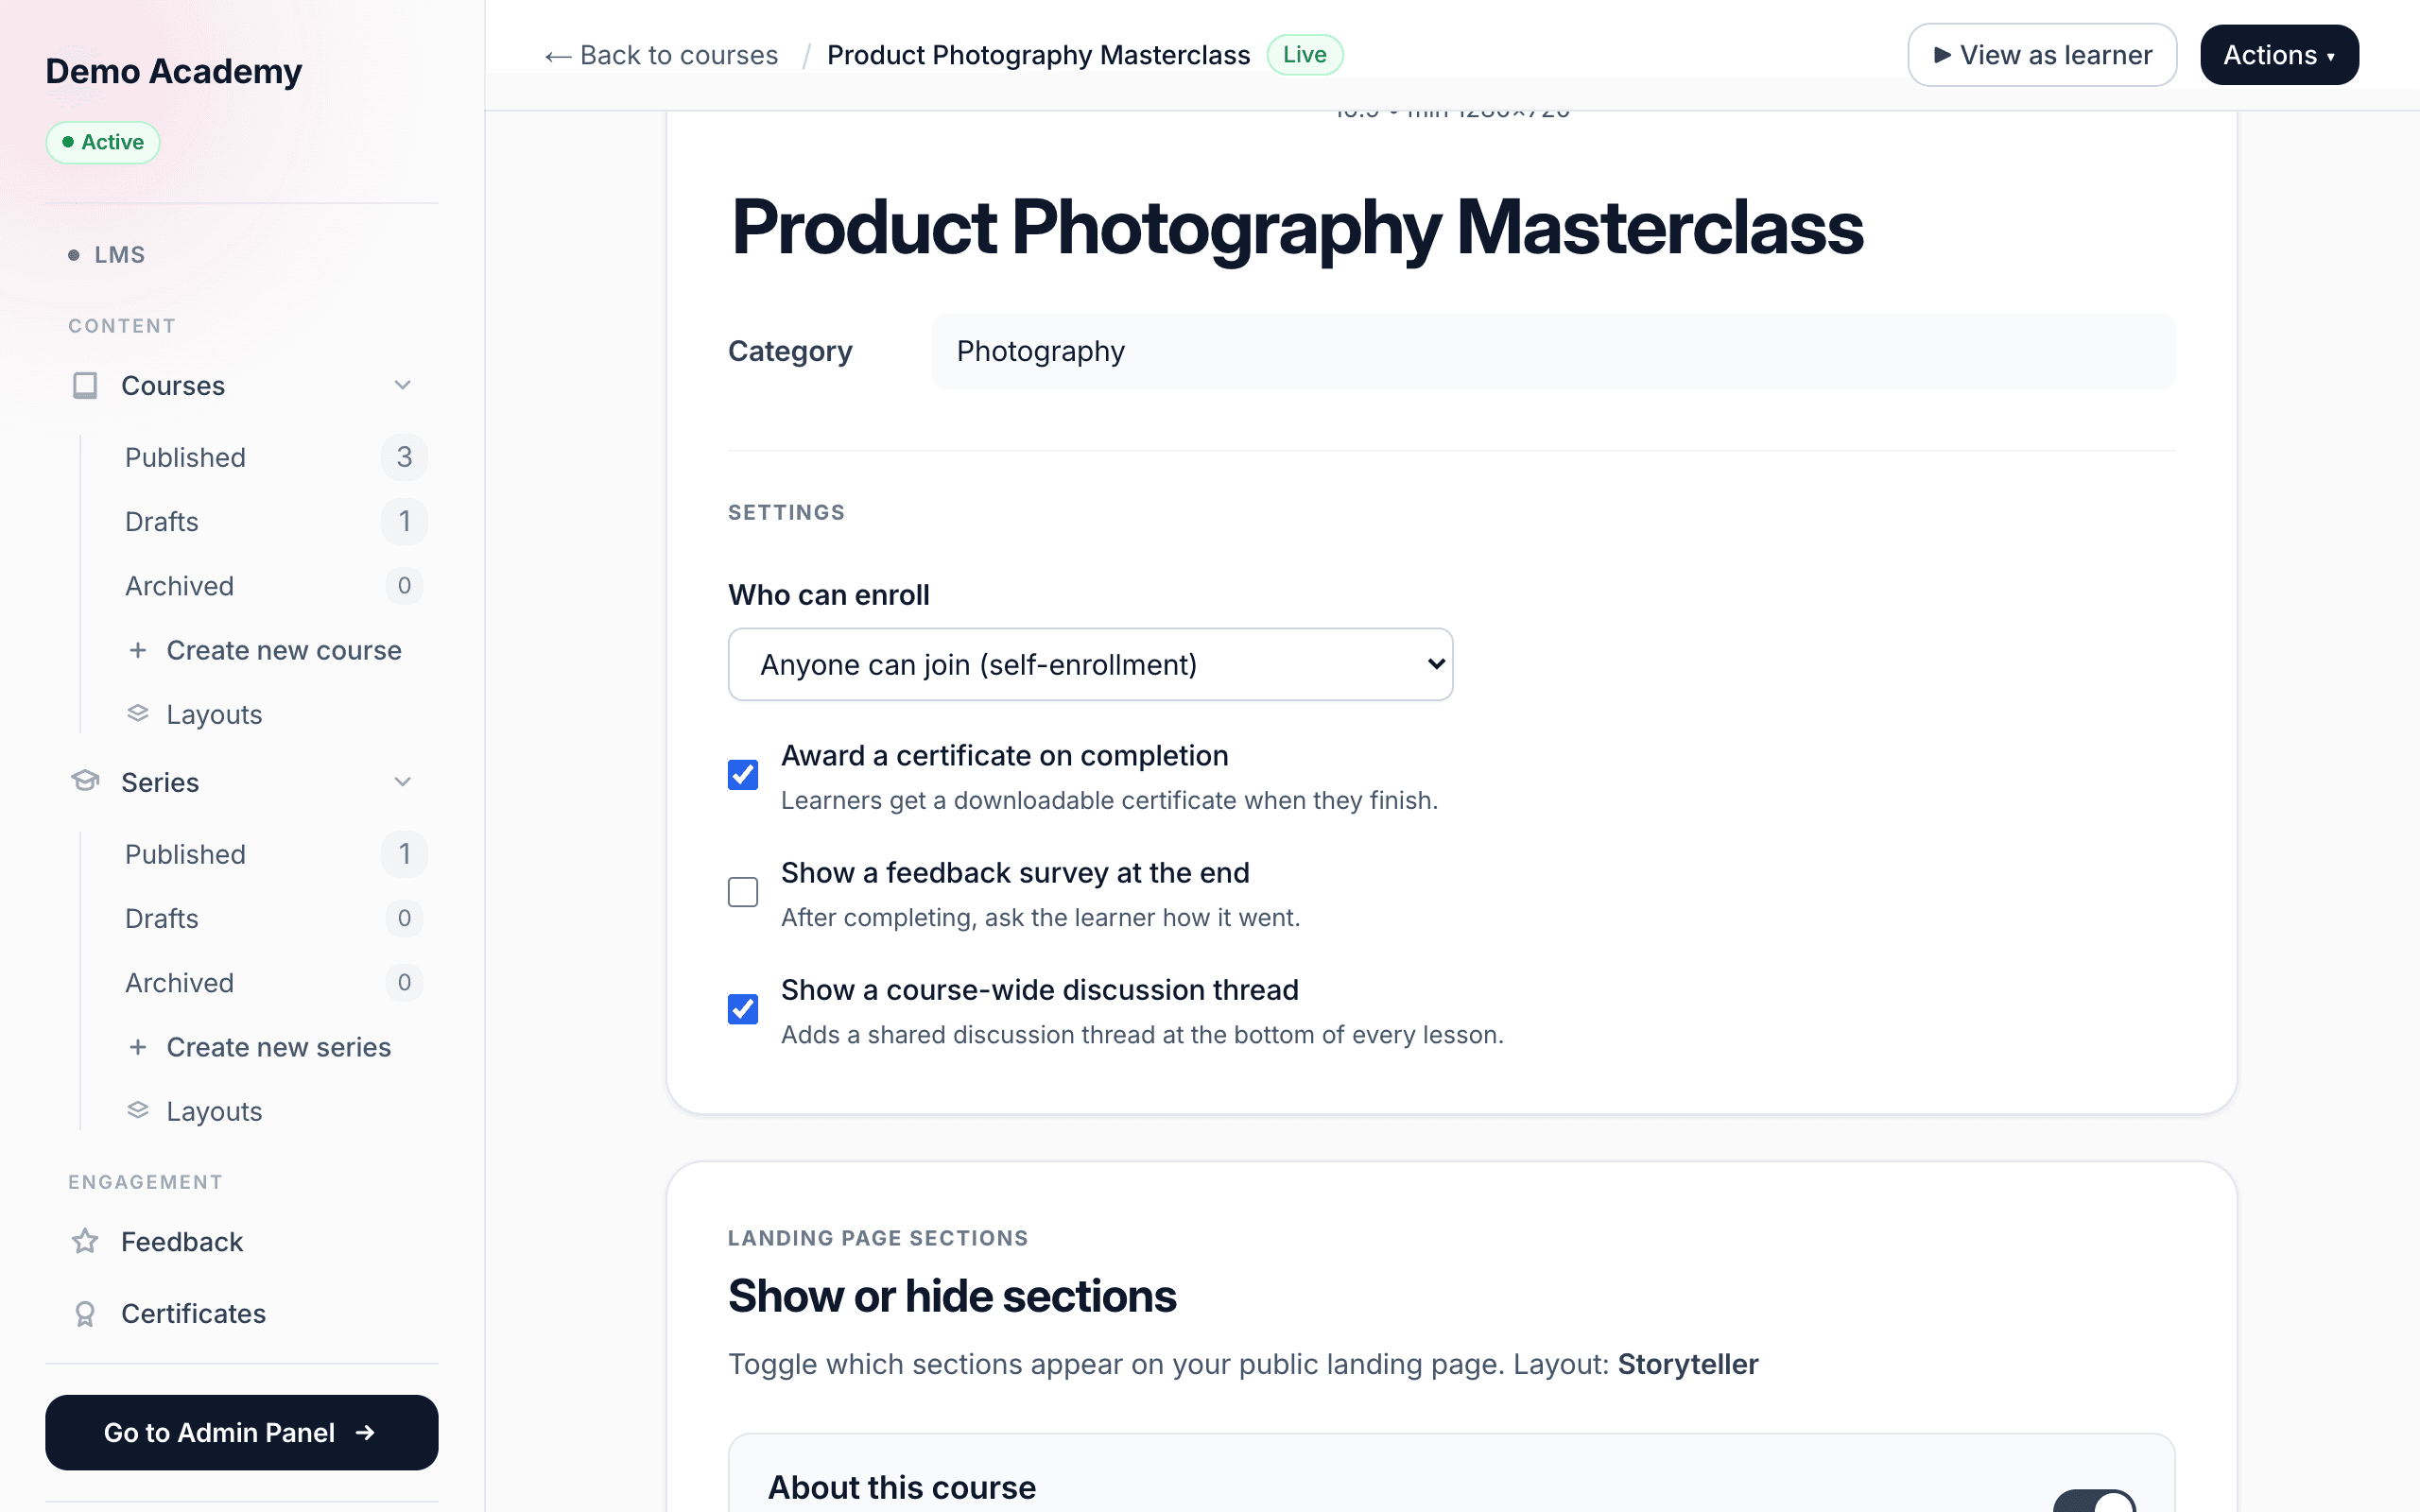
The course setting: “Award a certificate on completion”
This lives on the course basics page, in the Settings block (open a course from LMSCourses and you land on Step 1 · Course basics). It is on by default for every new course. Leave it on and a learner who reaches 100% completion is automatically issued a certificate — no other setup required. Learn 360 uses your default design (see below) and no expiry.
Turning this toggle off is the clean way to say “this course has no certificate.” The change autosaves the moment you flip it.
The certificate activity: choose a design, expiry, and signer
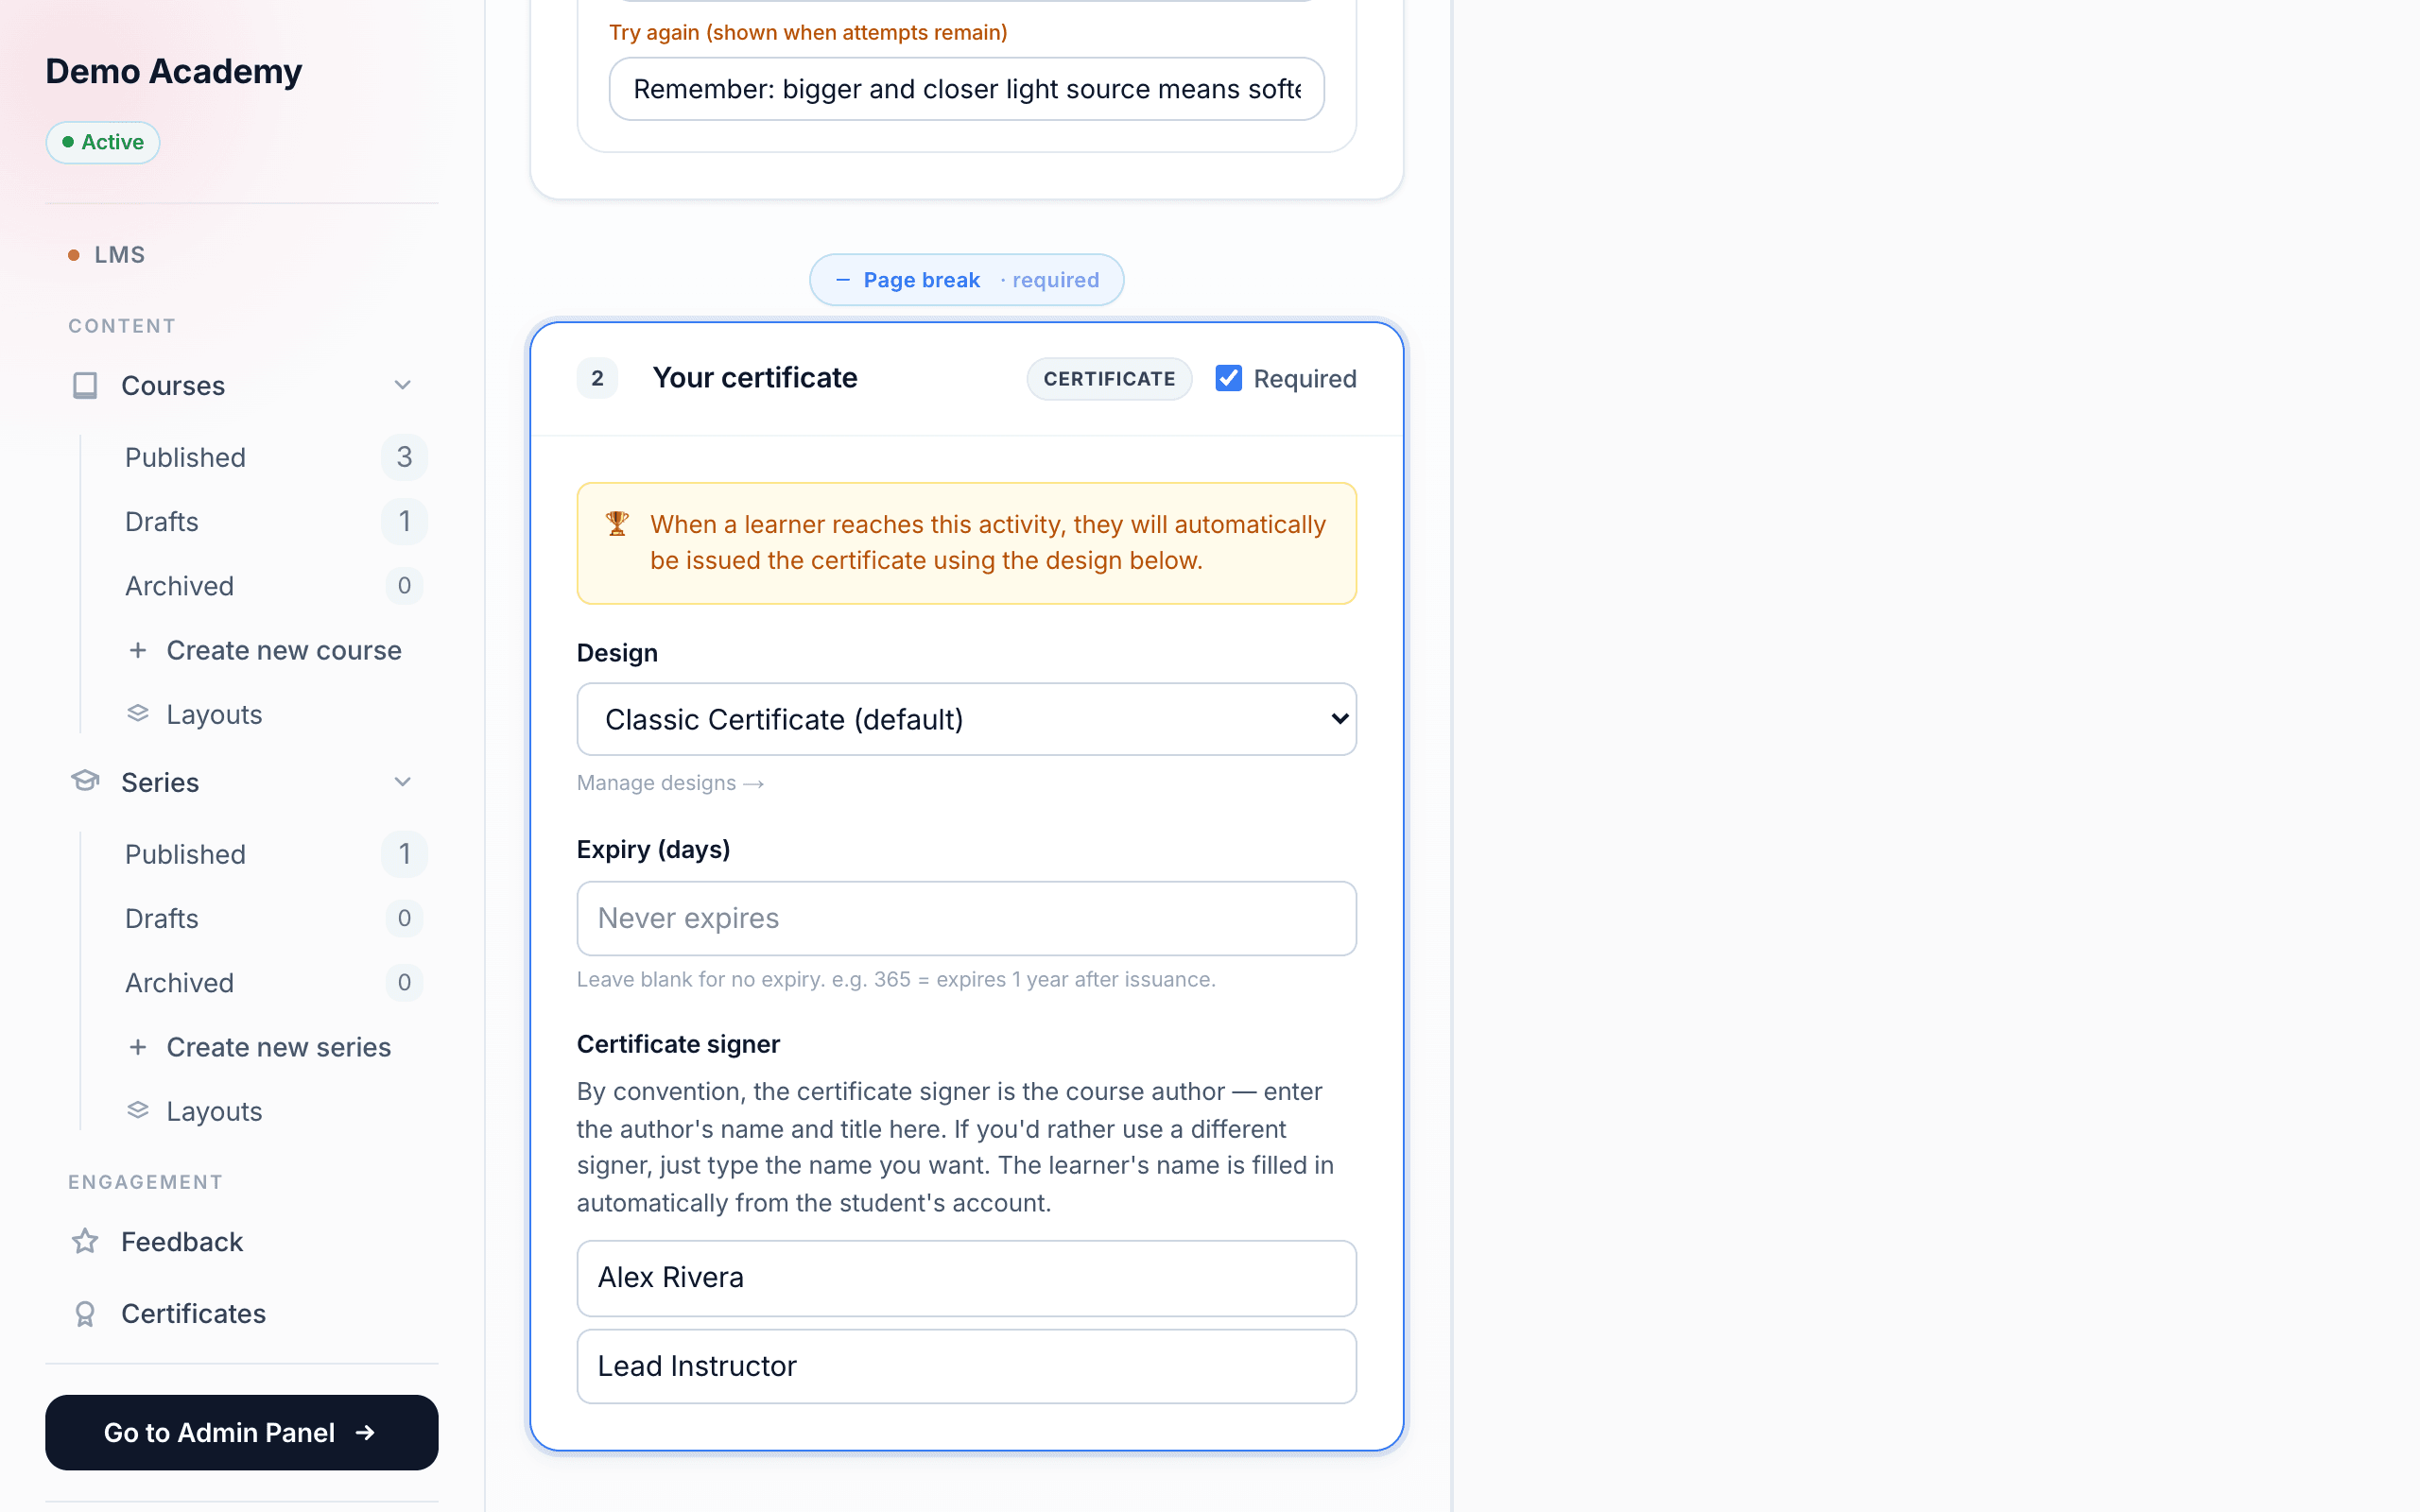
Inside the course content editor you can add a Certificate activity to a lesson — usually the very last one. See Add lessons & activities for how to add activities. When a learner reaches this activity, they are issued the certificate using the design you set right here.
The activity gives you three things the plain toggle does not:
- Design — a dropdown of your saved certificate designs. The first choice is “— Use tenant default —” (whatever design you have marked as default), or pick a specific one. If you have no designs yet, you’ll see a prompt to create one first, with a Manage designs → link.
- Expiry (days) — a number. Leave it blank and the certificate never expires; enter
365and it expires one year after it is issued. Covered in detail under Set an expiry. - Certificate signer — a name and a title (for example Signer name and Director of Learning). By convention this is the course author, but you can type any name. The learner’s name is filled in automatically from their account — you never type that.
Everything in the activity autosaves as you type. Note that the signer is set here on the activity, not in the design editor.
Design your certificate
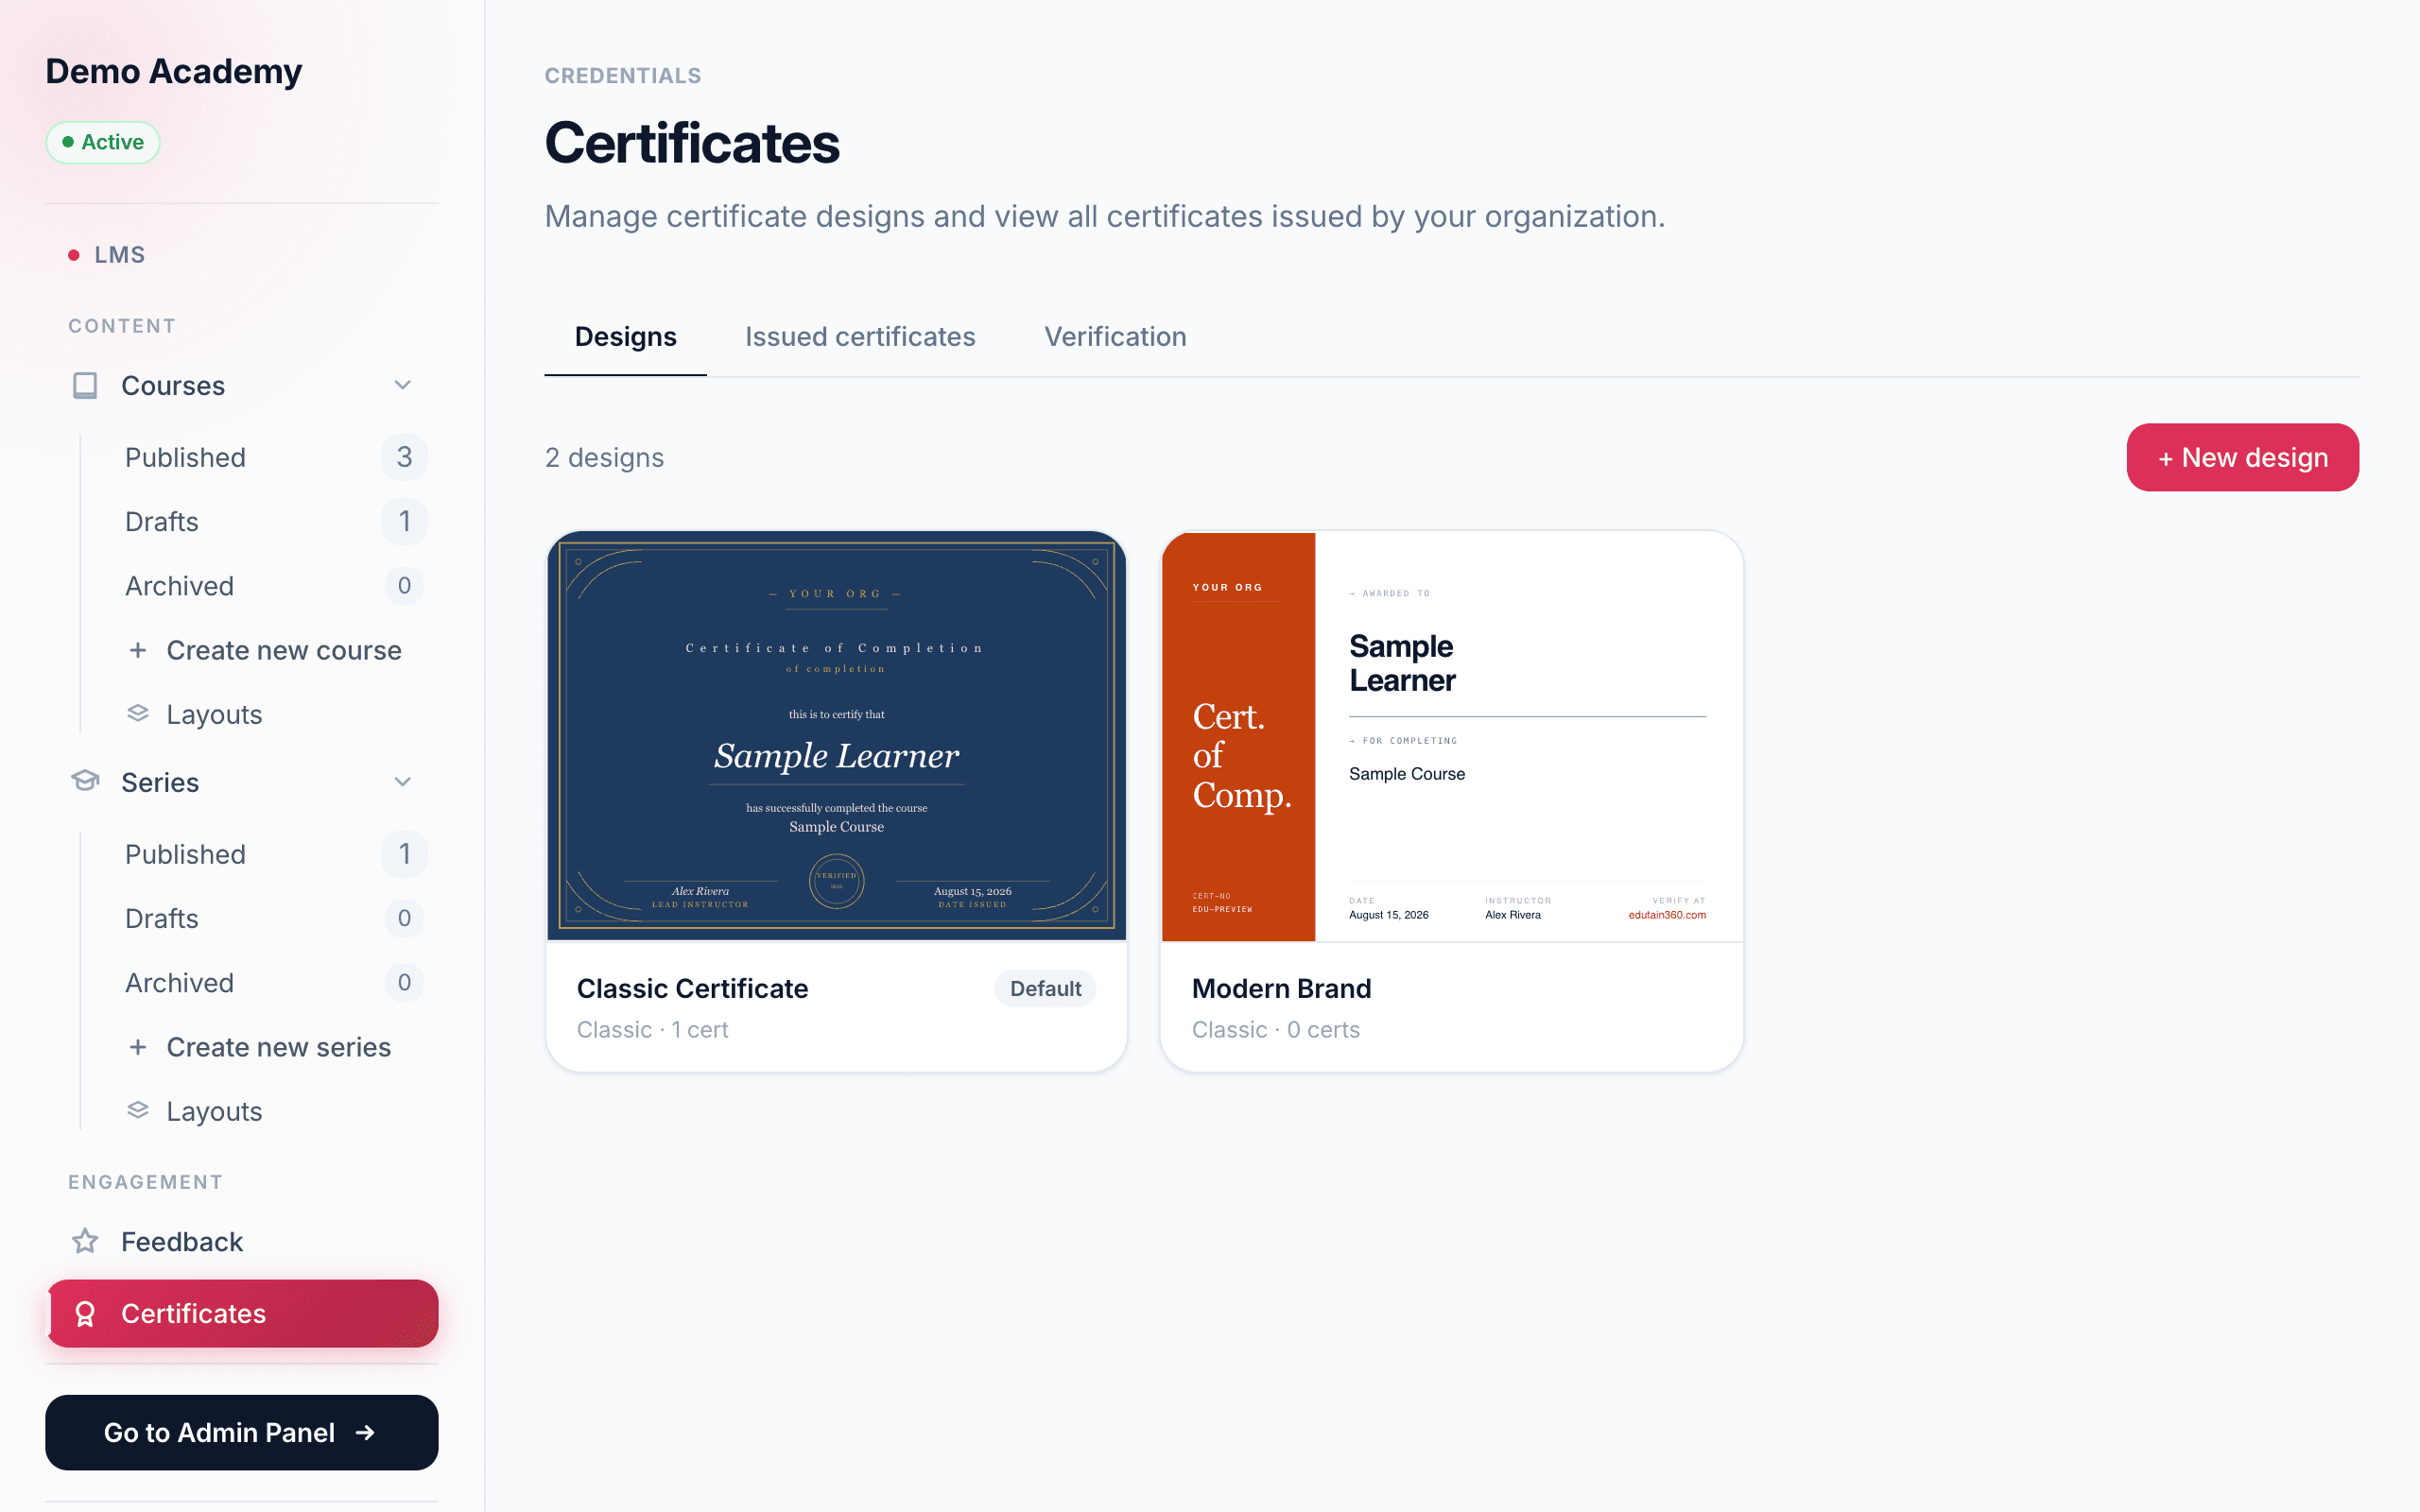
Certificate designs live under LMSCertificates. The page has three tabs — Designs, Issued certificates, and Verification. Start on Designs. Each design shows as a card with a live preview, its name, a Default pill if it is your default, and how many certificates it has issued.
Create a design and pick a template
Click + New design, give it a name (for example Standard Certificate), and choose one of five built-in templates. Each has its own live preview:
- Classic — traditional and formal, with gold accents and a “verified” seal. The most customizable template.
- Modern — a bold editorial layout with a colored hero rail down one side.
- Elegant — refined cream paper with delicate hairline rules.
- Minimal — pure whitespace and architectural typography; just a thin border.
- Bold — a statement piece with a gradient mesh background and dramatic scale.
Click Create design and you drop straight into the editor. You can change everything afterwards, so don’t agonize over the template — pick the vibe that fits.
What you can customize
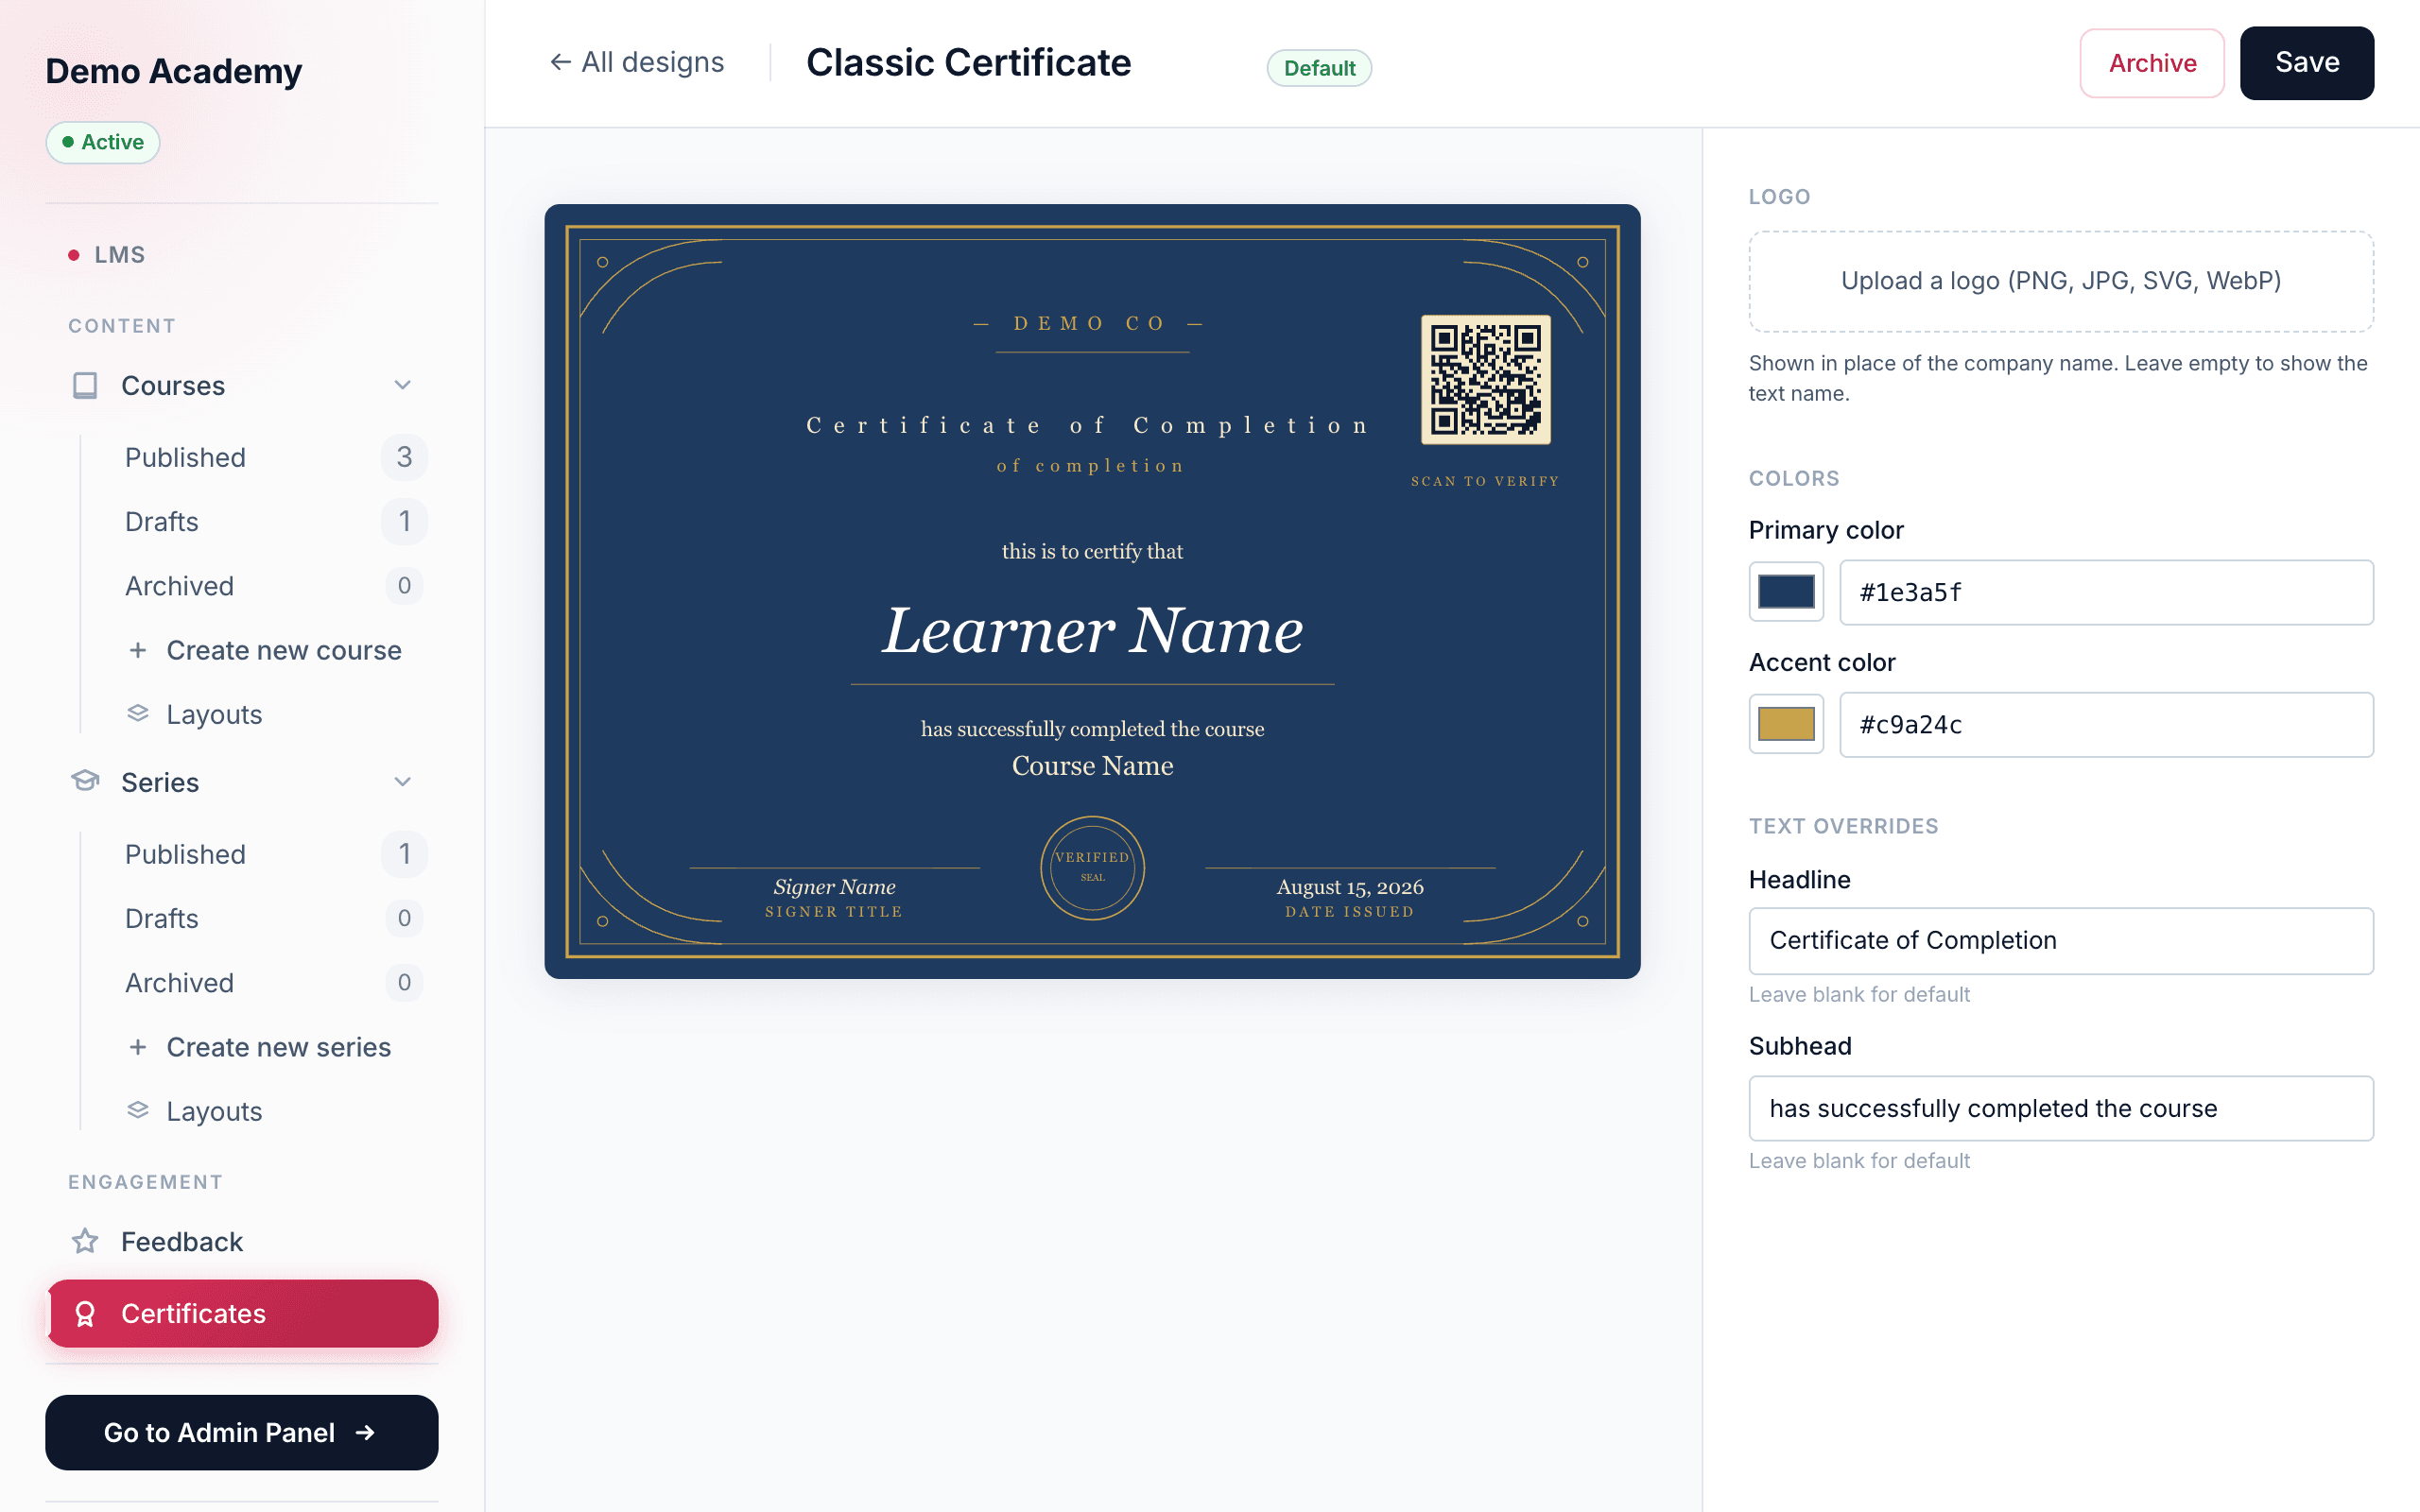
The editor is split: a live A4-landscape preview on the left (filled with sample data and a working QR code), and the controls on the right. Depending on the template, you can set:
- Logo — upload a PNG, JPG, SVG, or WebP. It shows in place of your company name. Leave it empty and the text name is used instead. Every template supports a logo.
- Primary color and Accent color — a color swatch plus a hex box for each. These drive the template’s brand colors.
- Headline — the big word at the top (defaults to “CERTIFICATE”). Leave blank for the default.
- Subhead — the line of body text (for example “has successfully completed”).
The signer is not set here — remember it comes from the certificate activity. Click Save when you’re happy.
Default, and archiving designs
- Set as default — exactly one design is your default. Setting a new one clears the old one. The default is what courses use when they don’t name a specific design.
- Archive — hides a design you no longer want. You can restore it later. You can’t archive a design that a course is still using (you’ll be told how many activities to update first), and you can’t archive your last remaining design.
Set an expiry
Certificates can be permanent or expire after a set time — useful for compliance training that has to be renewed. You set expiry in the Expiry (days) field of the certificate activity. Blank means it never expires; a number is the count of days from the moment it’s issued (so 365 = one year). A certificate issued through the plain toggle alone has no expiry.
Expiry is calculated from the issue date, so a certificate simply becomes expired on its own when the clock passes that date — nothing needs to be run and the learner’s certificate isn’t deleted.
Expiry alerts
Learn 360 helps everyone stay ahead of expirations:
- Learner reminders — the learner is emailed 30 days before, then again 7 days before, and once more when the certificate has expired. Each reminder is sent only once.
- Admin alerts — your team is alerted about upcoming expirations too, and the LMSCertificates item in your sidebar shows a badge when certificates have newly expired. Opening the Certificates page clears it.
- Issued table countdown — the Issued certificates tab has an “Expires in” column that counts down live: green when there’s plenty of time, amber inside the last week, and red once it has expired.
Verify a certificate
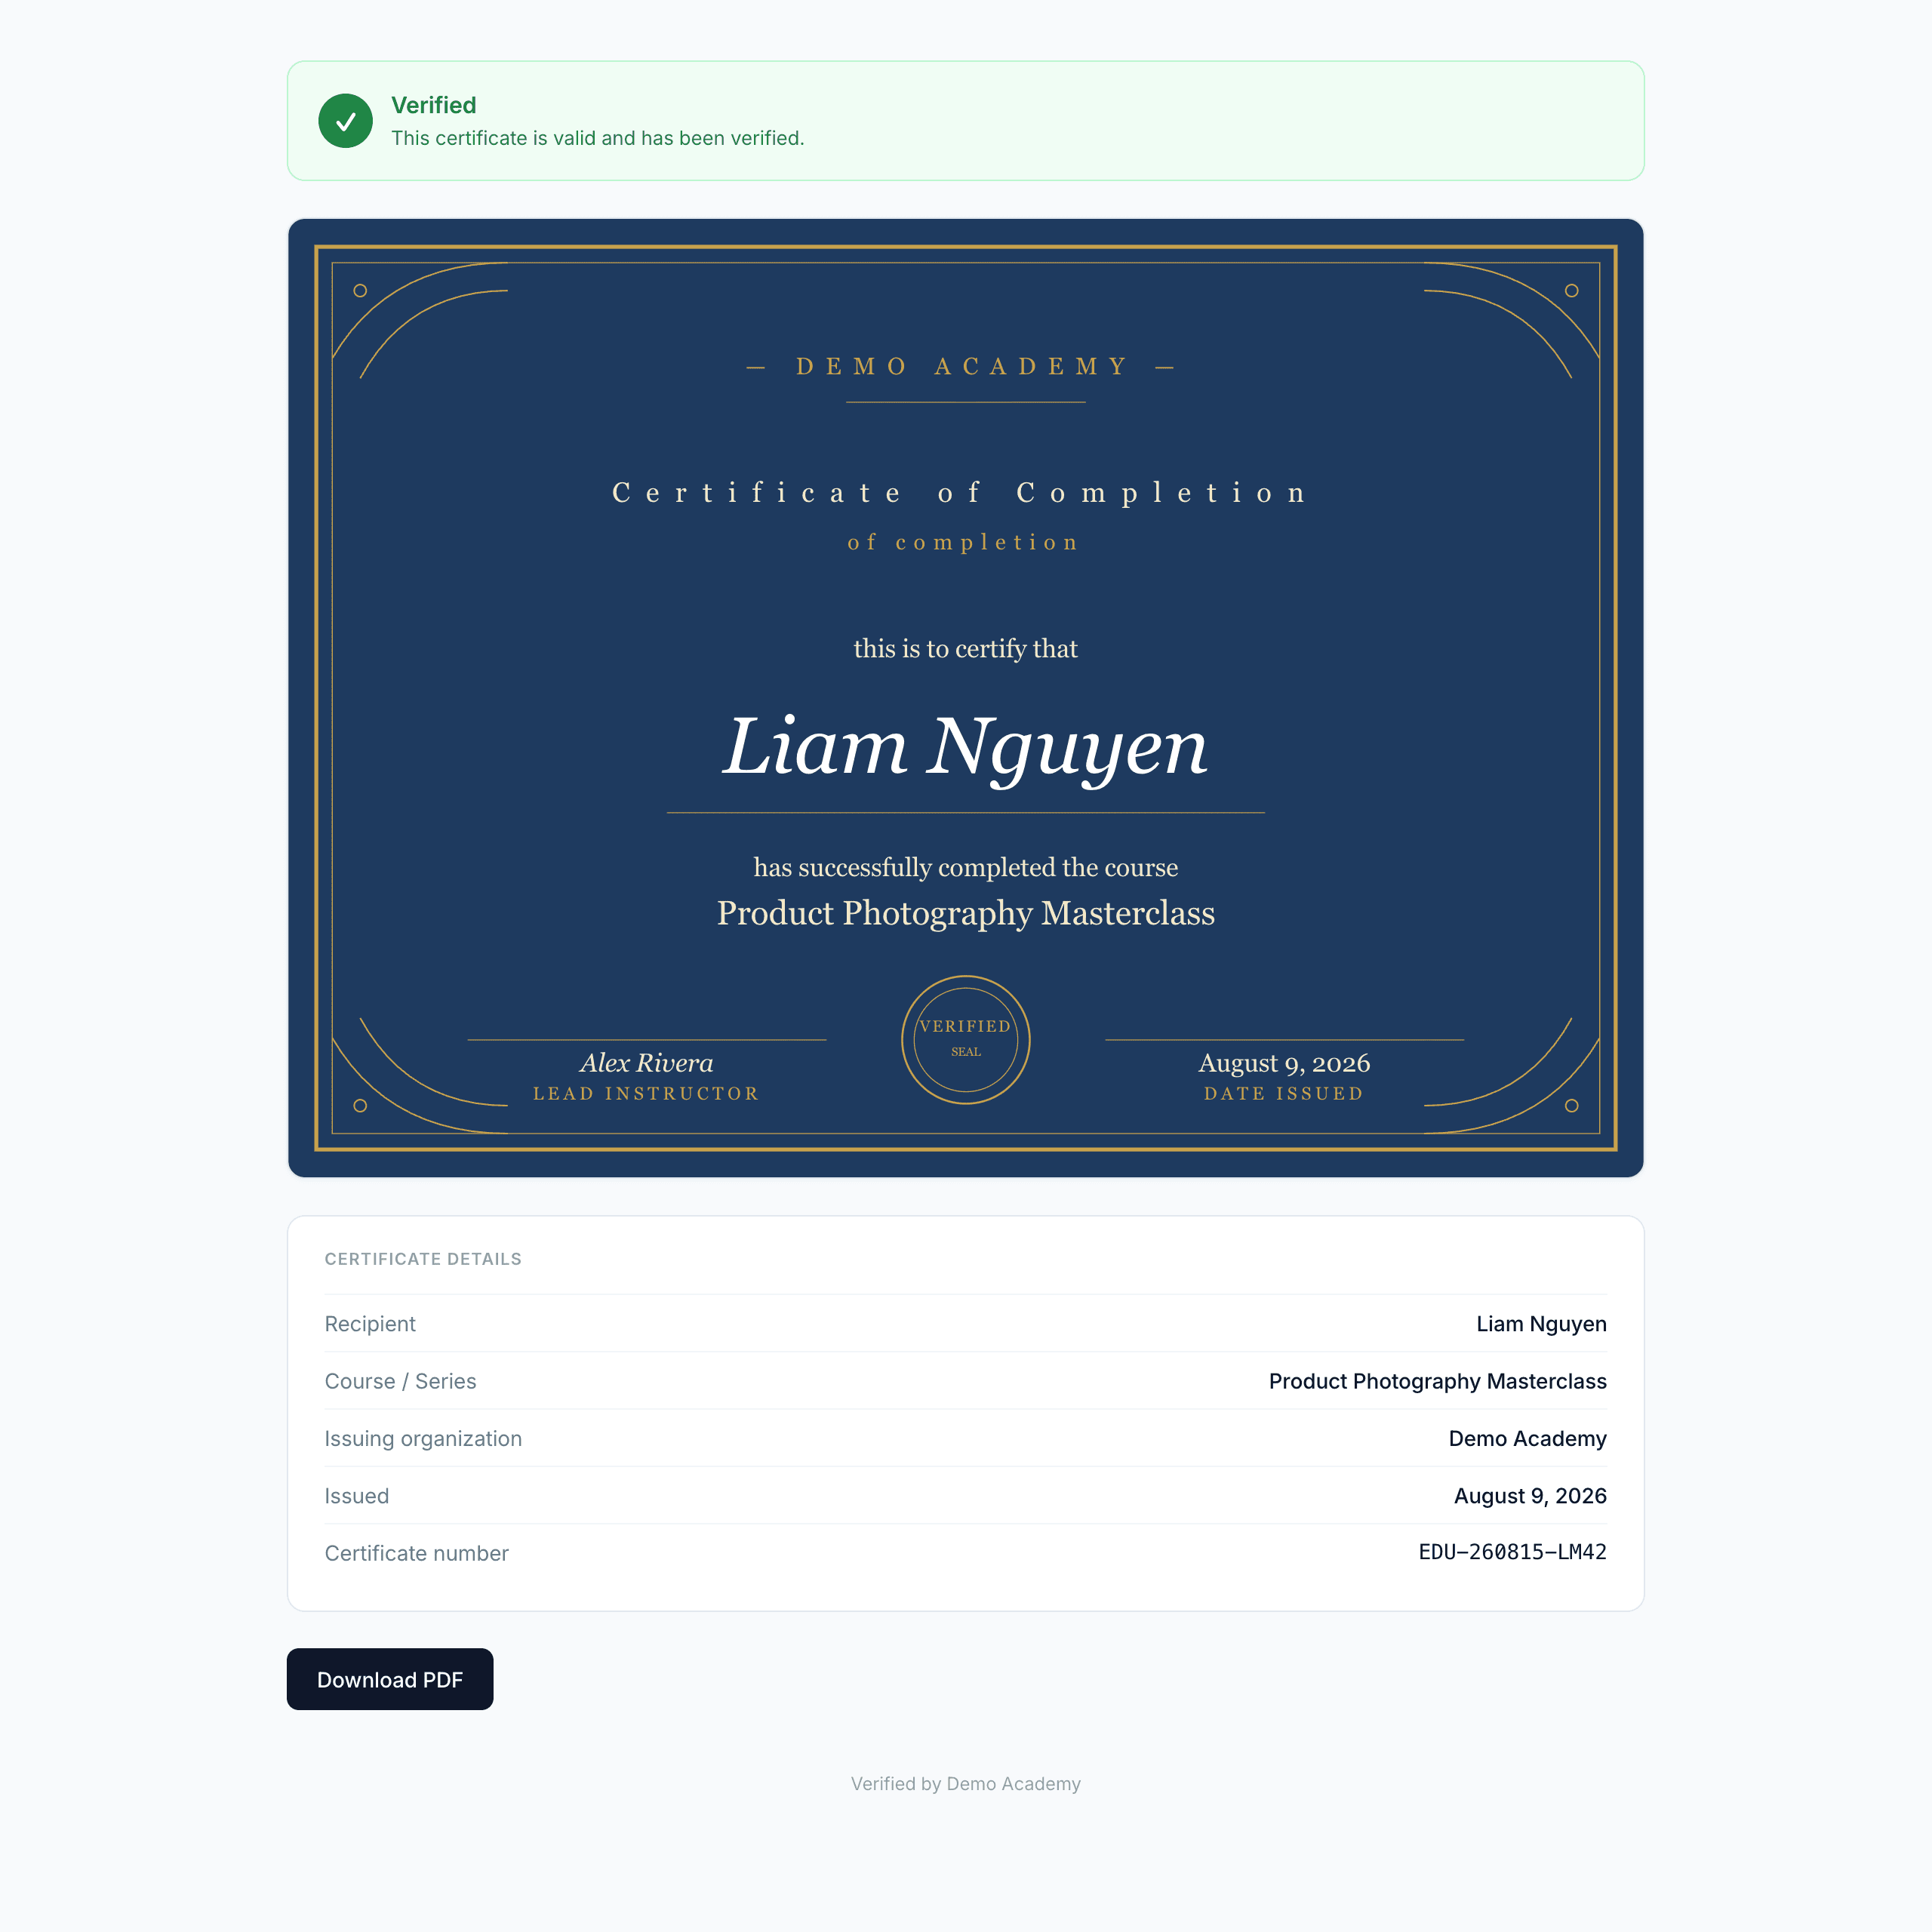
This is what makes a Learn 360 certificate trustworthy. Every certificate carries a unique certificate number — like EDU-260611-FB39 — that points at your public verification portal, where anyone can confirm the certificate without logging in. At the moment a learner earns one, that issued certificate also shows a scannable QR code to the same page.
How a third party checks one
- They visit
/verifyon your storefront (or scan the QR on a freshly issued certificate, which opens it directly). - They type in the certificate number (for example
EDU-260611-FB39) and press Verify. - They immediately see the result, with a clear status banner:
- Verified (green) — the certificate is valid.
- Expired (amber) — it was valid but has passed its expiry date, and the date is shown.
- Revoked (red) — you pulled it back (see below), with the date and any reason you gave.
- Not found — no certificate matches that number.
A valid result also shows the certificate itself plus the details that matter — recipient, course or series, issuing organization, issue date, expiry (if any), and the certificate number — and a Download PDF button. Only these details are shown publicly; nothing else about the learner is exposed.
Track, revoke, and reinstate
The Issued certificates tab lists every certificate your organization has awarded. Search by learner name, course, or certificate number, and filter by All statuses, Valid, Expired, or Revoked. Each row has actions:
- Preview — see the exact certificate that was issued.
- Revoke — invalidate a certificate (for example if work was found to be plagiarized). You can add a reason. The public verify page shows it as Revoked immediately.
- Reinstate — reverse a revocation; the certificate reads as valid again.
Learners see and download their own certificates from their portal once they qualify — see The learner experience. And if you group courses into a series, you can award a single series-level certificate on top of the per-course ones.
Series-level certificates
When you bundle courses into a series, learners can earn a single certificate for finishing the whole program — separate from, and on top of, the per-course certificates they collect along the way. A series certificate carries its own certificate number and QR code and verifies on your public page exactly like a course certificate, just listed under the series’ name instead of a course.
To offer one, open the series and go to its basics. Under Settings, tick “Award a series-level certificate on completion.” A learner who finishes every course in the series — plus the finale, if you added one — is then issued the series certificate automatically. The full walk-through lives in Award a series certificate.
Its design, expiry, and signer come from the finale
Here’s the part that trips people up: there is no separate design, expiry, or signer picker on the series itself. A series certificate borrows all three from a Certificate activity placed inside the series’ hidden finale — its completion course. It is the very same certificate activity described above, with its design dropdown, its Expiry (days) field, and its signer — only this time it lives in the finale. Whatever you set there becomes the series-wide certificate’s design, expiry, and signer.
So to give the series certificate its own look, add a finale from the Series completion slot at the bottom of the series’ course builder, edit its content, and drop a Certificate activity into it. Bundle courses into a series covers adding the finale step by step.
Like every certificate, a series certificate is frozen the moment it’s issued — editing the finale’s design or renaming the series later never changes one that’s already awarded. Learners find it in their portal next to their course certificates, and you can track, revoke, or reinstate it from the Issued certificates tab just like any other.