Sometimes you don’t want people finding a course in the catalog — you want to hand it to a specific person: a client, a new hire, a beta group, or a learner you’re onboarding before your storefront is even public. For that, invite them by email straight from the course. Each invite creates a private link, bound to that person’s email, that grants access (free or paid) when they accept.
Where invitations live
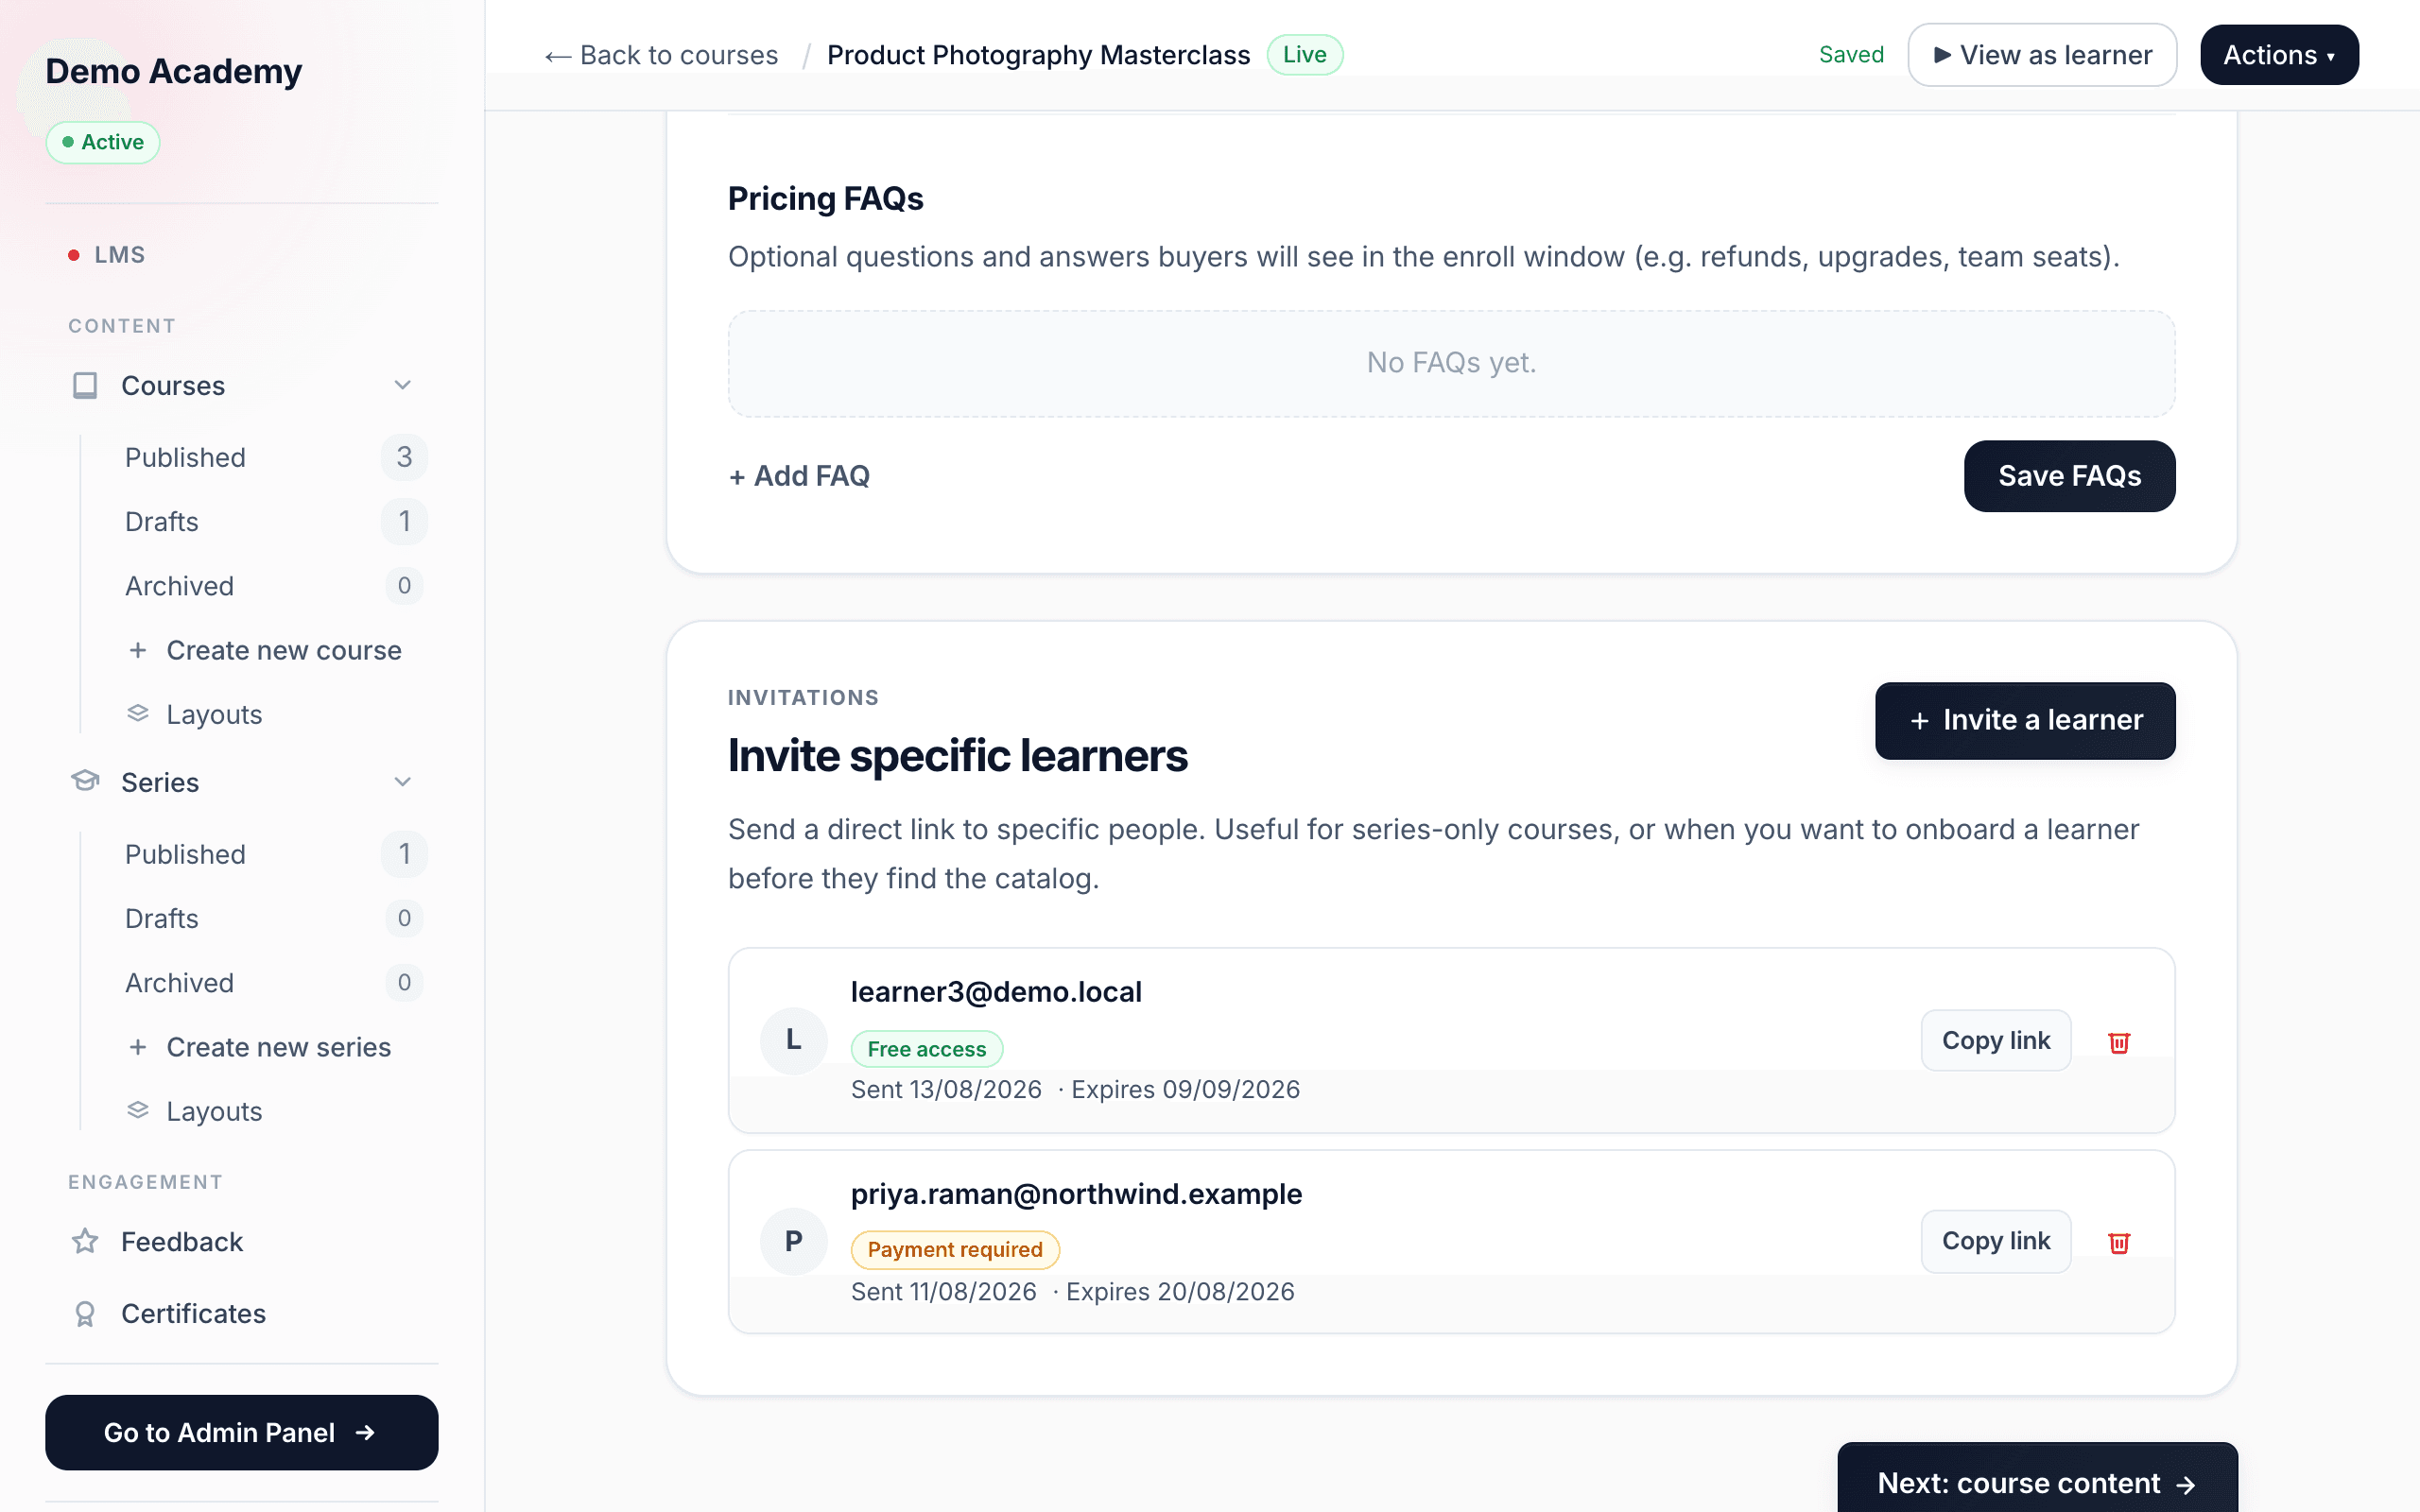
Invitations are set per course, on the course basics page. Open LMSCourses, edit the course you want, and scroll the Course basics page to the Invitations card — headed Invite specific learners. It’s the same place you manage everything else about the course, so there’s nothing new to learn to find it.
Send an invite
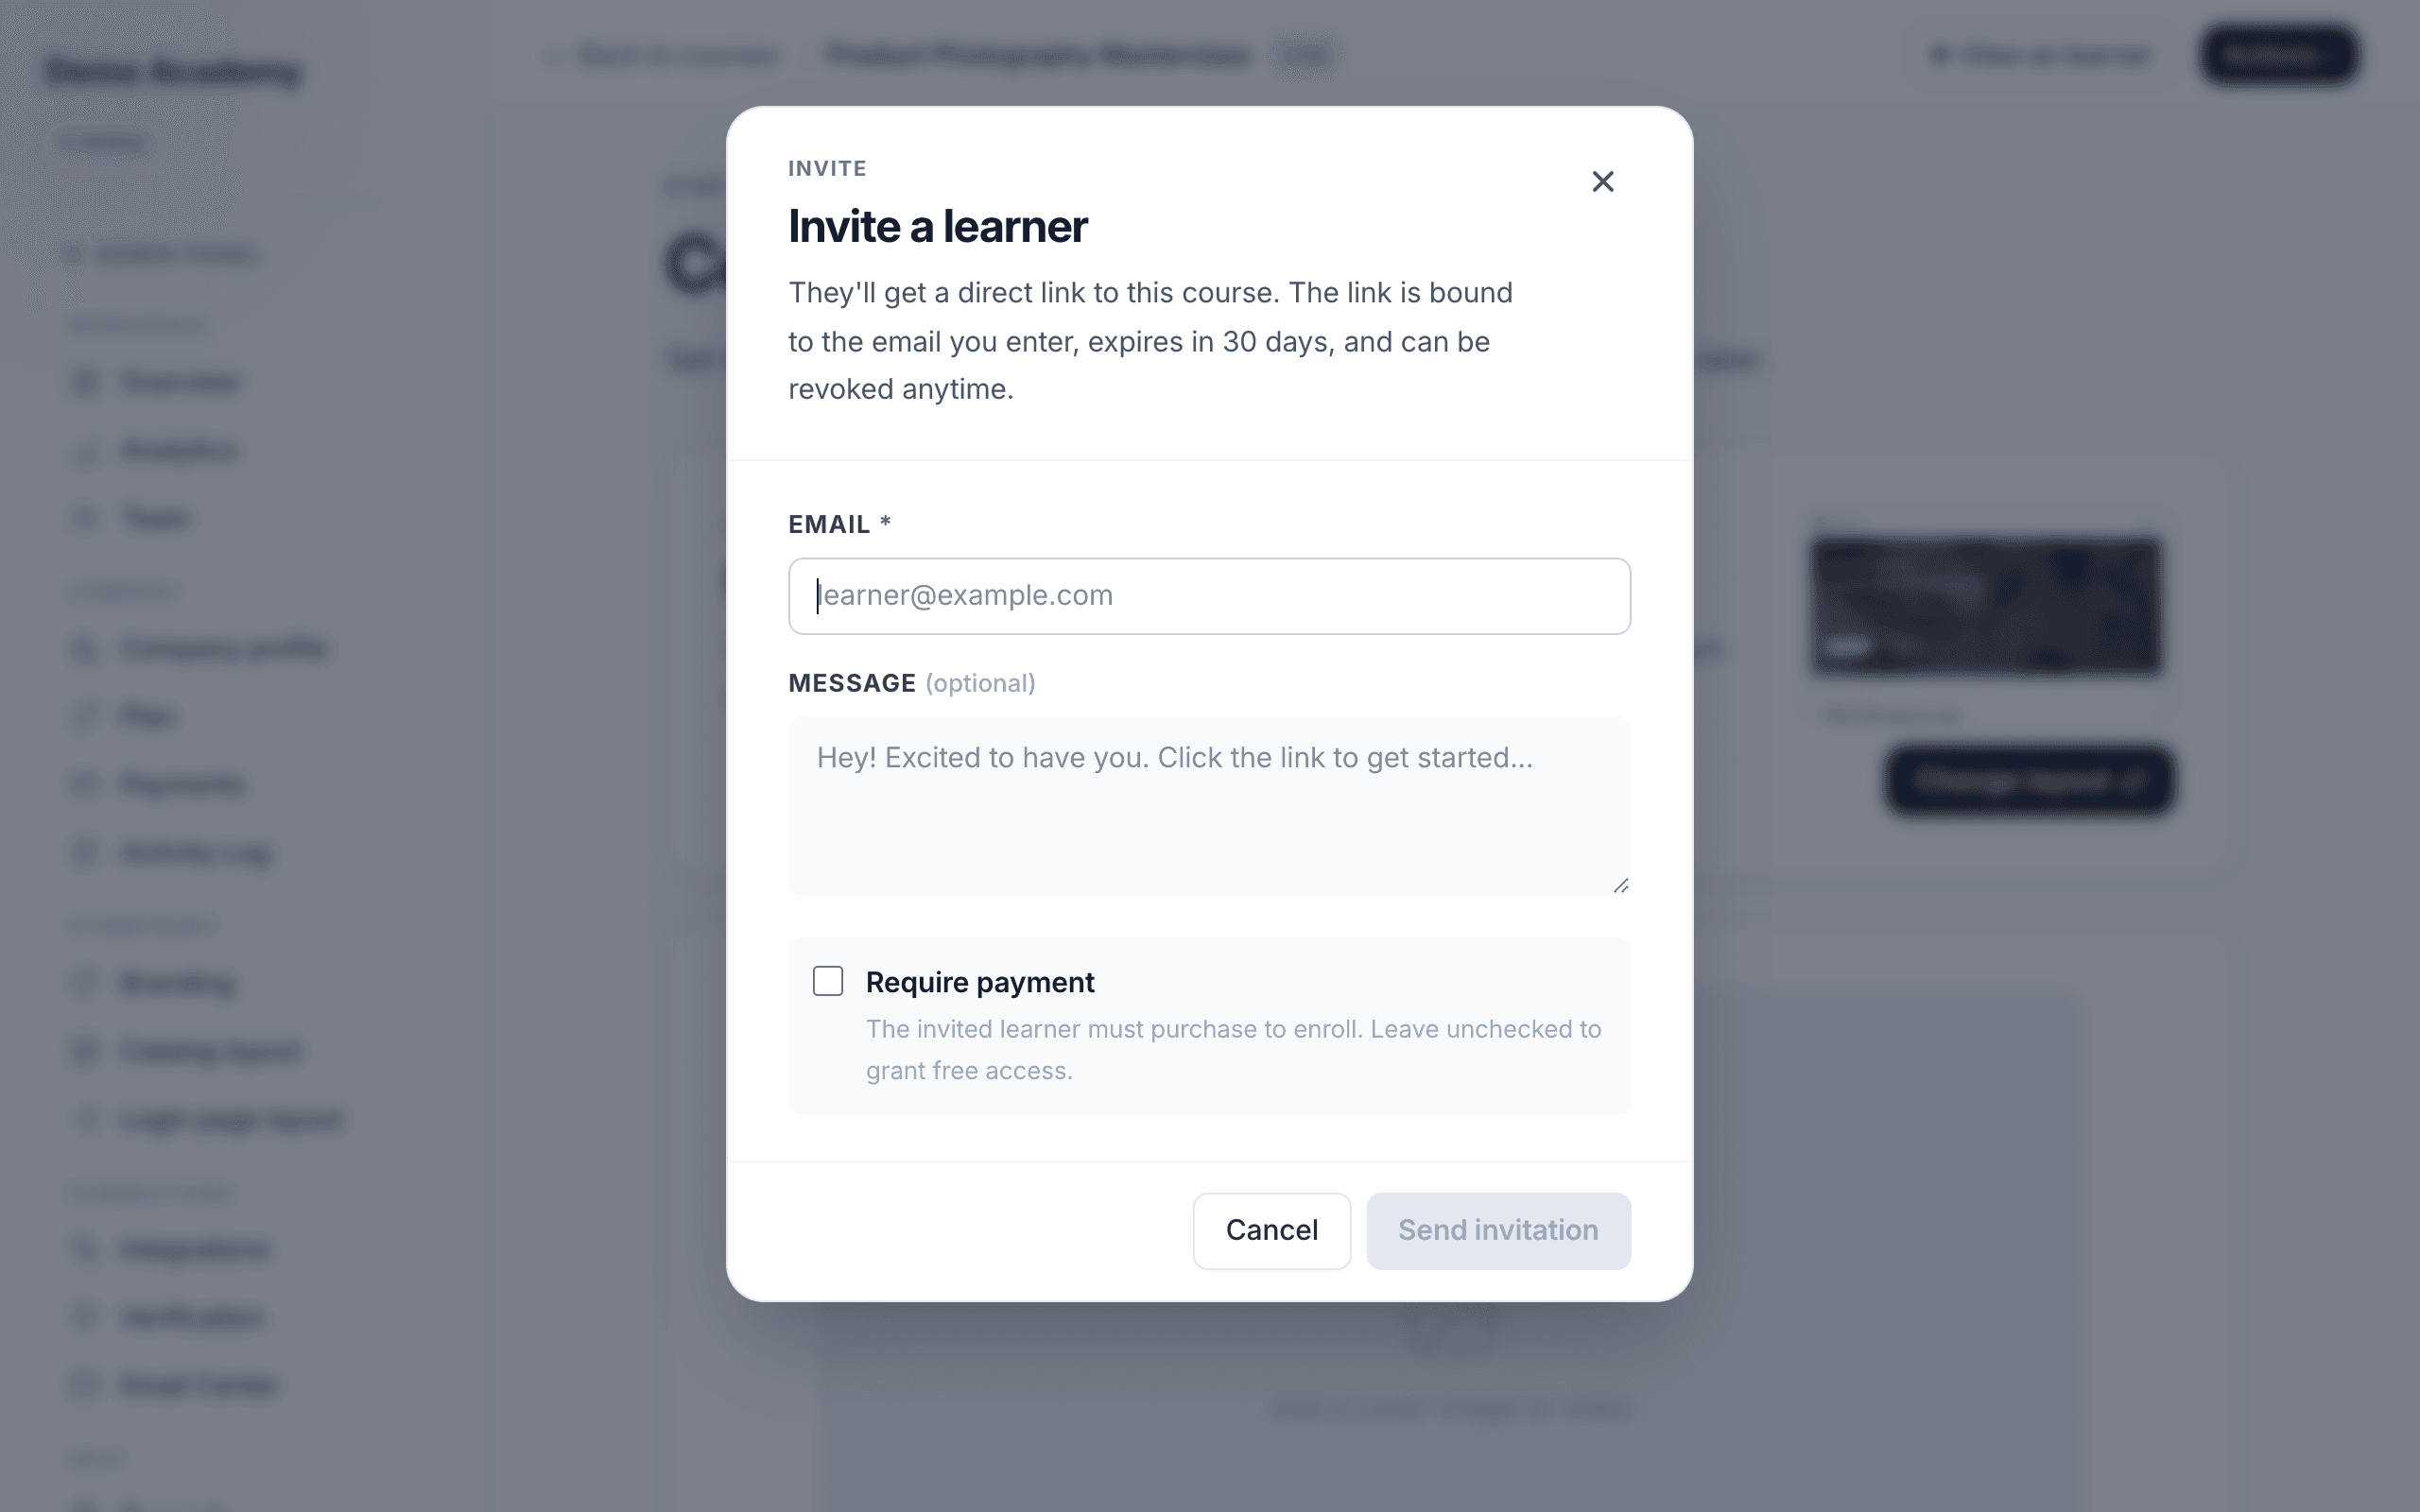
Click Invite a learner to open the invite window. It has three fields:
- Email (required) — the person you’re inviting. The link that gets created is bound to this exact email, so it only works for them; if they try to accept while signed in as someone else, they’re asked to switch accounts.
- Message (optional) — a short personal note included in the invitation.
- Require payment — a checkbox that decides how they get in:
- Leave it unchecked to grant free access — accepting enrolls them immediately, no card needed.
- Check it to still require them to purchase. The invite gets them to the course, but they buy a package to enroll — useful when you want to guarantee a seat for a named person who will pay their own way.
Click Send invitation and they receive an email with a link to the course. The window reminds you of the key rule: the link is bound to that email, expires in 30 days, and can be revoked at any time.
What the learner receives
The invited person gets an email with a button to the course. Clicking it opens the acceptance page — where they sign in if needed, then click Accept invitation. Free invites land them in the course enrolled; payment-required invites open the enroll window so they can buy. The full acceptance flow, including the switch-account and pay-to-enroll paths, is covered in How learners enroll.
Manage pending invitations
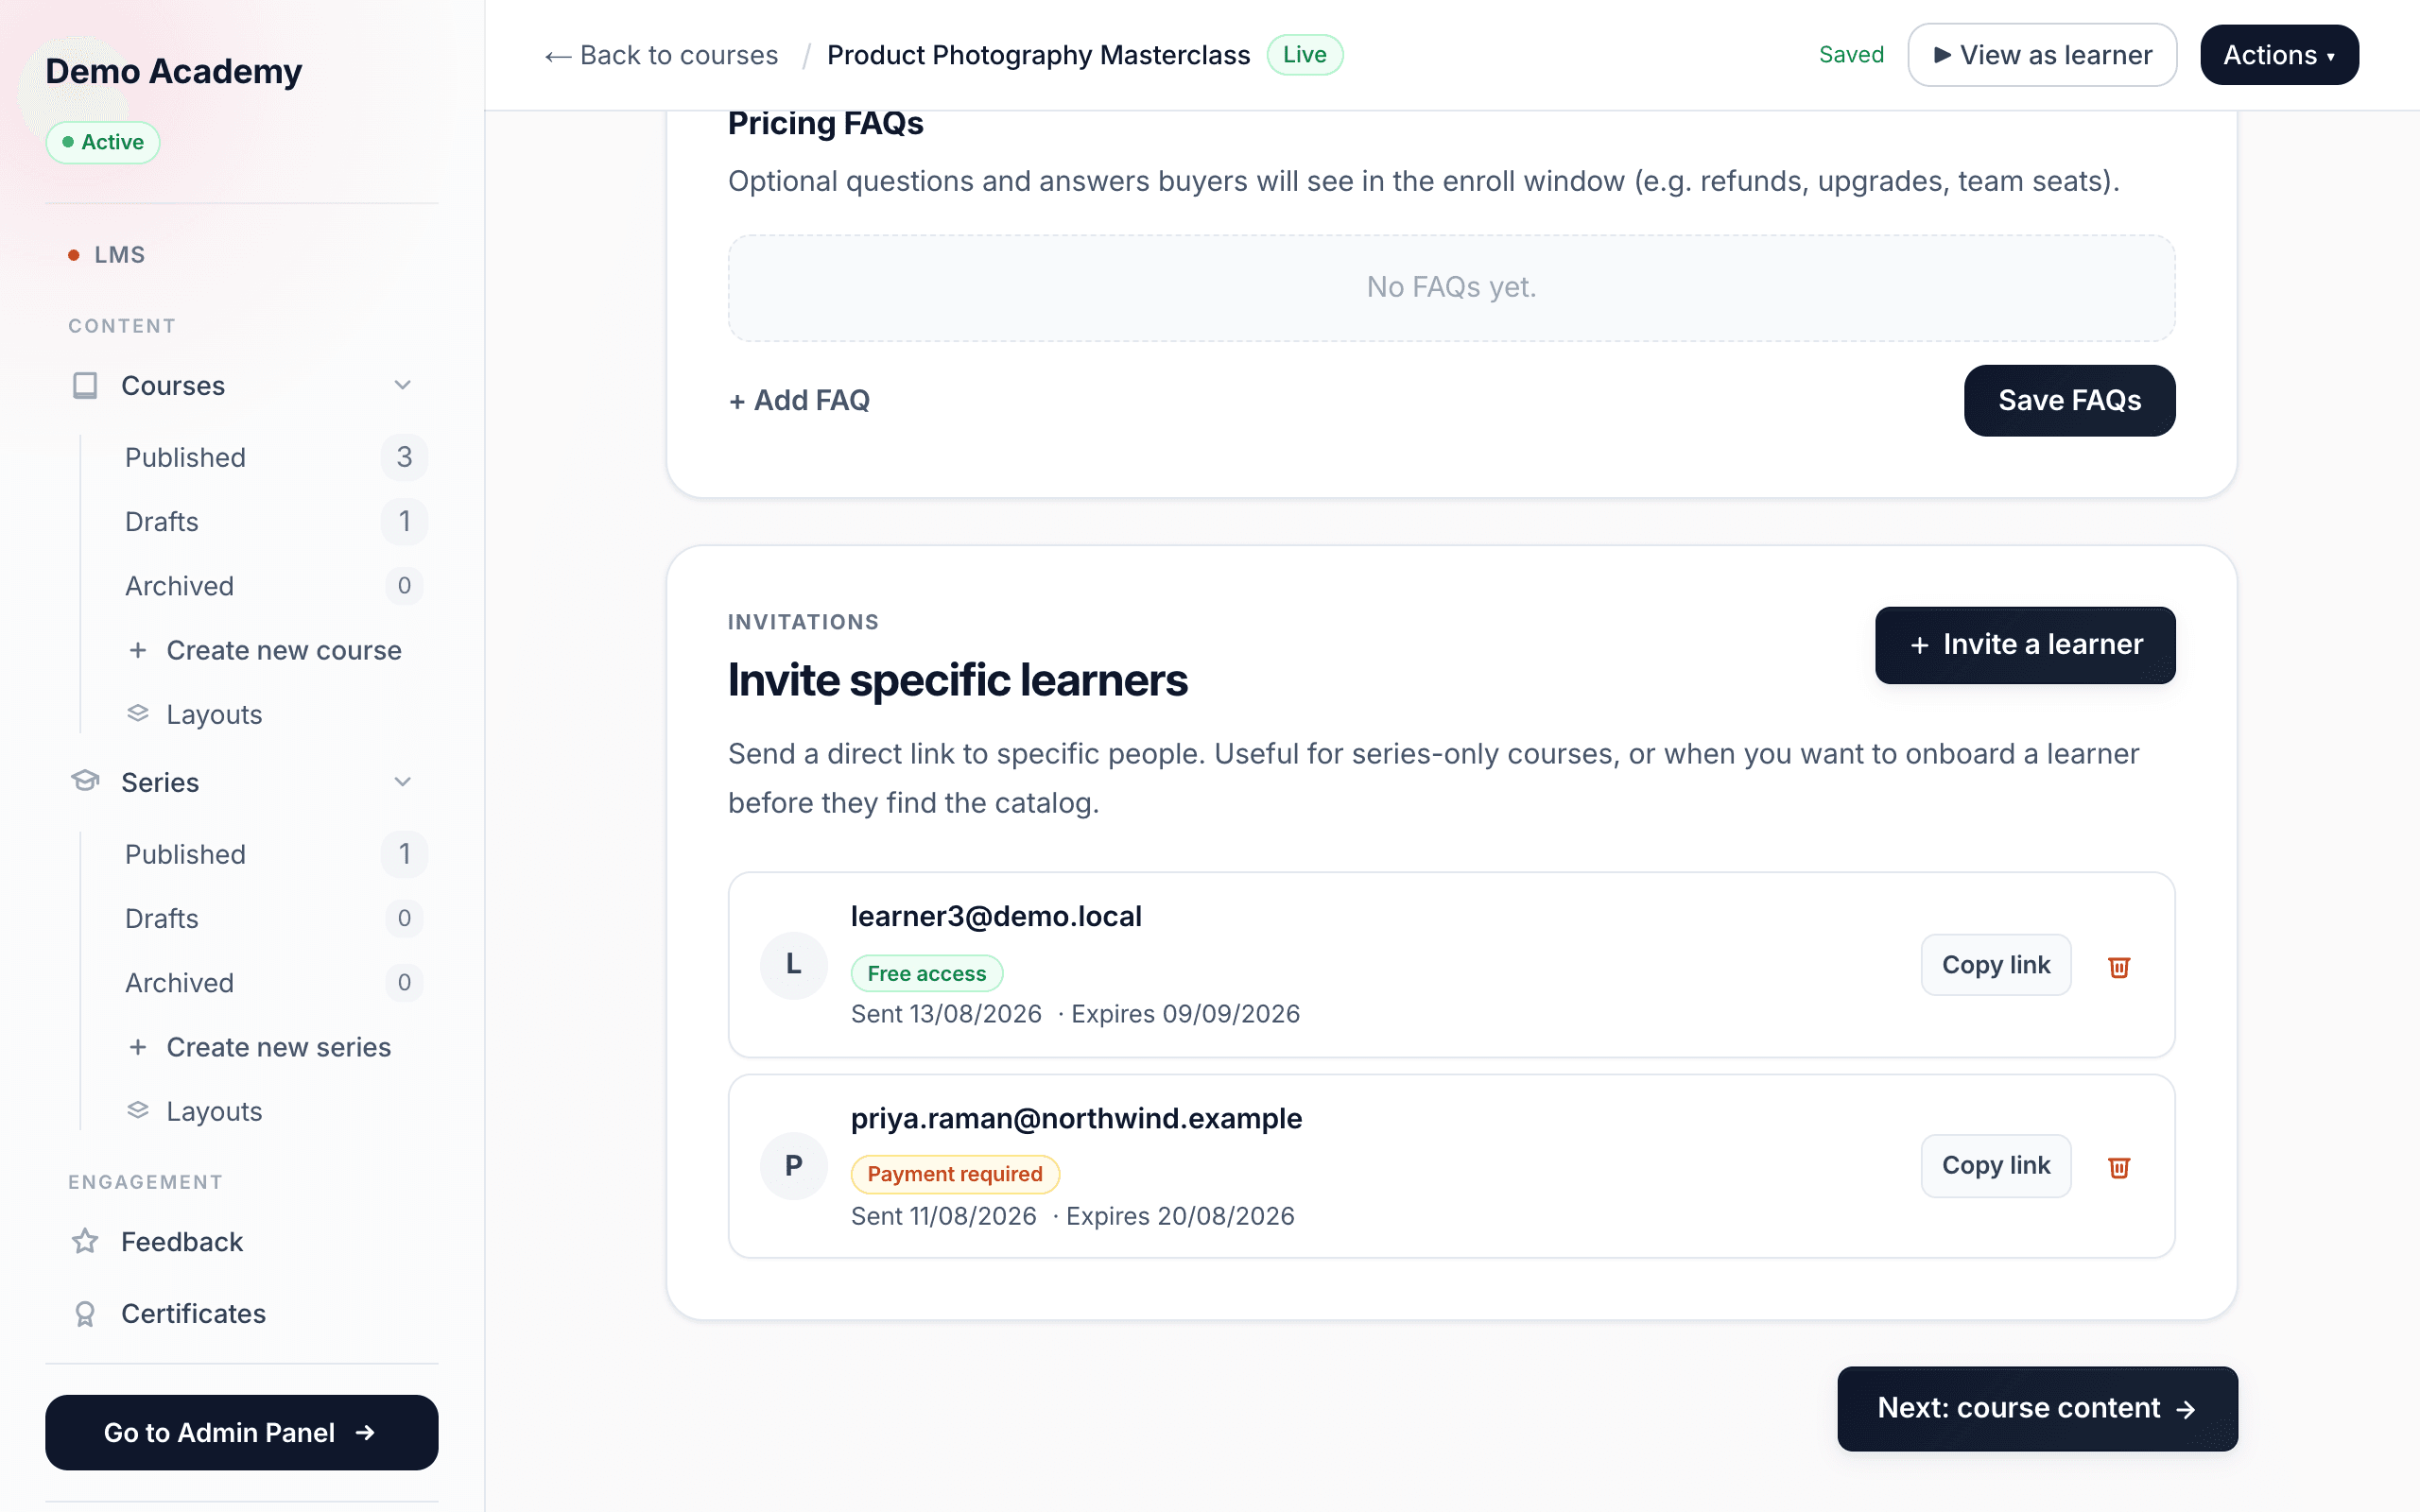
Every invite you’ve sent that hasn’t been accepted yet is listed right on the card. Each row shows the invited email, a colored badge for the access type — Free access or Payment required — and the dates it was Sent and when it expires (the expiry turns amber when it’s within a few days). Two actions sit on each row:
- Copy link — copies the invite link so you can send it your own way: paste it into an email, a DM, a welcome doc, or your CRM instead of relying on the automatic email.
- Revoke (the trash icon) — cancels the invitation. You’re asked to confirm, and once revoked the link stops working, so the person can no longer accept it.
When there are none outstanding, the card simply reads No pending invitations. Accepted invites drop off this list — the person is now a real learner, visible with everyone else you’re teaching.
Invitations vs. the other ways in
Keep the three routes straight:
- Invitations (this page) — you name one person by email; they get a private link.
- Self-enrollment — anyone browsing your catalog enrolls themselves. See How learners enroll.
- Team seats — a buyer purchases a batch of seats and invites colleagues to them. See Sell to teams.
And note that inviting a learner is different from adding a teammate who helps you run the academy — that’s Manage your team.