Your storefront is everything a visitor sees before they enroll — the catalog that shows off your courses, and the login page returning learners land on. You shape both from the Admin Panel, on two separate pages: Admin PanelCatalog layout and Admin PanelLogin page layout.
Your logo and brand color flow into both automatically, so picking a layout is about structure — which sections show, what leads, how it’s arranged — not about recoloring anything by hand.
Catalog layout
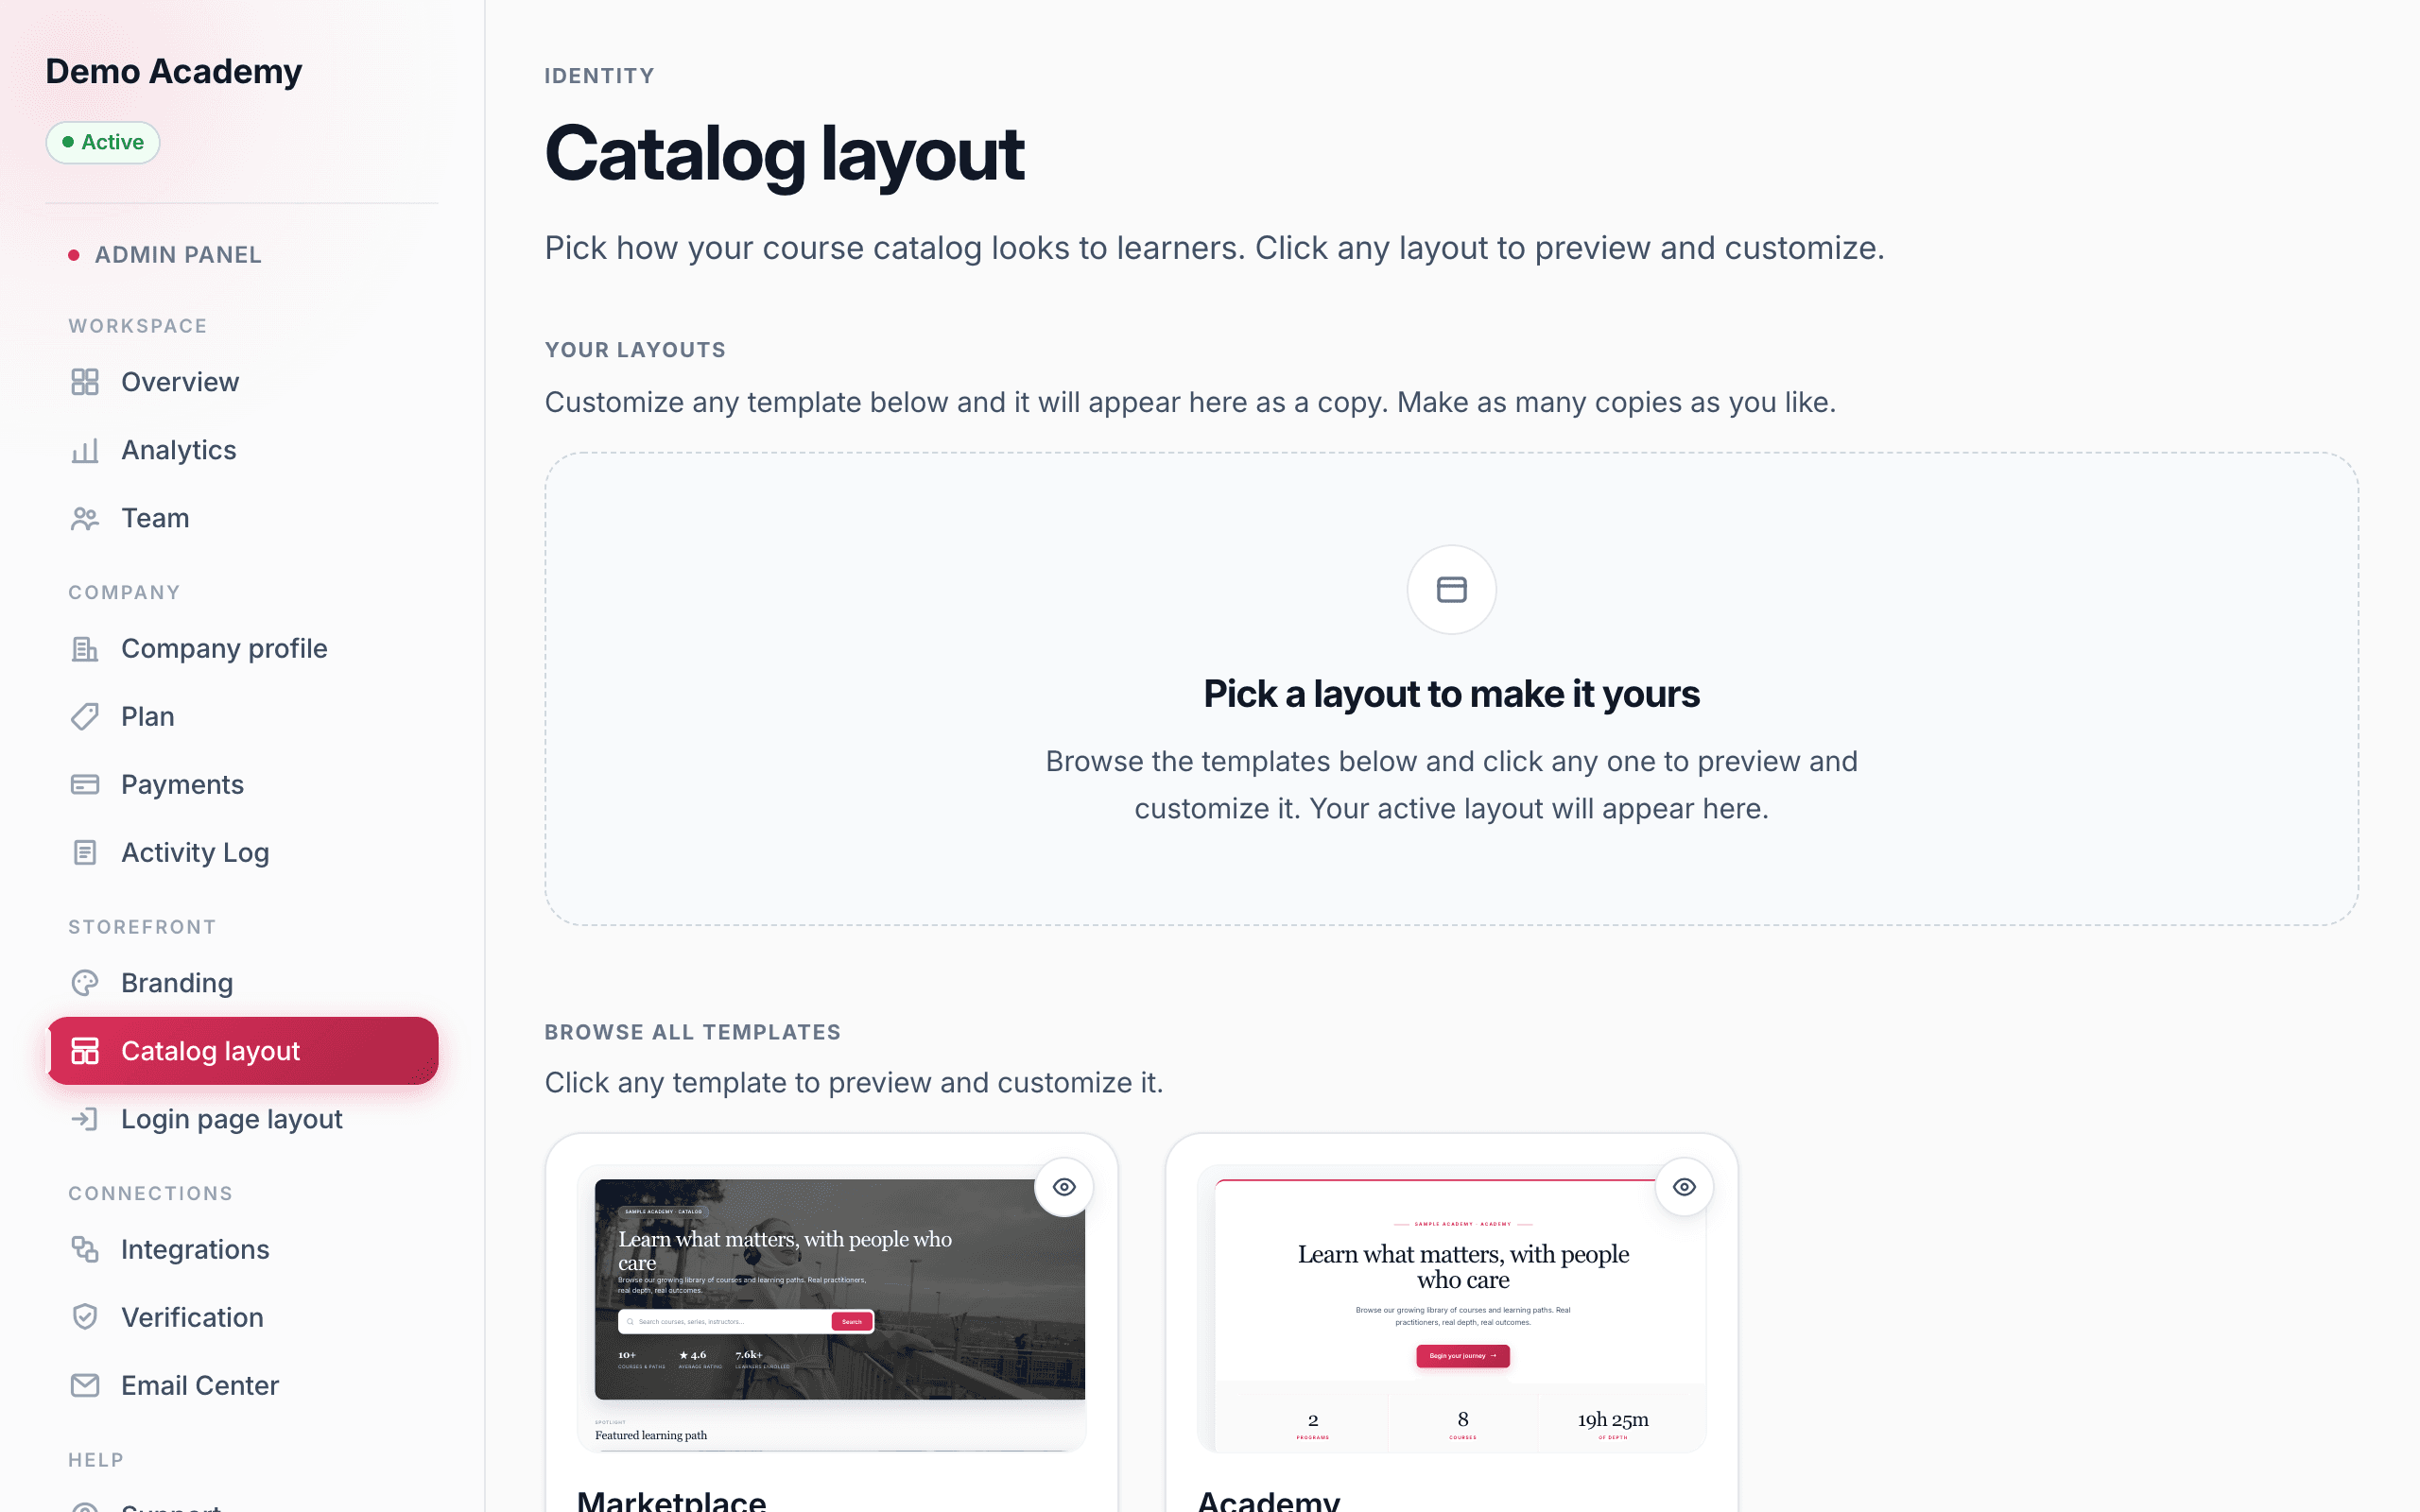
Open Admin PanelCatalog layout. The page (titled Identity · Catalog layout) is split into two stacked sections: Your layouts at the top and Browse all templates below.
Templates vs. your layouts
Catalog design works as a small library of your own copies:
- Browse all templates is the set of ready-made designs. Click any one to open it in the editor with sample data and start customizing.
- Your layouts is where your saved copies live. When you customize a template and save it, it lands here as a copy you can name — you can keep several, even several versions of the same template (say a “Holiday sale” one and an “Evergreen” one).
Exactly one copy is active at a time — it wears a green Live pill and is what learners actually see. On each saved copy you get a primary button (Set as active when it’s not live, or Edit layout when it is) plus quiet Edit · Rename · Delete links. Rename is inline; Delete asks you to confirm in a Delete layout? dialog. Before you’ve made any copies, this section shows a Pick a layout to make it yours prompt.
The two catalog designs
Learn 360 offers two catalog templates, and they set very different tones:
- Marketplace — a big hero with a search bar and a stats row (courses, average rating, learners enrolled), then a dense, merchandised grid: Spotlight, Most popular, Featured courses, Newly added, Learning paths, and an All-courses catch-all. Best when you’re selling to the public and want a shoppable, browse-everything feel.
- Academy — a quieter, editorial design: an eyebrow header, one large flagship “where to begin” card, then curated Programs and a Library of individual courses. No search or hero image — your brand color and typography carry it. Best for structured training programs and cohorts.
Customizing a layout
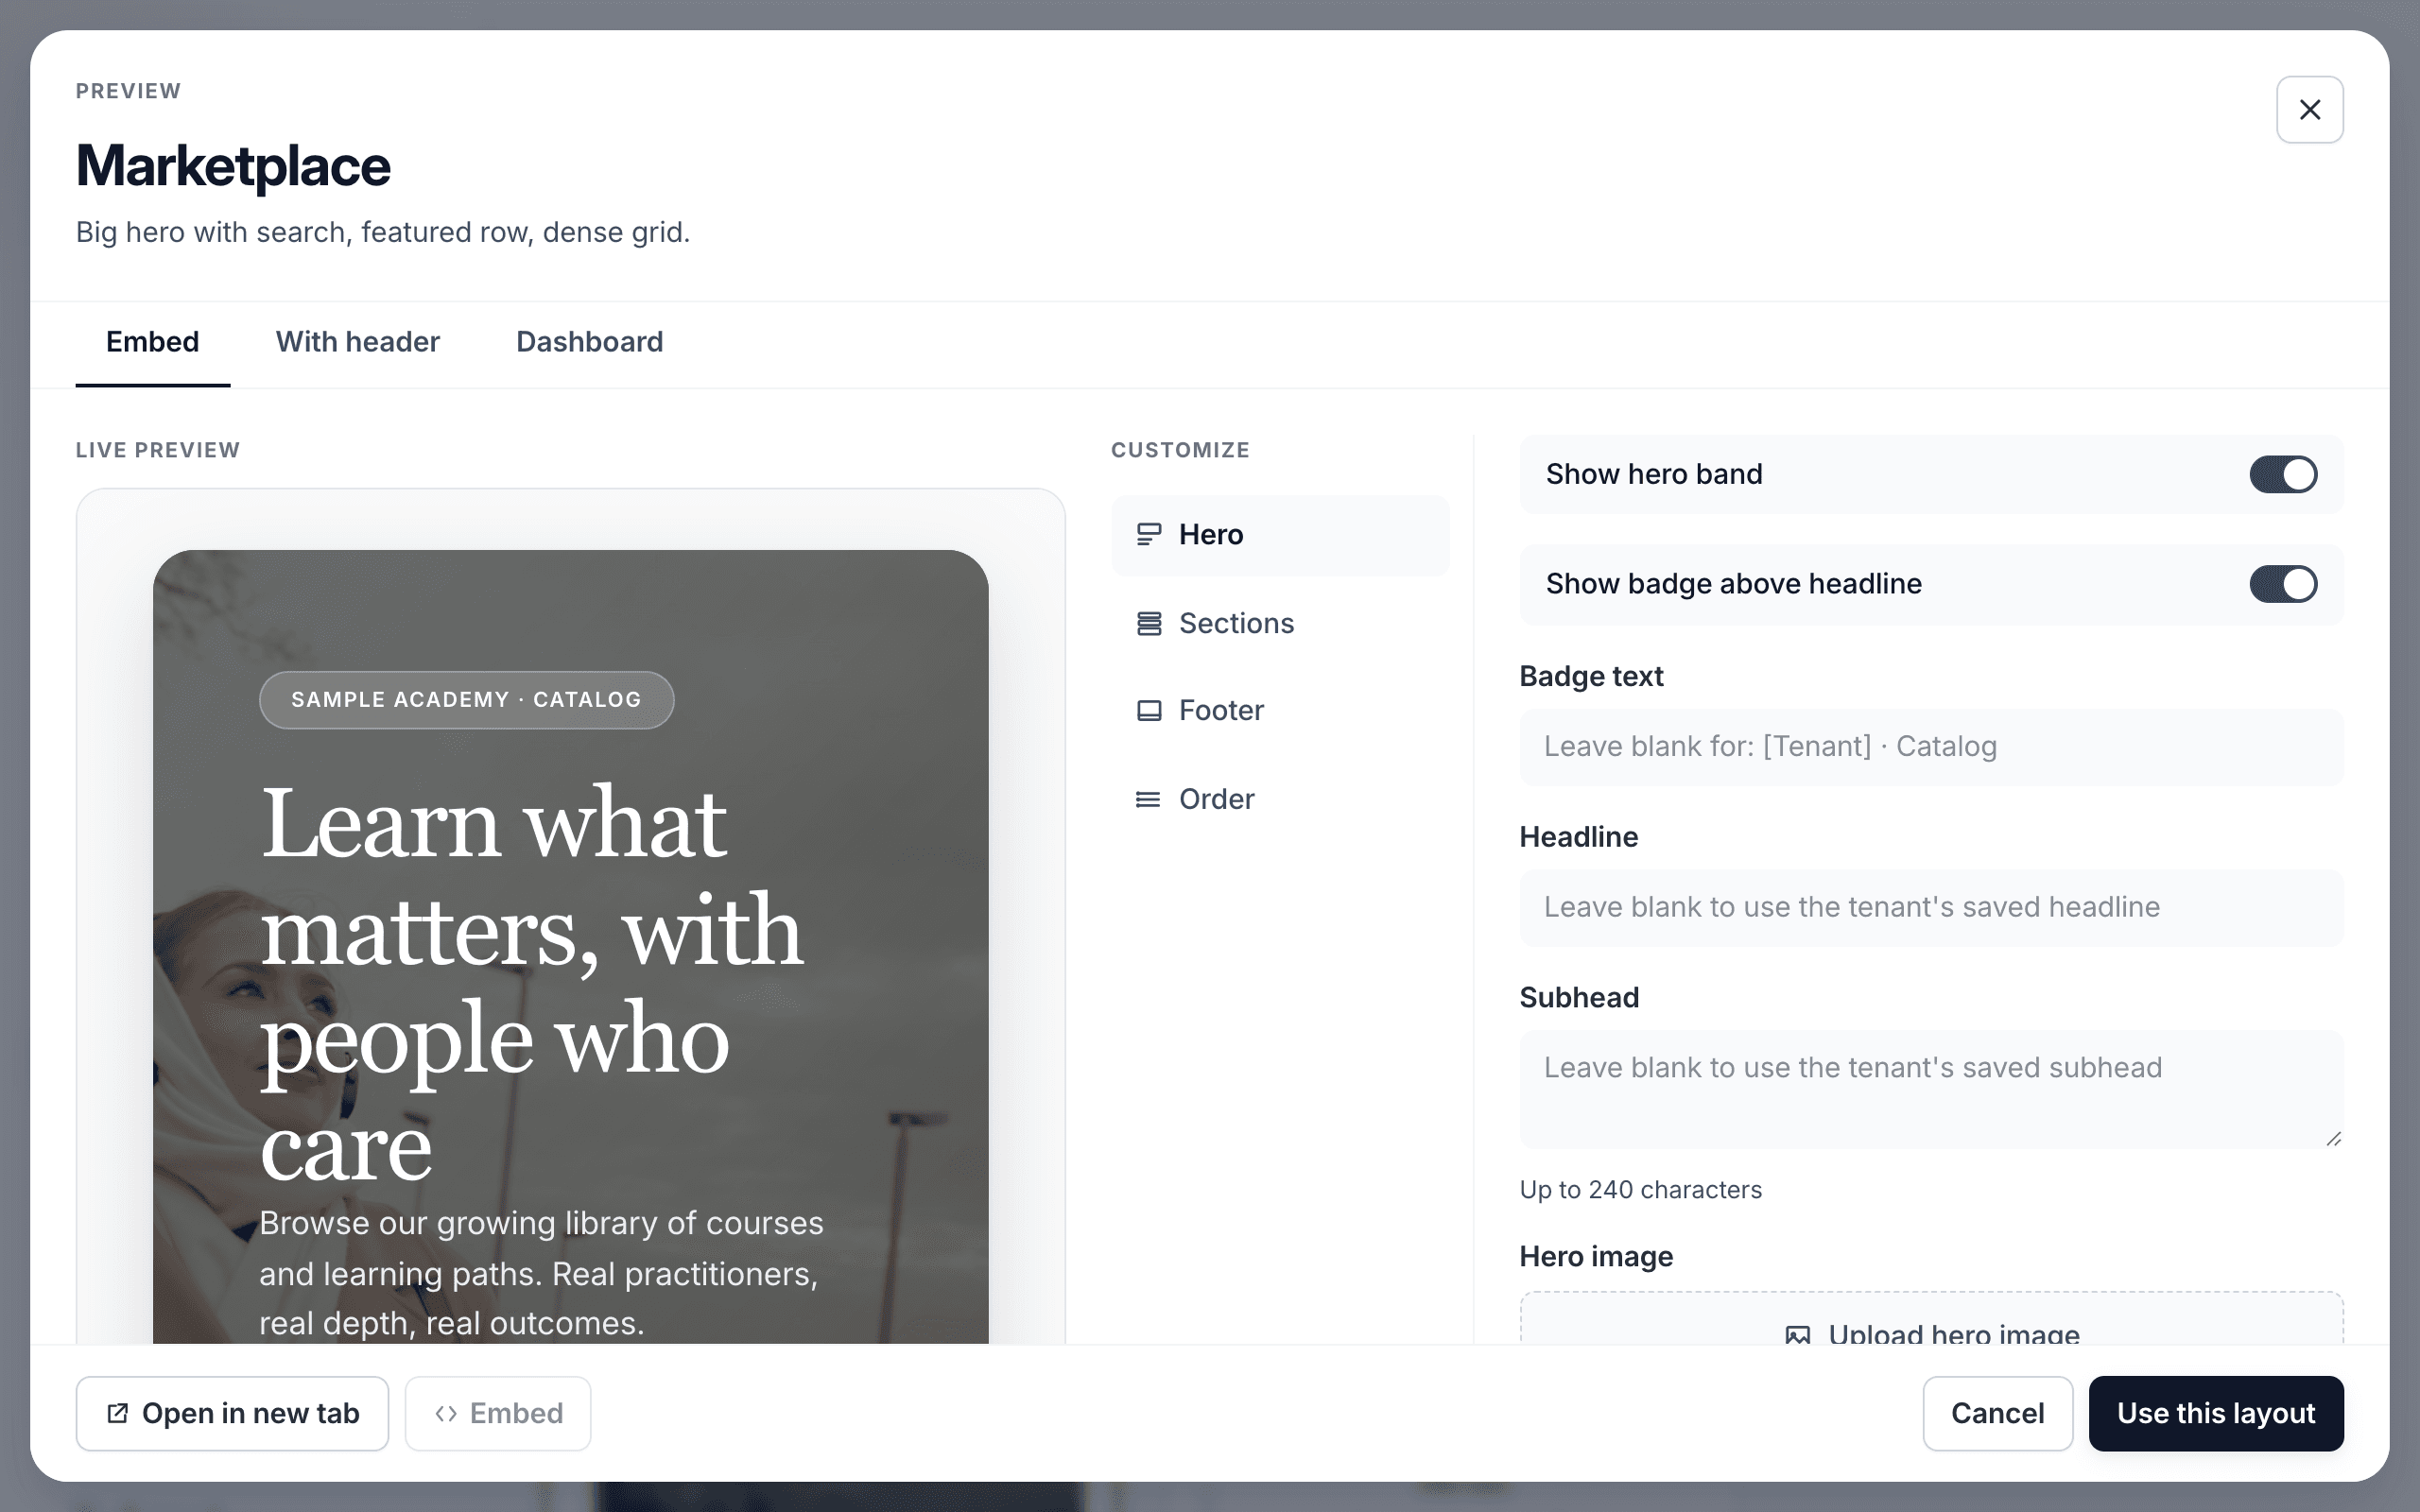
Clicking a template (or Edit layout on a copy) opens a large editor. On the left is a live preview, with three view tabs across the top so you can check it in context:
- Embed — the bare catalog with no header or footer, exactly as it looks embedded on your own site.
- With header — the full public catalog page, with the top navigation and footer.
- Dashboard — how it looks inside the learner portal.
The preview always uses sample data so edits are easy to judge; real learners always see your actual courses. To the right of the preview is the editor, organized into four tabs:
- Hero — turn the hero band on or off, then set the badge or eyebrow, headline, and subhead. You can upload a hero image (roughly 3:1, PNG/JPG/WebP/GIF up to 5 MB); Marketplace also supports a hero video (MP4/WebM/MOV up to 200 MB) and a search button label. Image and video are mutually exclusive — setting one clears the other.
- Sections — every row of the catalog is a section you can expand. Each has a Visible / Hidden toggle, optional headers (eyebrow, title, subtitle), and a content picker. Depending on the row you either pick one featured item, let it auto-pick (e.g. the top 6 by rating, or the newest additions), or switch to Manual and hand-pick up to 6 courses or 8 items in the order you want. The All-courses / Library row is the catch-all and needs no picking.
- Footer — an optional closing band with a call-to-action headline, subhead, button label and link, plus (on Marketplace) an optional stats grid. The footer shows in the dashboard view and is hidden in embeds.
- Order — drag the sections into the order you want; the preview updates live.
Embed your catalog on your own website
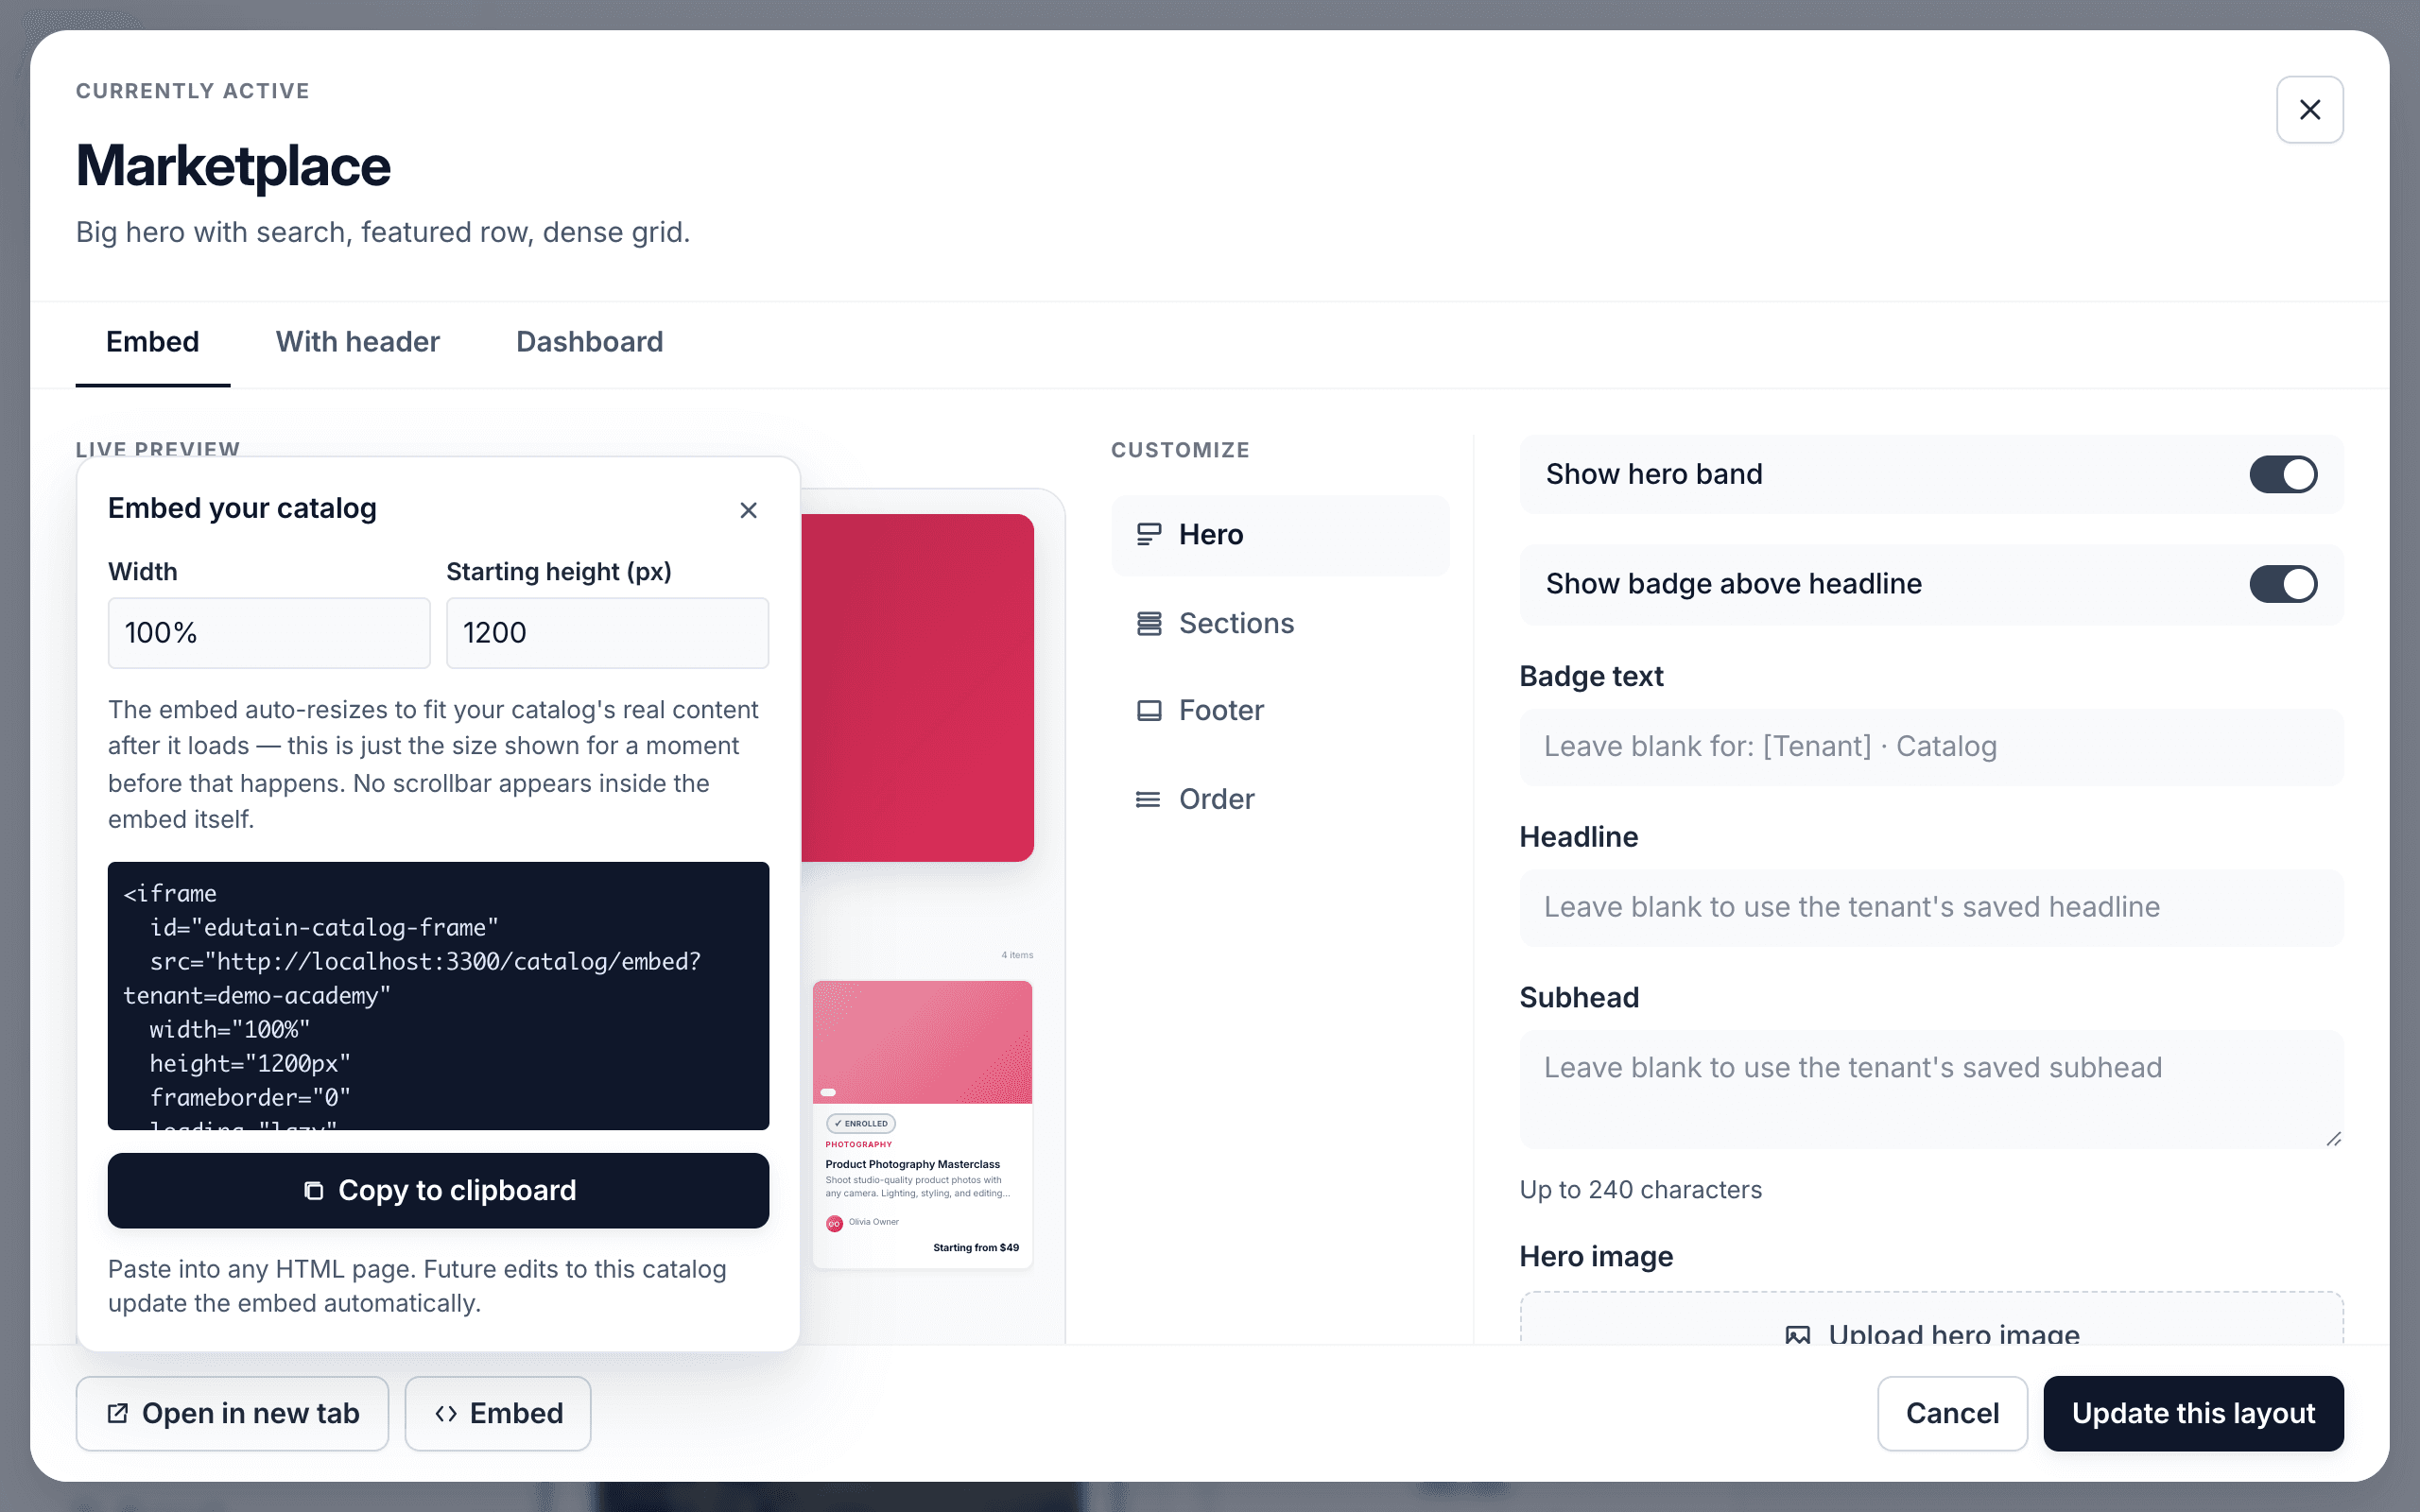
You don’t have to send people to a Learn 360 URL — you can drop your live catalog straight into your own site. In the editor, the Embed button opens an Embed your catalog panel with a Width field (default 100%), a Starting height in pixels (default 1200), a ready-made code box, and Copy to clipboard.
The snippet is an <iframe> pointing at app.learn-360.com/catalog/embed?tenant=your-company plus a tiny auto-resize script, so the frame grows to fit your content with no inner scrollbar. Paste it into any HTML page. Because it’s live, any edit you make to the catalog later updates the embed automatically — you never re-paste.
Login page layout
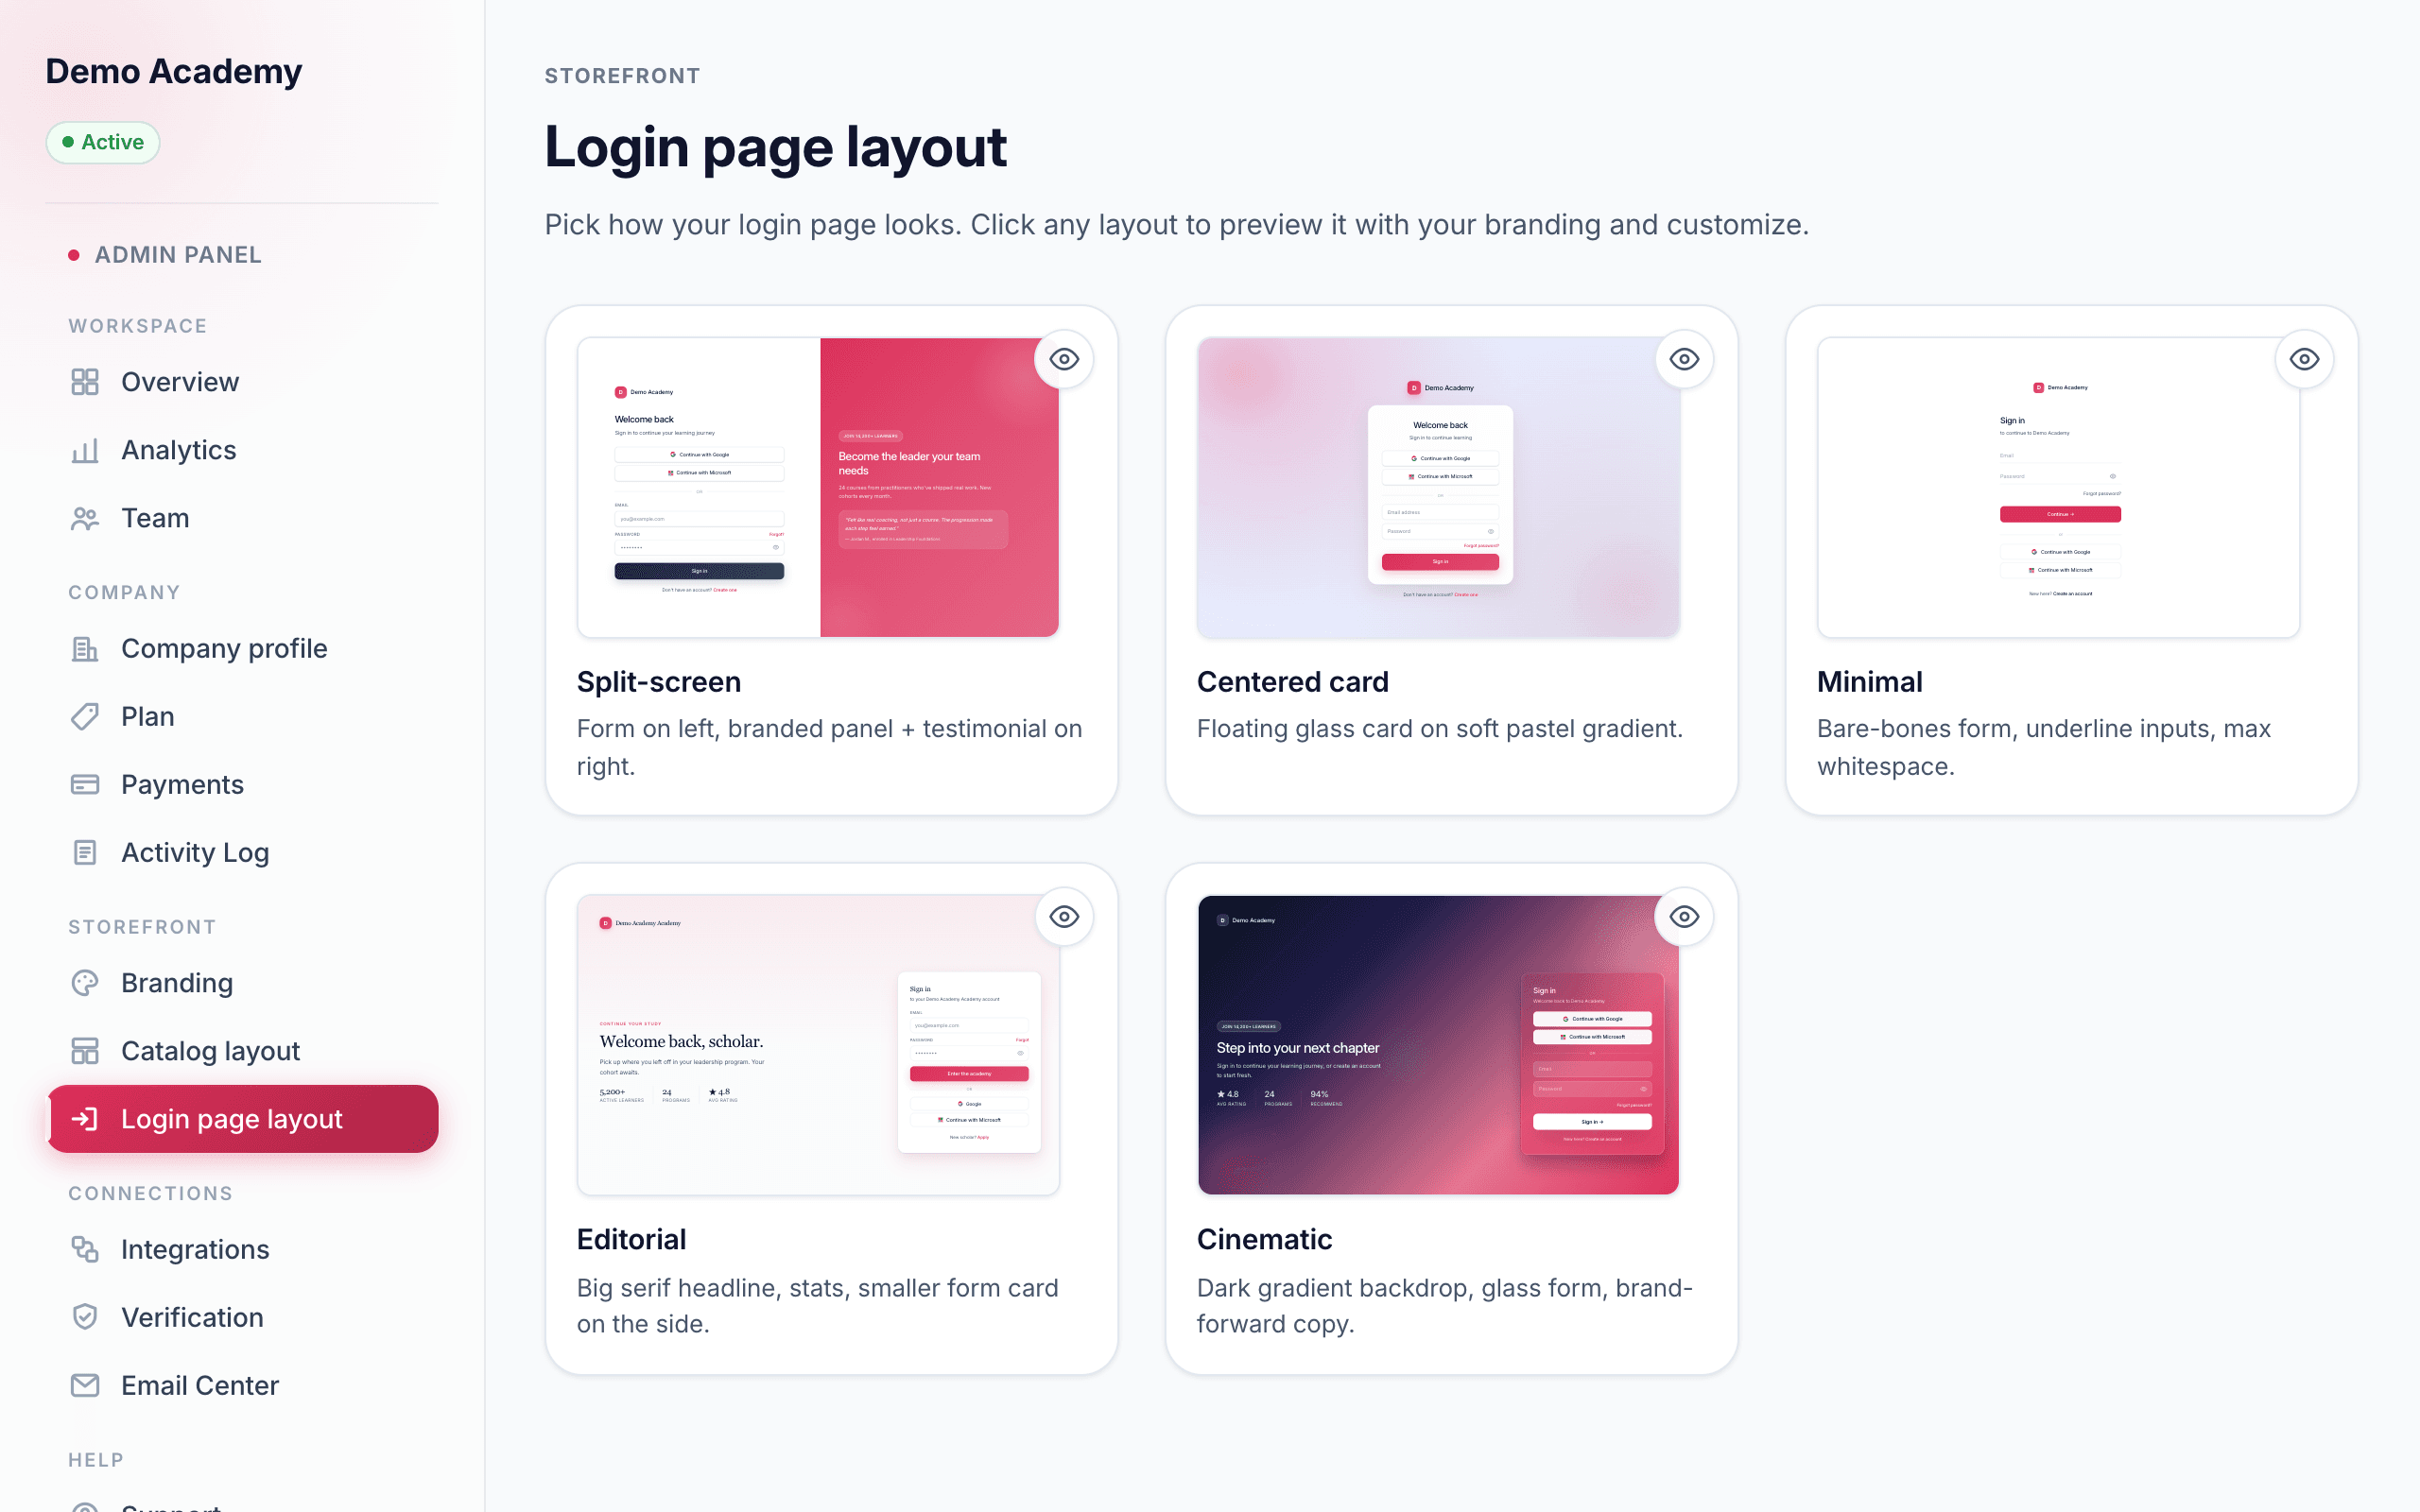
Open Admin PanelLogin page layout. This is the branded sign-in page returning learners see, shown as a grid of template cards — each a live preview rendered with your logo and color, with anActive badge on the one in use and an eye icon to preview it full-screen. Unlike the catalog, the login page has no copies: you have one active template and one saved set of wording.
The five login templates
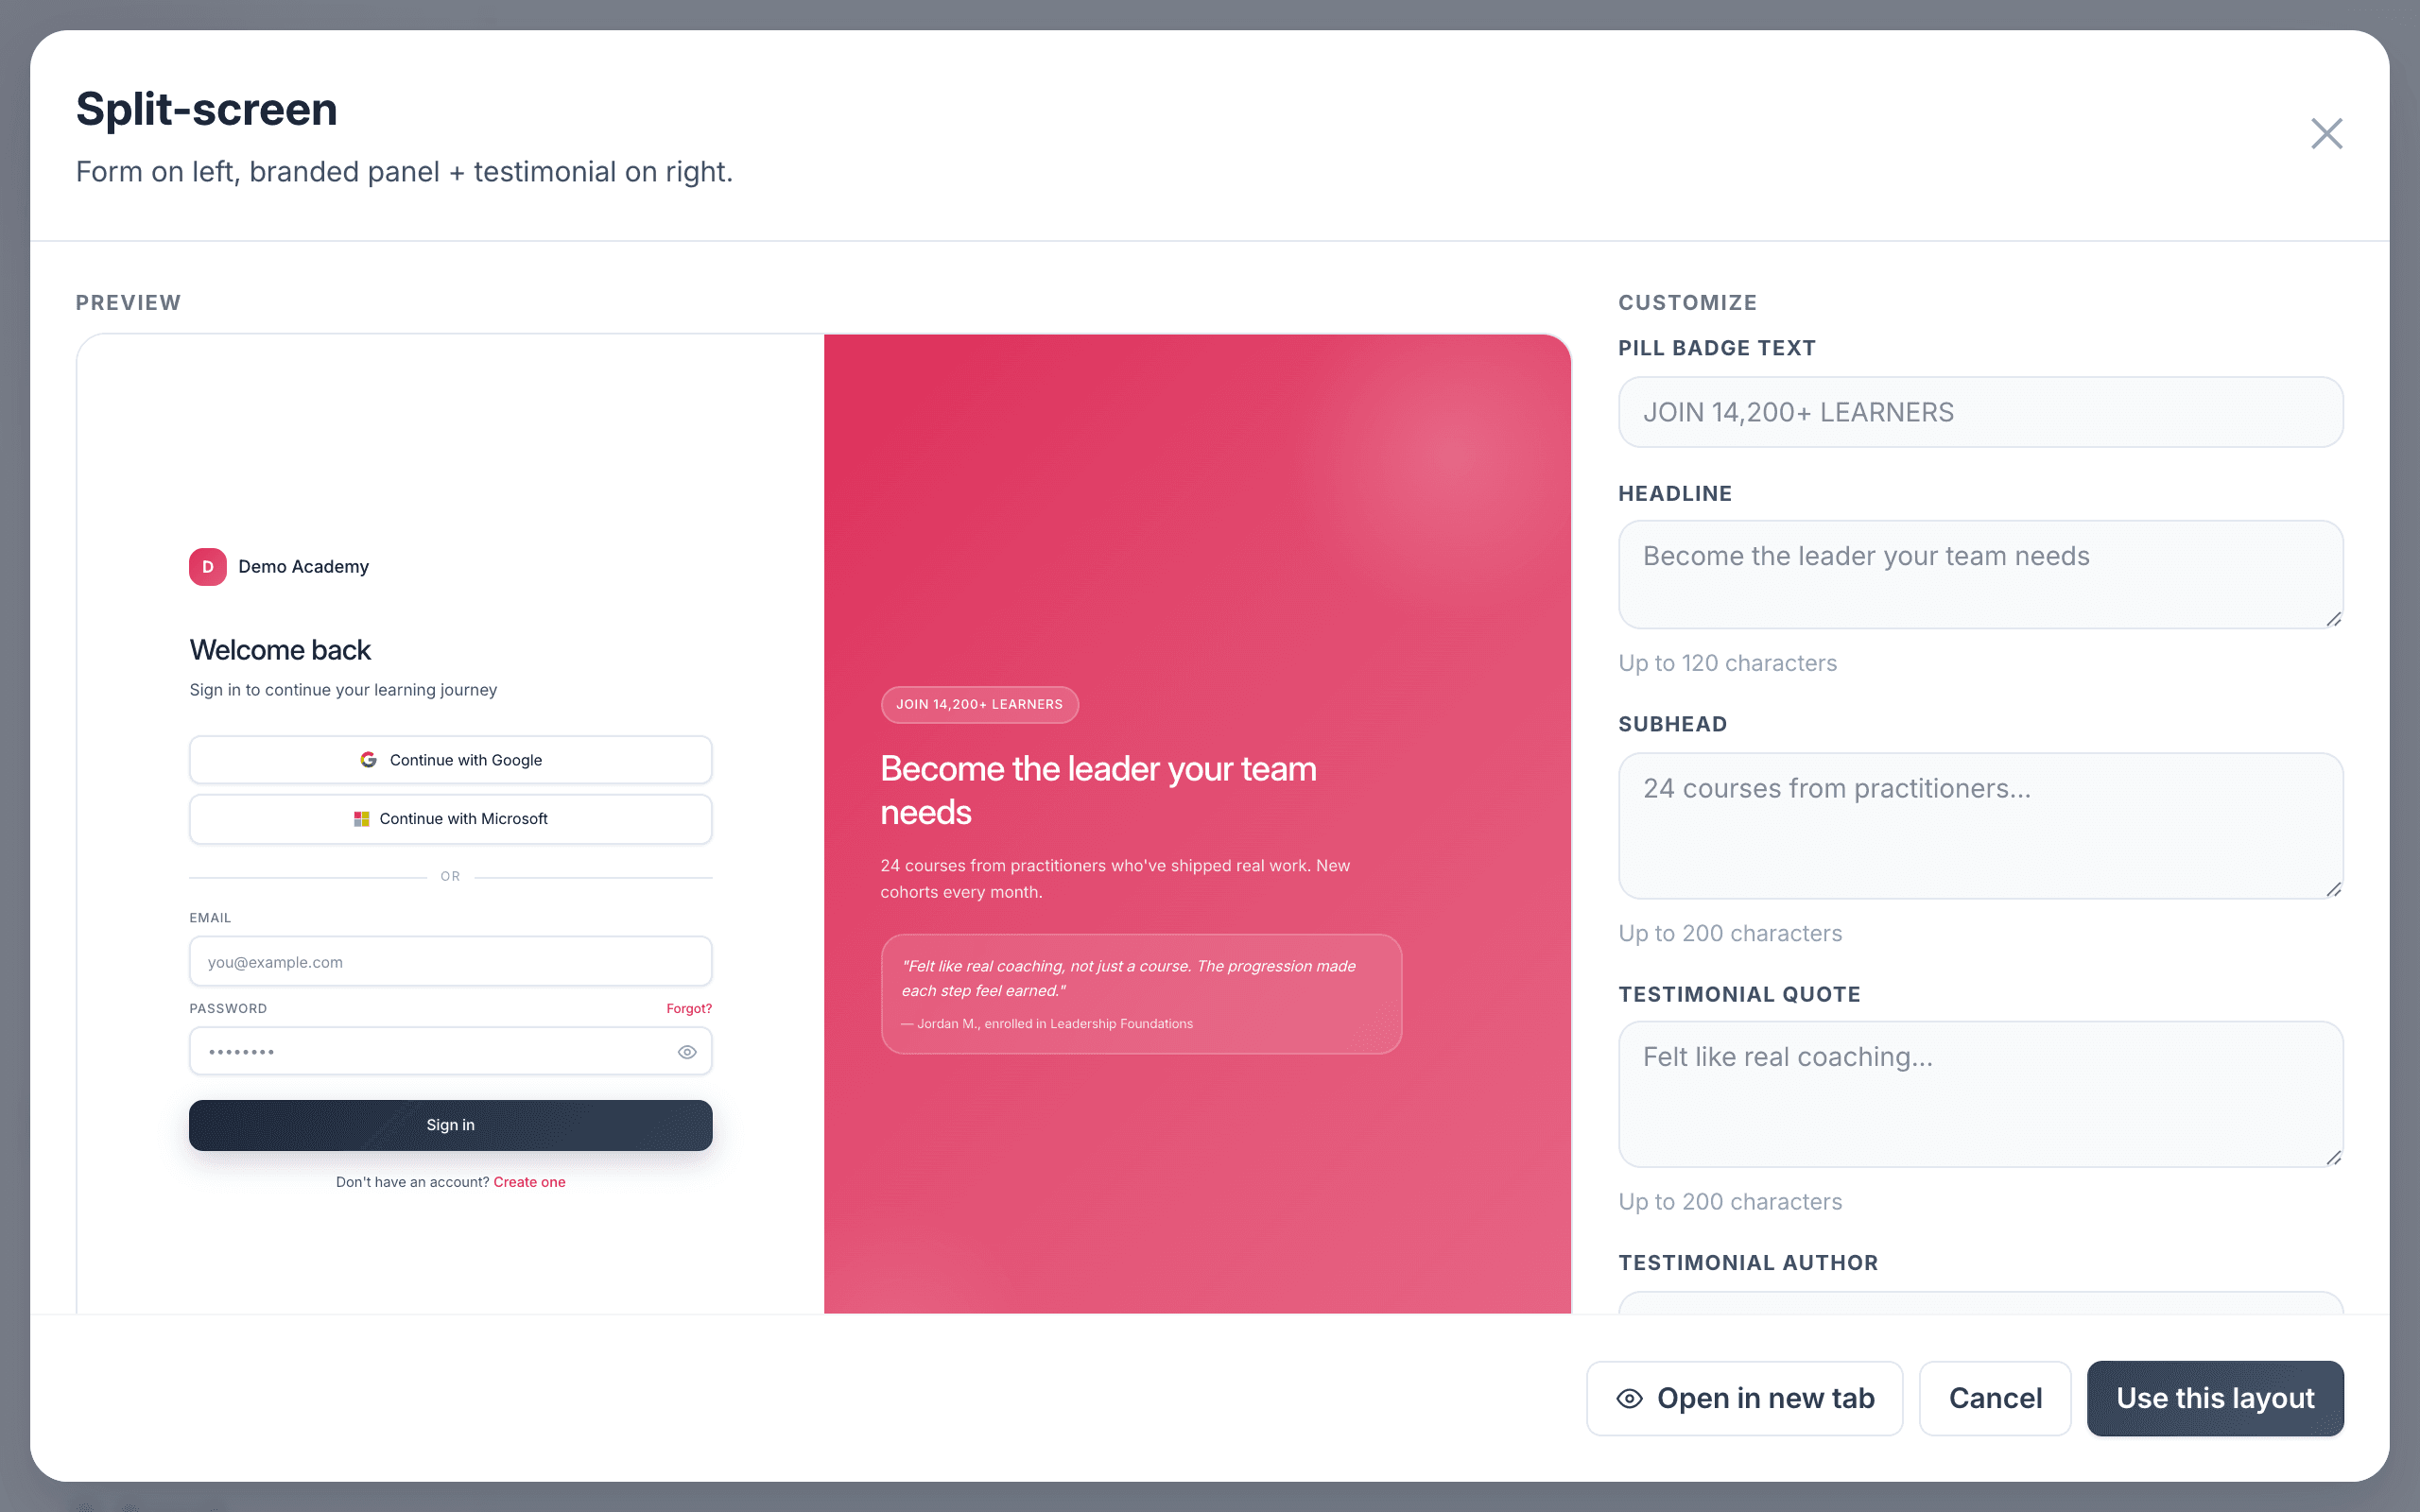
- Split-screen — sign-in form on the left, a branded panel with a testimonial on the right.
- Centered card — a floating glass card on a soft pastel gradient.
- Minimal — a bare-bones form with underline inputs and lots of whitespace.
- Editorial — a big serif headline with a stats row and a smaller form card to the side.
- Cinematic — a dark, gradient backdrop with a glass form and brand-forward copy.
Customizing your login page
Click a card to open its editor. A full live preview of your branded login page sits alongside a Customize panel, and it updates as you type — no reload. What you can edit depends on the template:
- Split-screen — a pill badge, headline, subhead, and a testimonial quote and author.
- Centered card — a card headline and subhead.
- Editorial and Cinematic — headline, subhead, an eyebrow or badge, and three stat blocks (each a value plus a label, like “4.8 · Avg rating”).
- Minimal — nothing to edit by design; your logo and color carry the whole look.
When it looks right, click Use this layout (or Update this layout if you’re editing the active one). You’ll see a Login layout saved confirmation, and your live login page updates immediately.
With your brand, domain, catalog, and login page set, you’re ready to create your first course.