Verification lets you check who your learners really are before they can open a single course. You decide which documents to require — a government ID, a training certificate, a signed waiver — and each learner has to upload them and get your approval first. Until they do, your courses stay locked. It’s completely optional and off by default; turn it on only if your academy needs it.
Open the Verification page
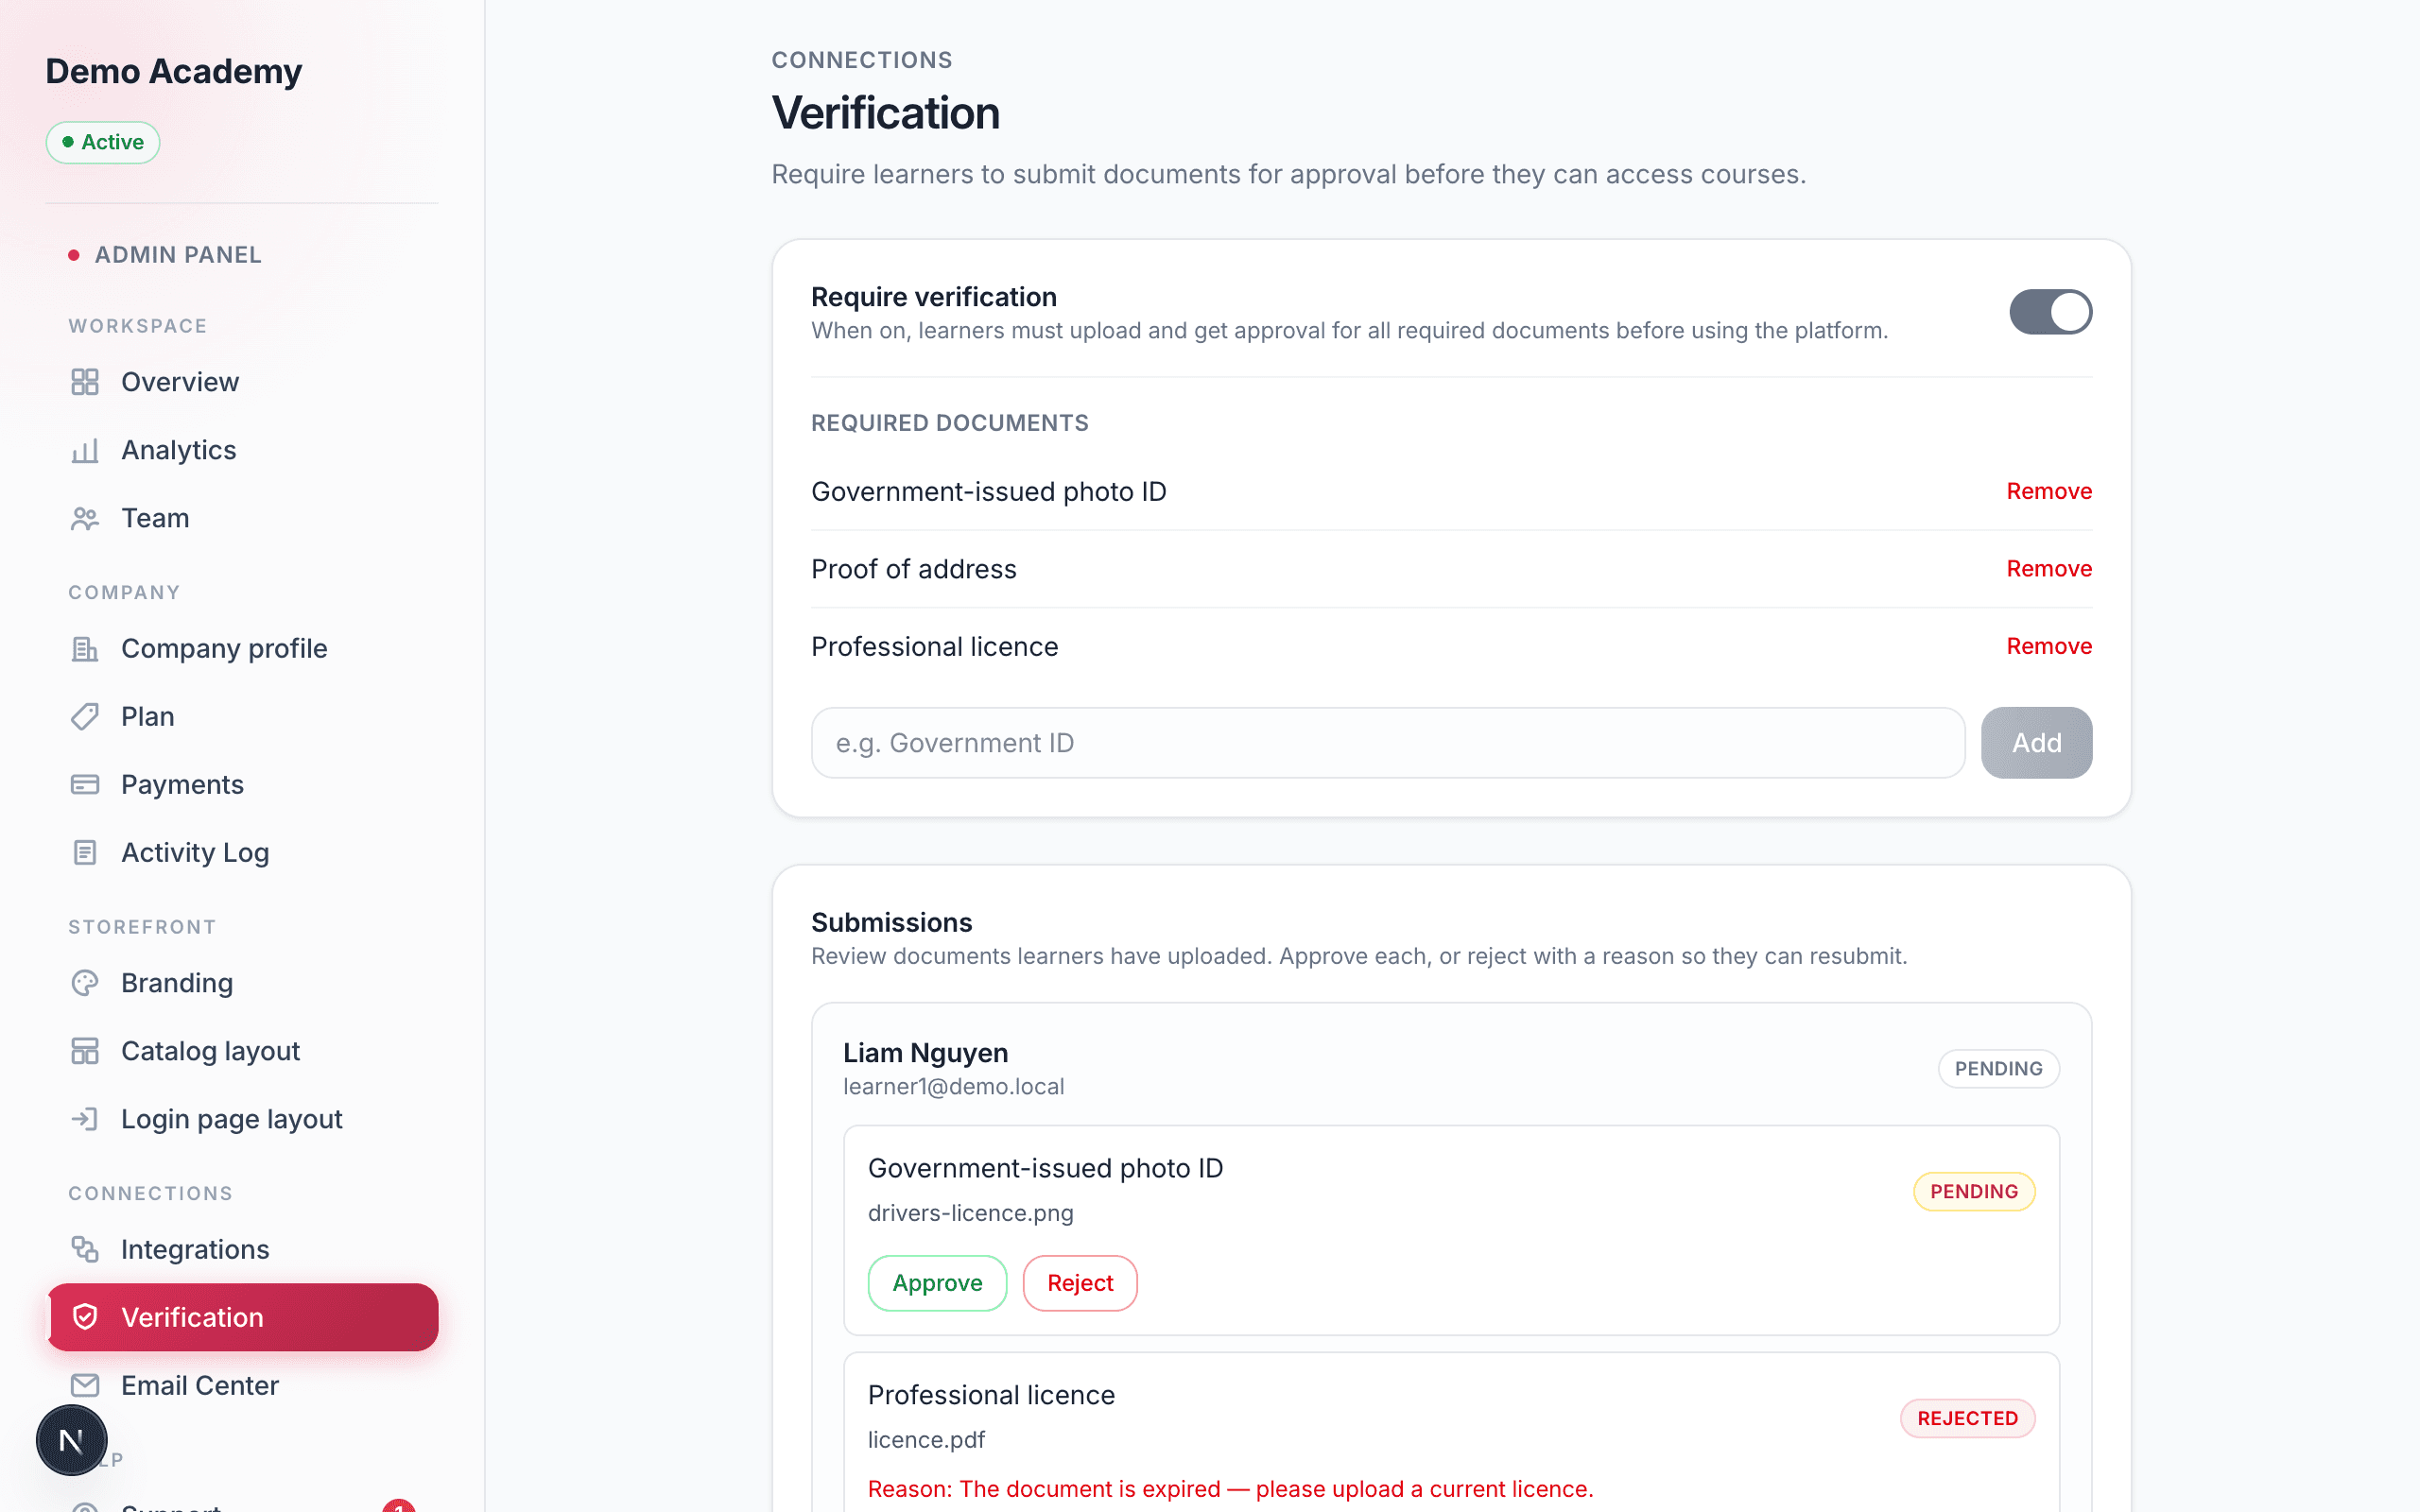
Go to Admin PanelVerification. It lives in the Connections group of the sidebar, between Integrations and Email Center. The page is headed Verification, under a small Connections label, with the line “Require learners to submit documents for approval before they can access courses.” It has two stacked cards: one to set up the gate, and one to review what comes in.
Turn the gate on
The first card is Require verification, and it holds a single toggle. Its description reads “When on, learners must upload and get approval for all required documents before using the platform.” Flip it on and Learn 360 confirms with Verification turned on; flip it off and everything unlocks again with Verification turned off. That one switch is the whole gate — nothing else about your academy changes.
Choose which documents you require
Under the toggle is Required documents. Each document is simply a labelled slot — a name for the thing you want to see. To add one, type its label into the box (it suggests an example, “e.g. Government ID”) and click Add or press Enter. It appears in the list at once and Learn 360 flashes Document added. Add as many as you like; every learner will have to clear all of them. When the list is empty it reads “No documents required yet. Add one below.”
Removing a document
Every slot has a Remove link. Clicking it asks you to confirm: “Remove this required document? Existing uploads are kept, but it will no longer be required.” That last part is the important one — removing a slot never deletes anyone’s file. It only stops requiring that document going forward, so nobody stays blocked by a slot you’ve retired. Any files learners already uploaded for it are left untouched.
Review what learners submit
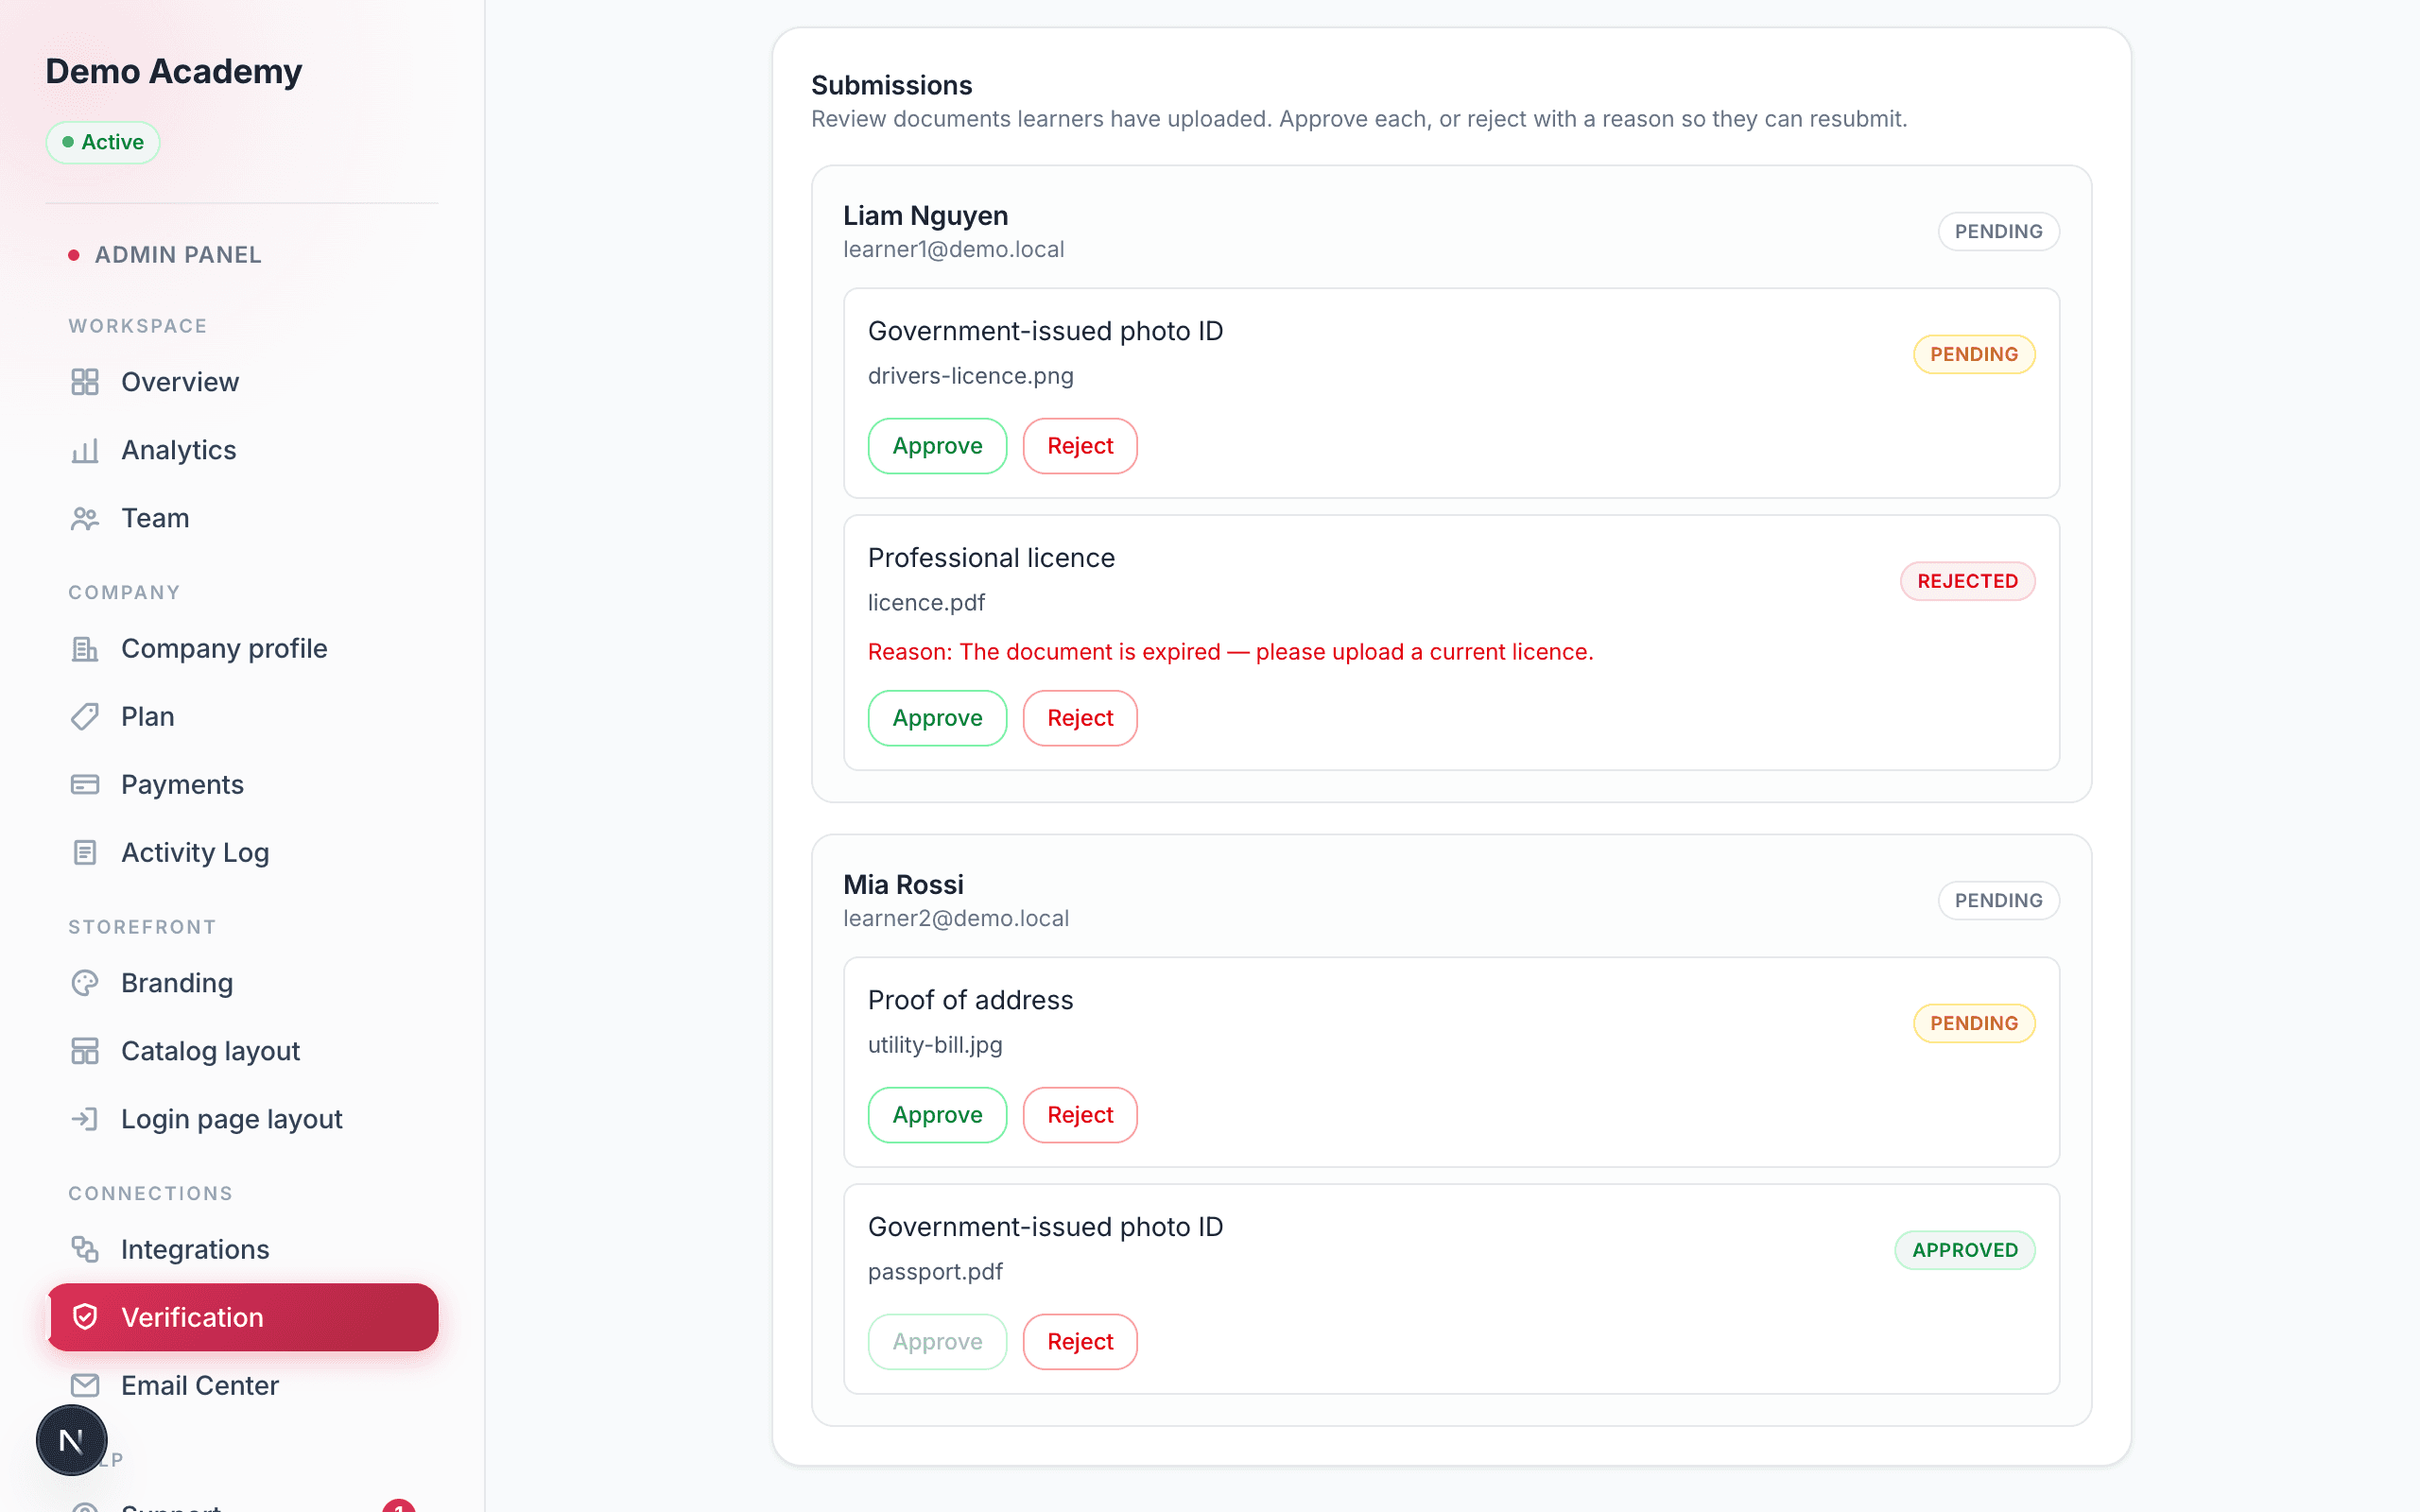
The second card is Submissions — “Review documents learners have uploaded. Approve each, or reject with a reason so they can resubmit.” Every learner who has uploaded anything shows up as their own block, with their name and email and a status badge that reads one of two ways:
- Cleared (green) — every required document is approved, so this learner is through the gate.
- Pending (grey) — there’s still something to review or something they need to fix.
Until anyone submits, the card just says “No submissions yet.” Inside each learner’s block, every document they’ve uploaded is listed with the document’s label (which slot it’s for), the file name as a clickable link that opens the file, and a status badge — pending, approved, or rejected. For a rejected document, the reason you gave is shown right underneath as “Reason: …”.
Approve or reject
Two buttons sit under each document:
- Approve marks it approved. Once it is, the button greys out so you can’t approve the same document twice.
- Reject opens a short box: “Why is this being rejected? (the learner will see this).” A reason is required — you can’t reject with an empty box — because the learner is shown exactly what you type and needs to know what to fix. Click Confirm reject to send it, or Cancel to back out.
When a learner re-uploads after a rejection, that document resets to pending and the old reason clears, so it comes back to you as a fresh review.
Open a submitted document
Click a file name and it opens inside Learn 360, in a pop-up viewer — a PDF renders in a frame and an image (PNG or JPG) shows inline — so you can read a submission without leaving the page. Close the viewer to go back to the queue. The Submissions queue itself is admin-only, and each learner only ever sees their own documents, so review stays limited to the people who should see it.
The emails Learn 360 sends
Verification runs quietly over email, so nobody has to keep refreshing the dashboard. Learn 360 emails the learner automatically at each step:
- Submitted — a confirmation the moment they upload a document.
- Approved — when you approve one of their documents.
- Cleared — a separate “you’re all set” email the instant your approval clears the last required document.
- Rejected — with the exact reason you wrote and a link back to re-upload.
You can keep yourself in the loop too. In the Email Center, under My Alerts, each admin can opt in to a new verification submitted alert — an email whenever a learner uploads something new to review. It’s per-admin and stays off unless you switch it on.
What learners see
On their side, verification is a hard gate. With it switched on, a learner who hasn’t cleared every document is held on a “Verification required” screen, and the rest of their portal stays locked until you approve everything. For the full learner-side walkthrough — the upload checklist, the reject-and-resubmit loop, and what unlocks once they’re cleared — see The learner experience.