The Email Center is mission control for every automatic email your platform sends — the messages learners get when they buy, finish, or earn a certificate, the alerts that land in your own inbox, and the “from” name they all carry. From one page you can switch emails on or off, rewrite the wording, and review exactly what went out.
Where to find it
Open Admin PanelEmail Center. Four tabs run across the top:
- Events & Templates — the automatic emails sent to learners and admins.
- My Alerts — which activity emails you personally receive.
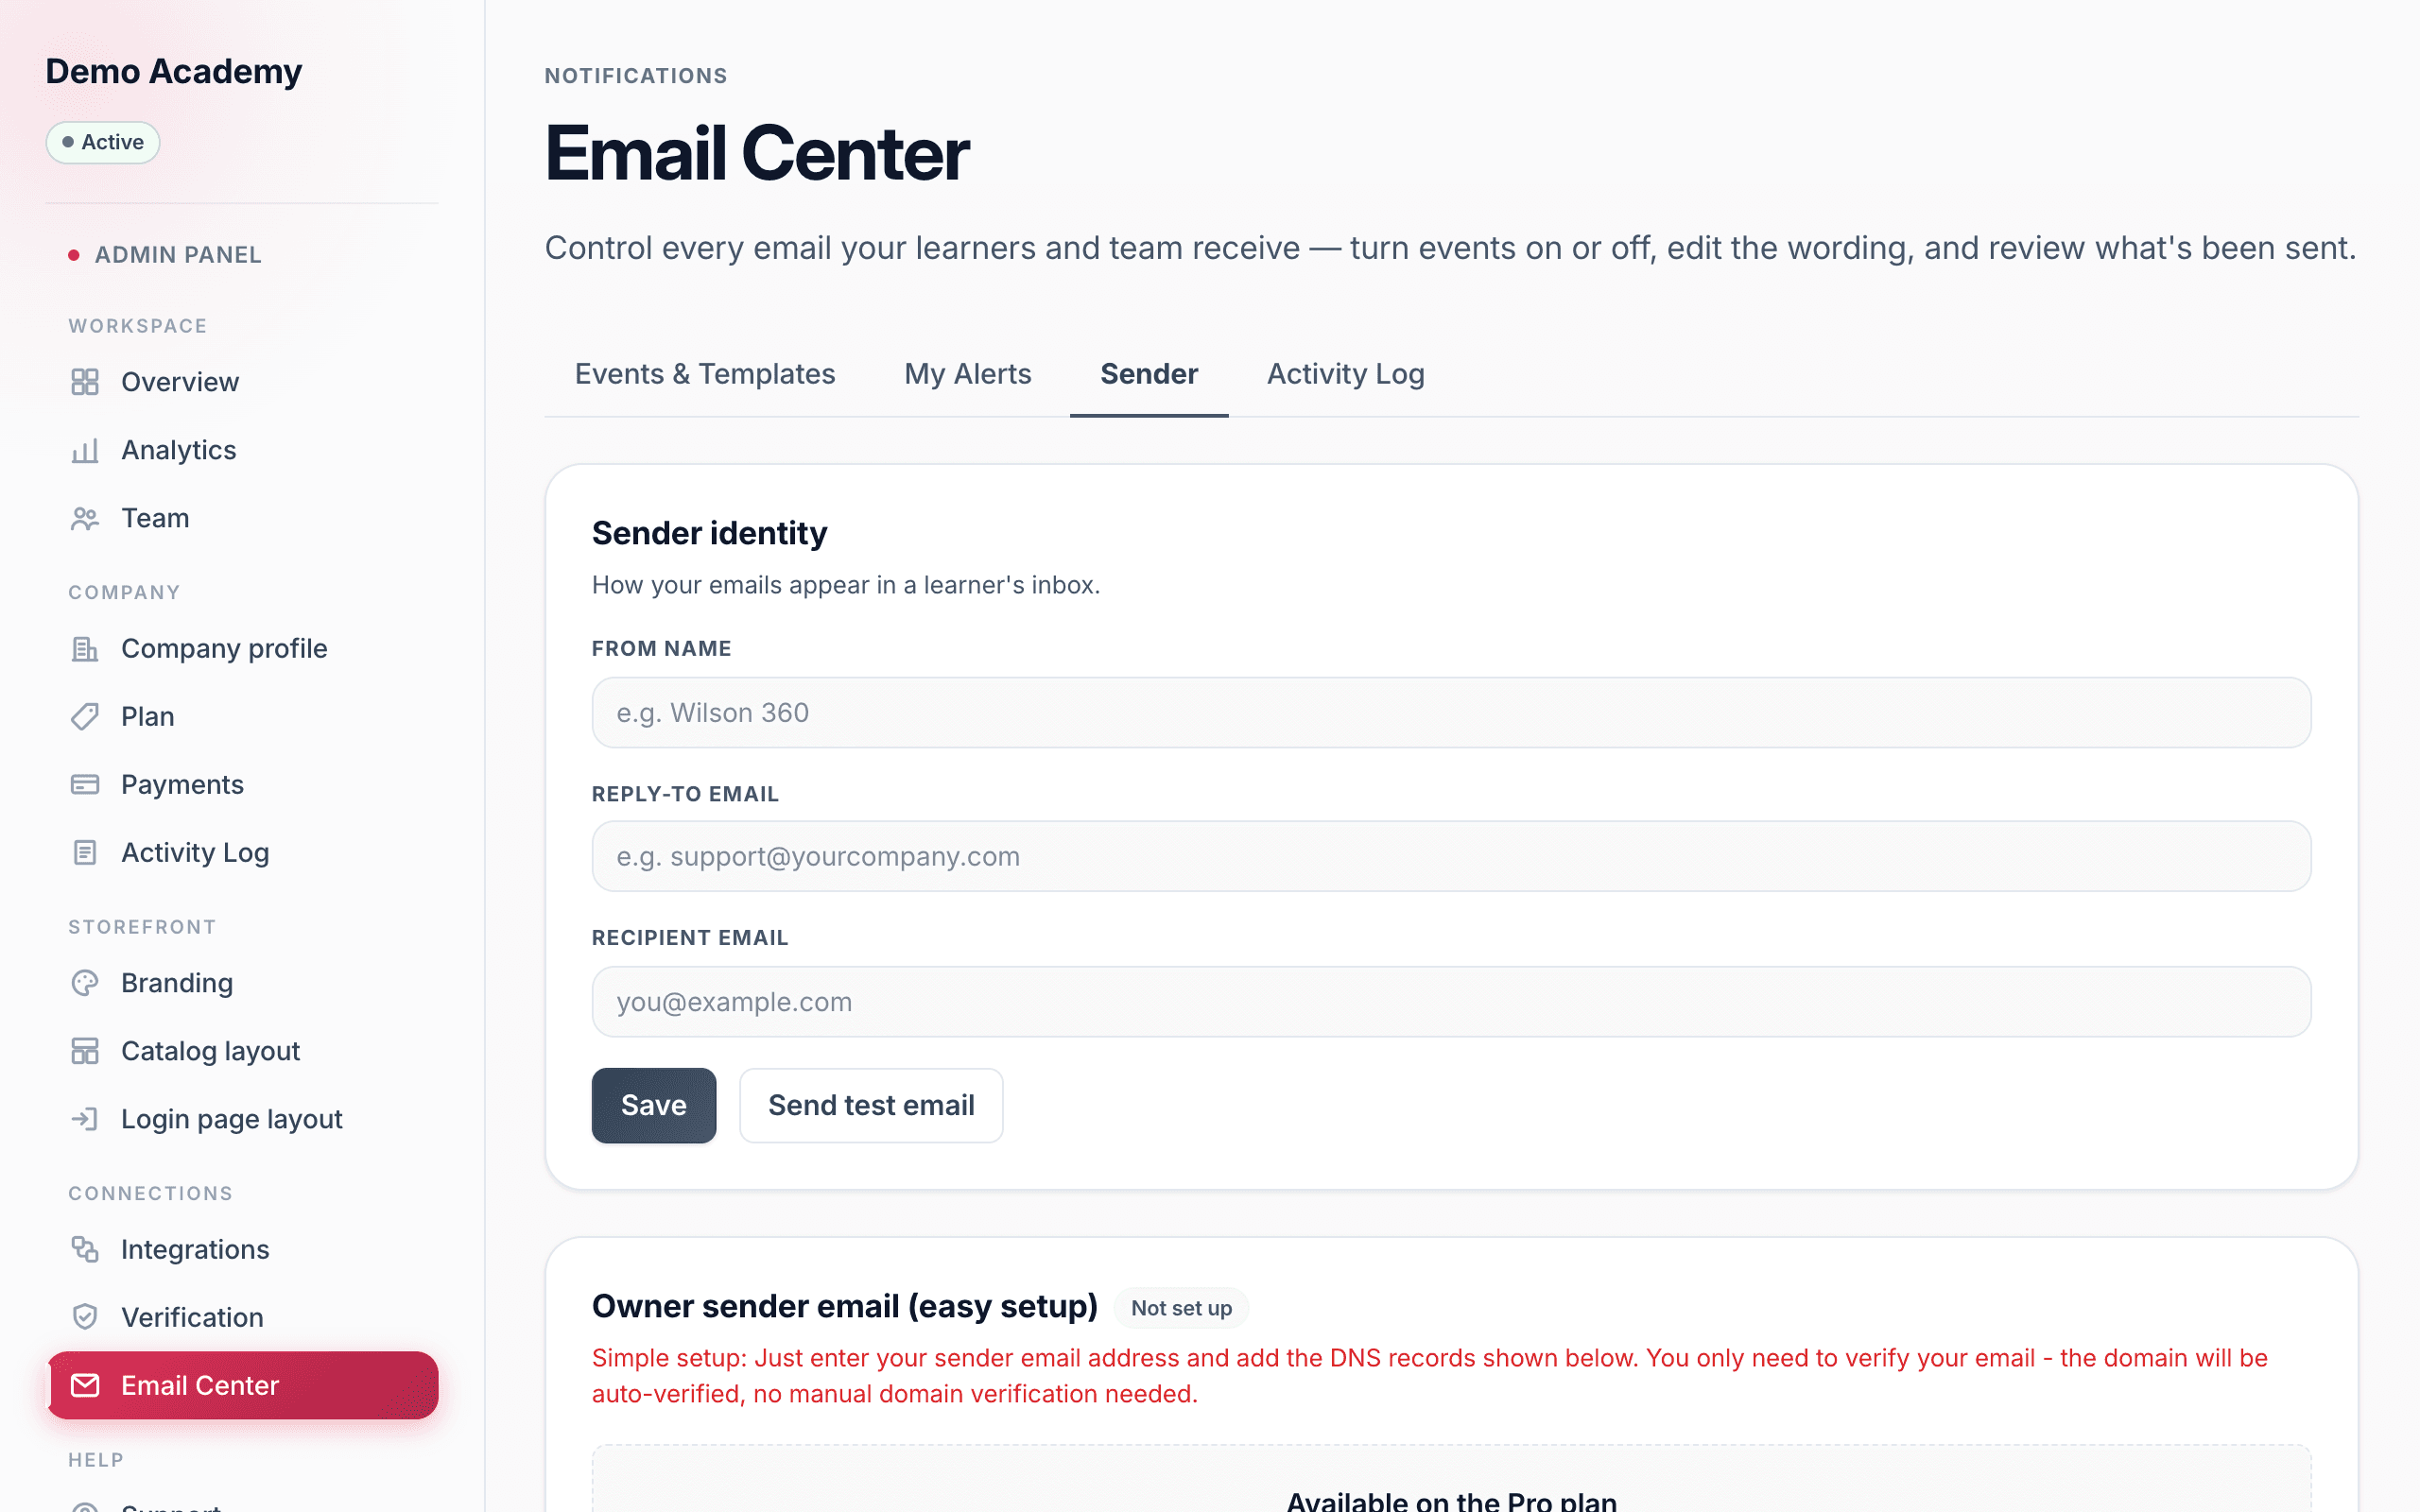
- Sender — the from-name, reply-to address, and (on Pro) your own sending domain.
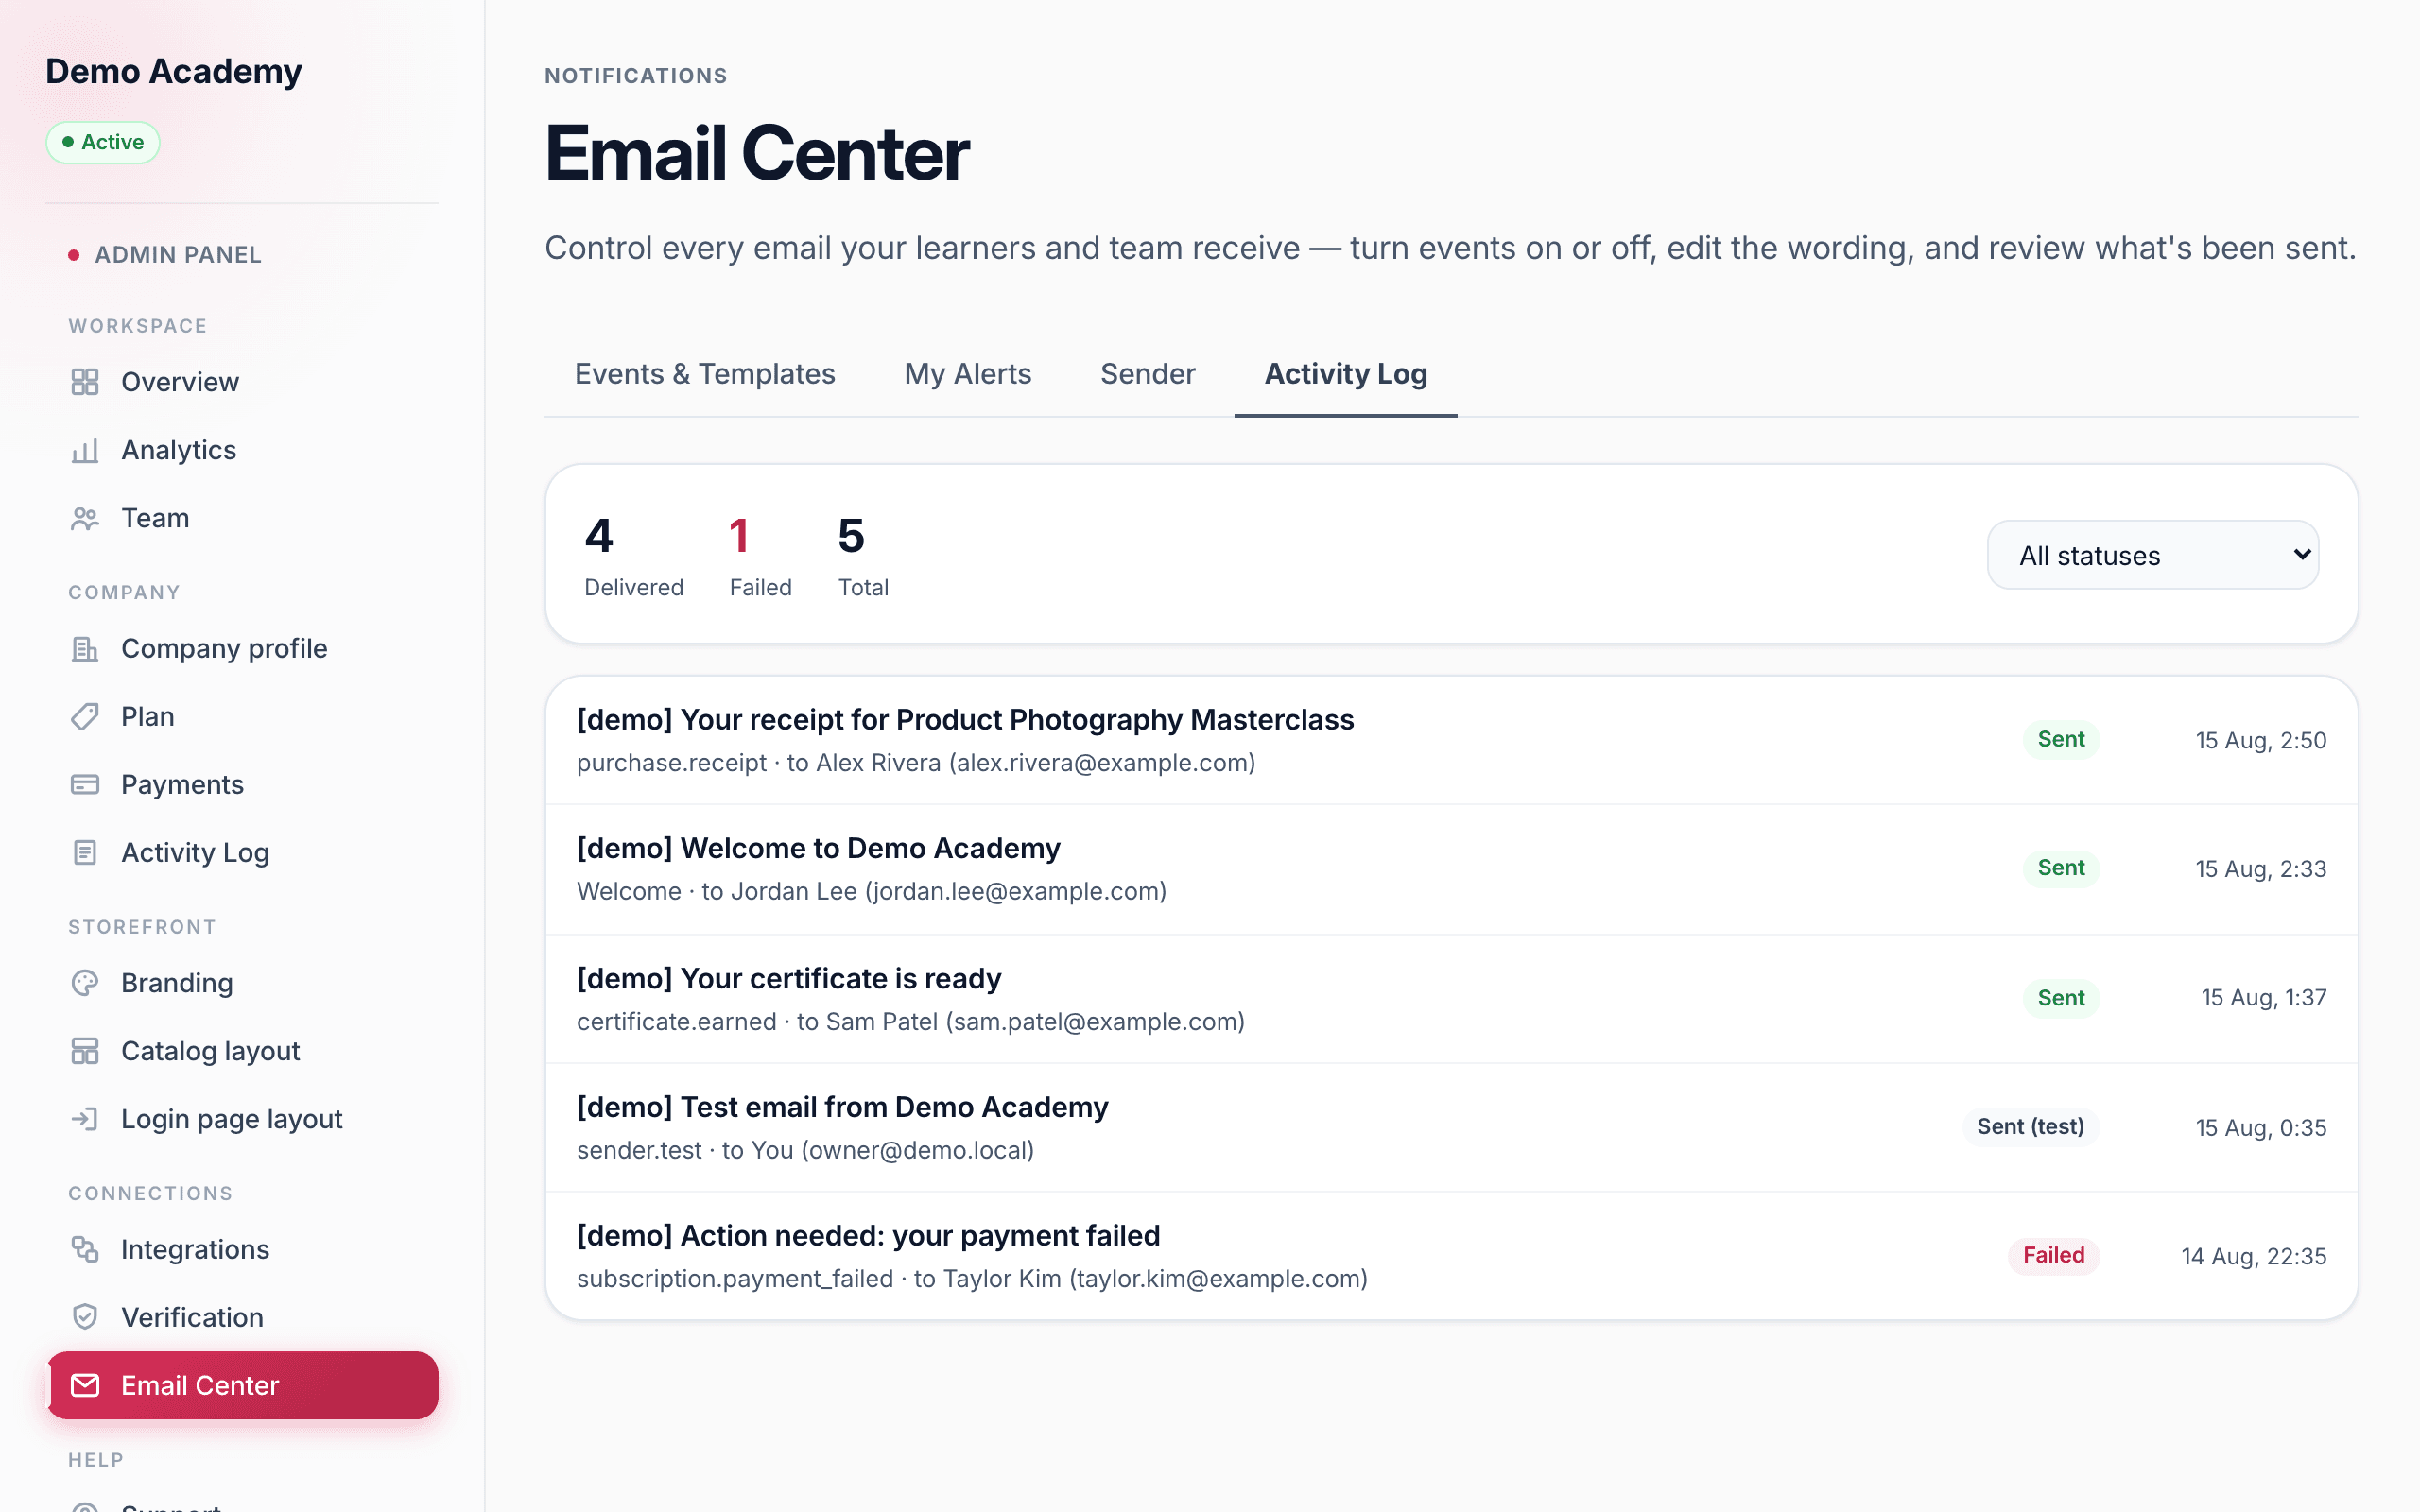
- Activity Log — a searchable record of every email sent.
Events & Templates
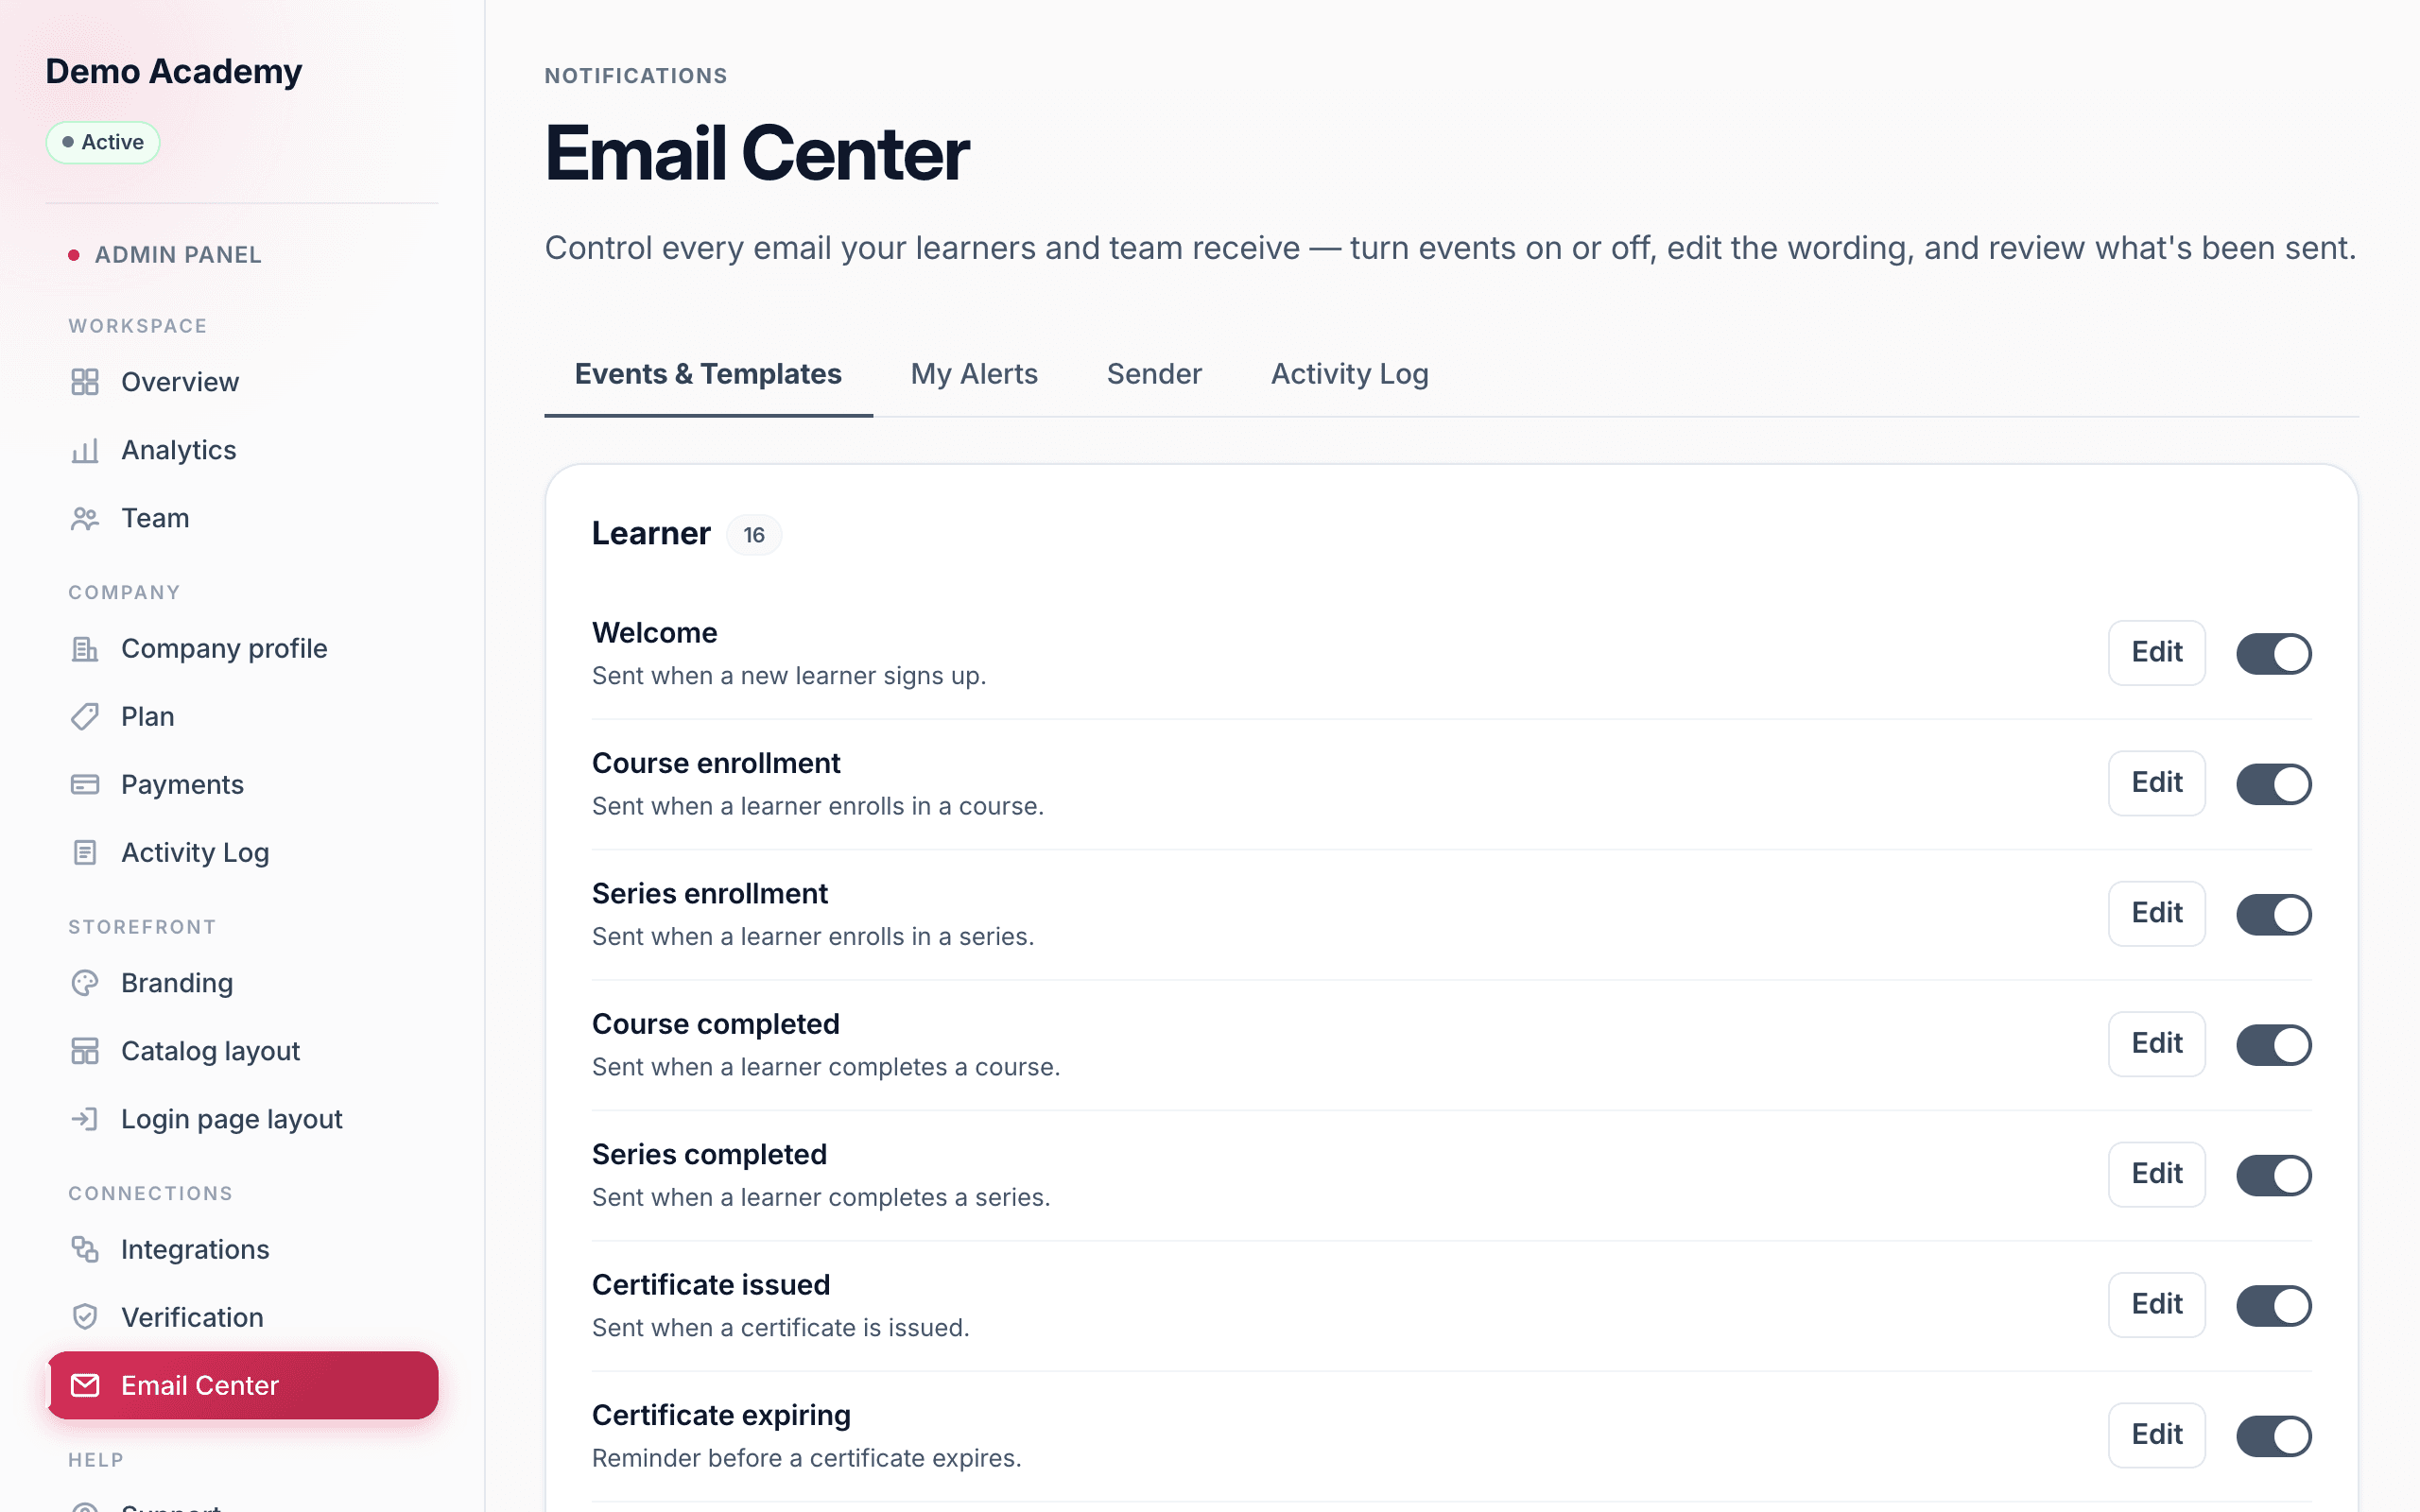
This tab lists every automatic email, grouped by who it’s for and what it’s about:
- Learner — messages your students receive: welcomes, enrolment, course completion, certificates, subscription reminders, and, if you use Verification, an email at each step of a document’s review — submitted, approved, rejected (with the reason you gave and a link to re-upload), and a final fully verified once every required document is approved.
- Admin alerts — notifications sent to your team when something happens on the platform, such as a new learner joining, a new document to review when a learner submits a verification file, or feedback received when a learner leaves feedback on a course.
- Reports — periodic summaries of platform activity.
- Commerce — payment-related notices such as successful charges, failed payments, and refunds.
Turn an email on or off
Each row has a toggle on the right. Switch it off and Learn 360 stops sending that email entirely — useful if you’d rather handle, say, purchase receipts through your own system. The change saves instantly.
Edit the wording
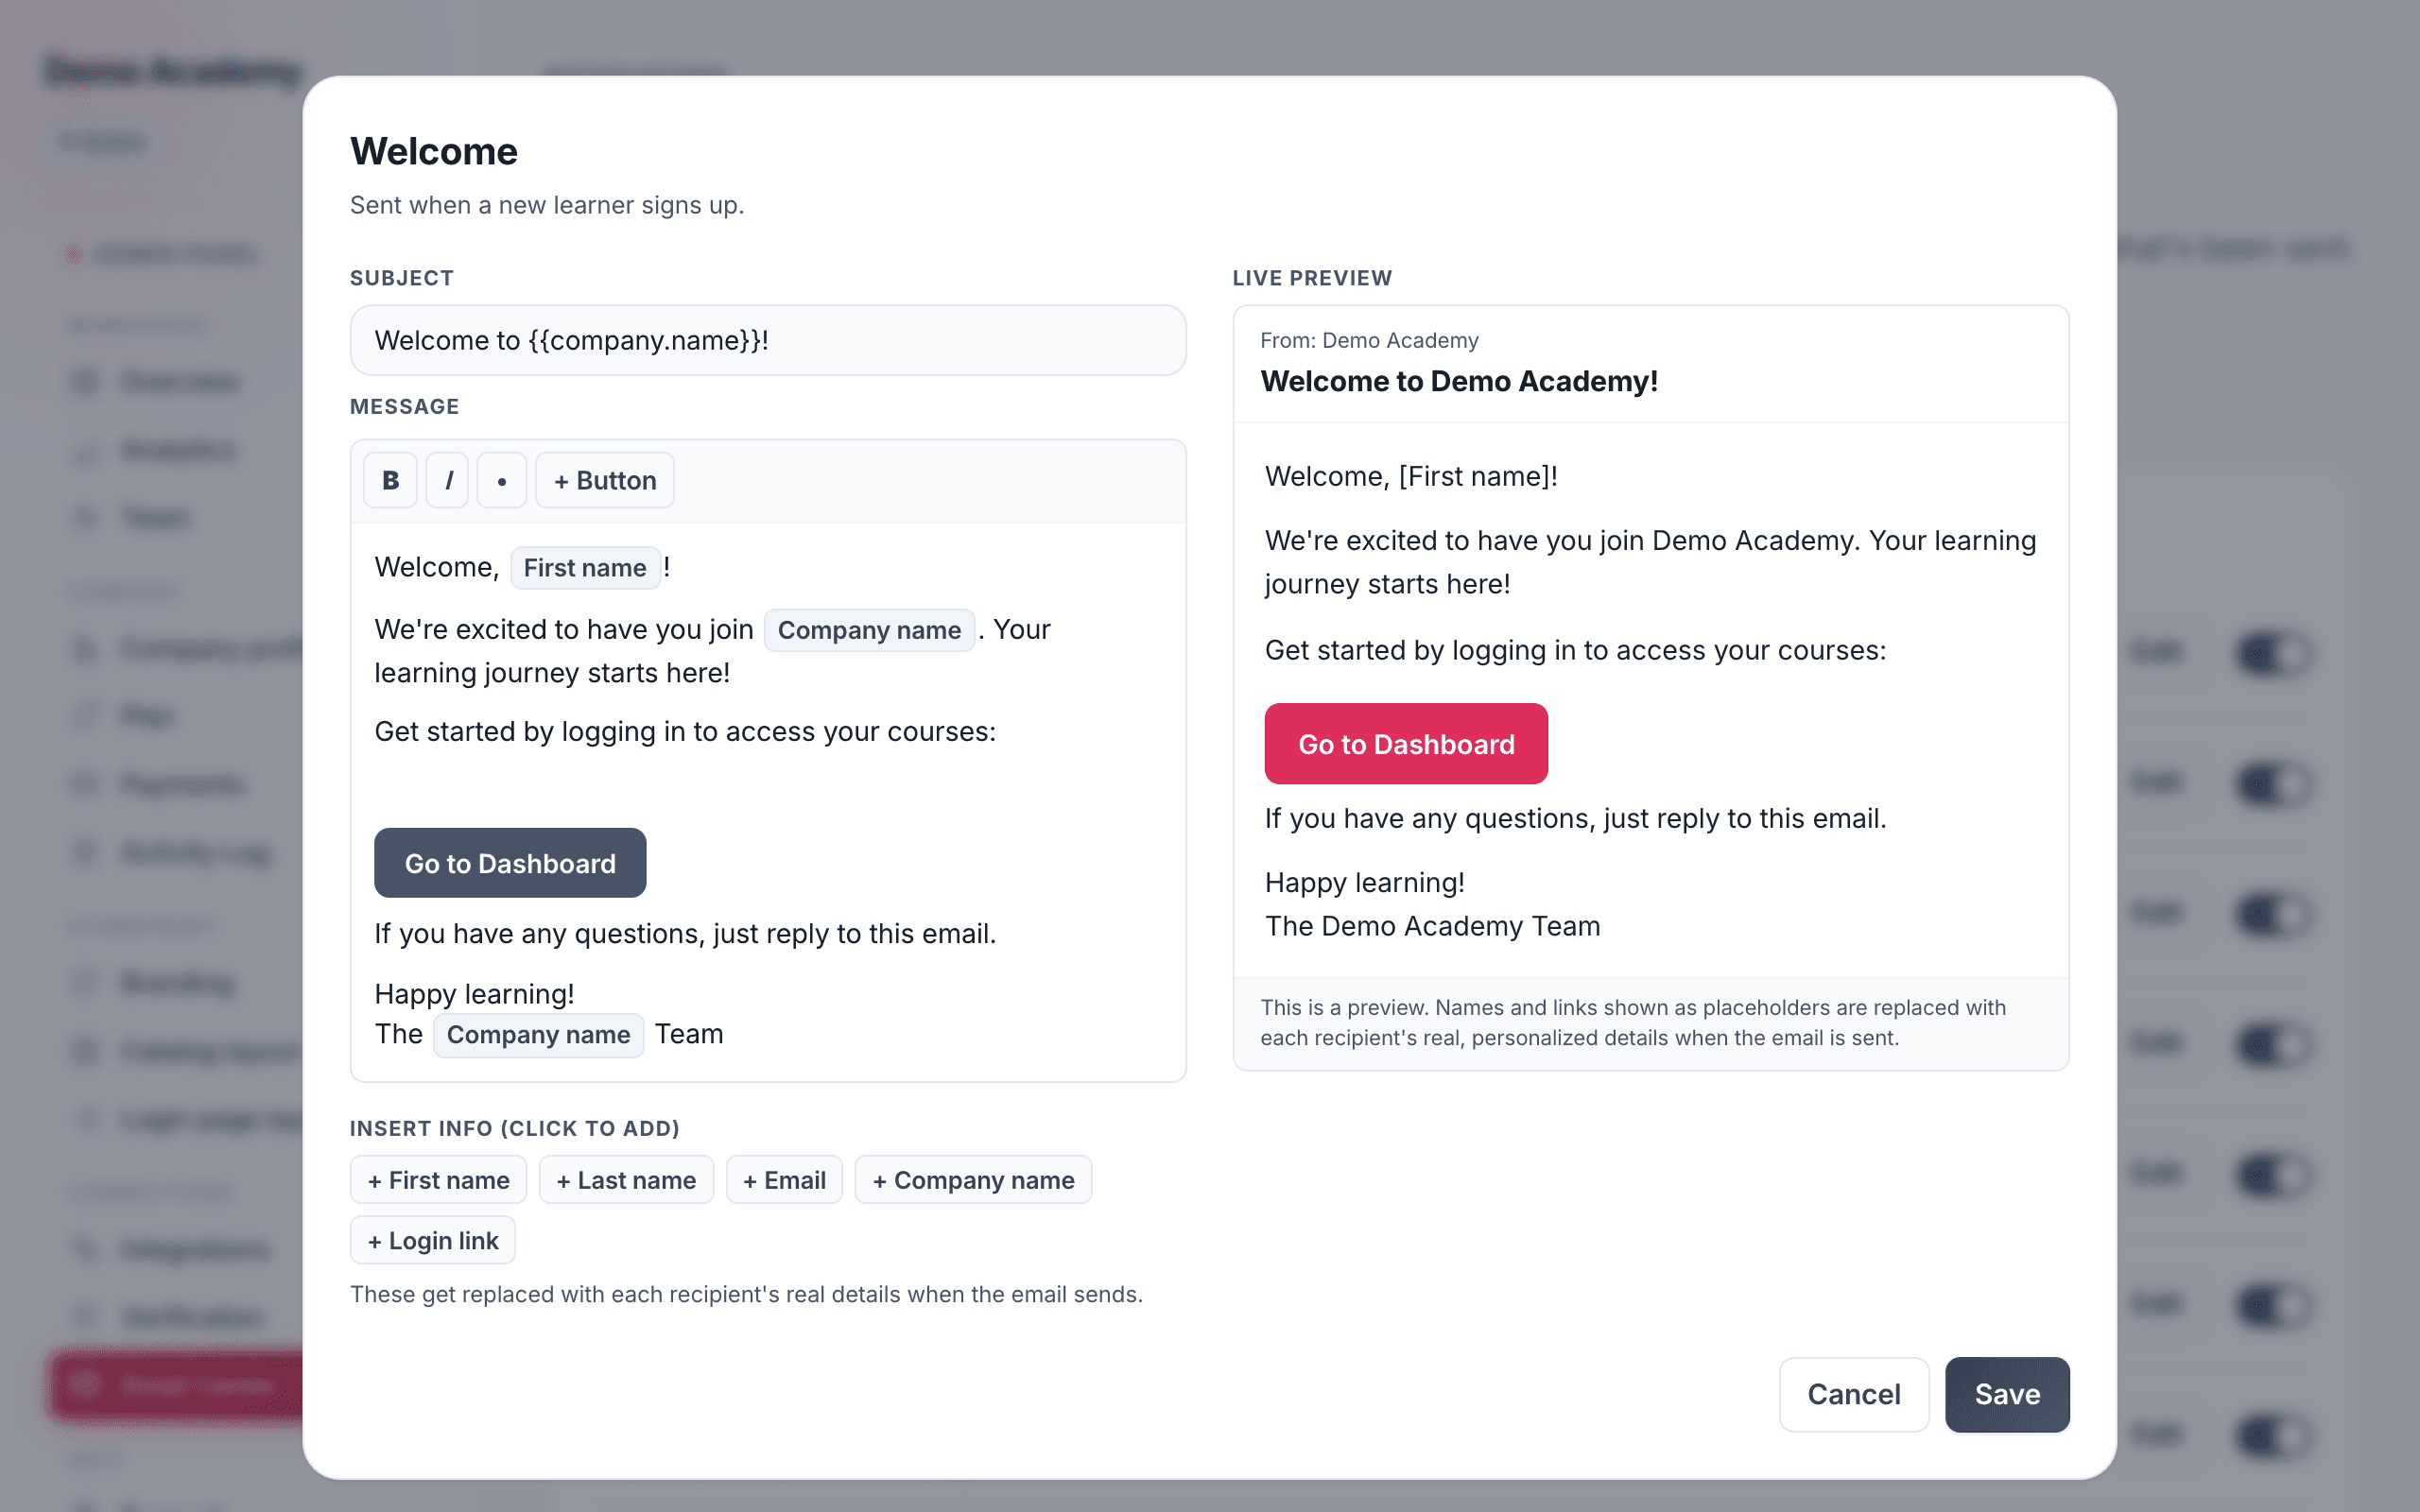
Click Edit on any email to open the template editor. It’s split in two: you write on the left and a live preview updates on the right, showing the email exactly as a recipient would see it, with your company as the sender.
- Subject — the subject line of the email.
- Message — a rich editor with Bold, Italic, and bullet-list buttons.
- + Button — drop in a call-to-action button and point it at a link, such as the login page, the course, or a certificate verify link.
- Insert info — click any chip (First name, Course name, Amount, Next billing date, and so on) to drop in a personalization token. Each one is replaced with that recipient’s real details when the email sends.
Click Save and the new wording takes effect on the next send.
My Alerts
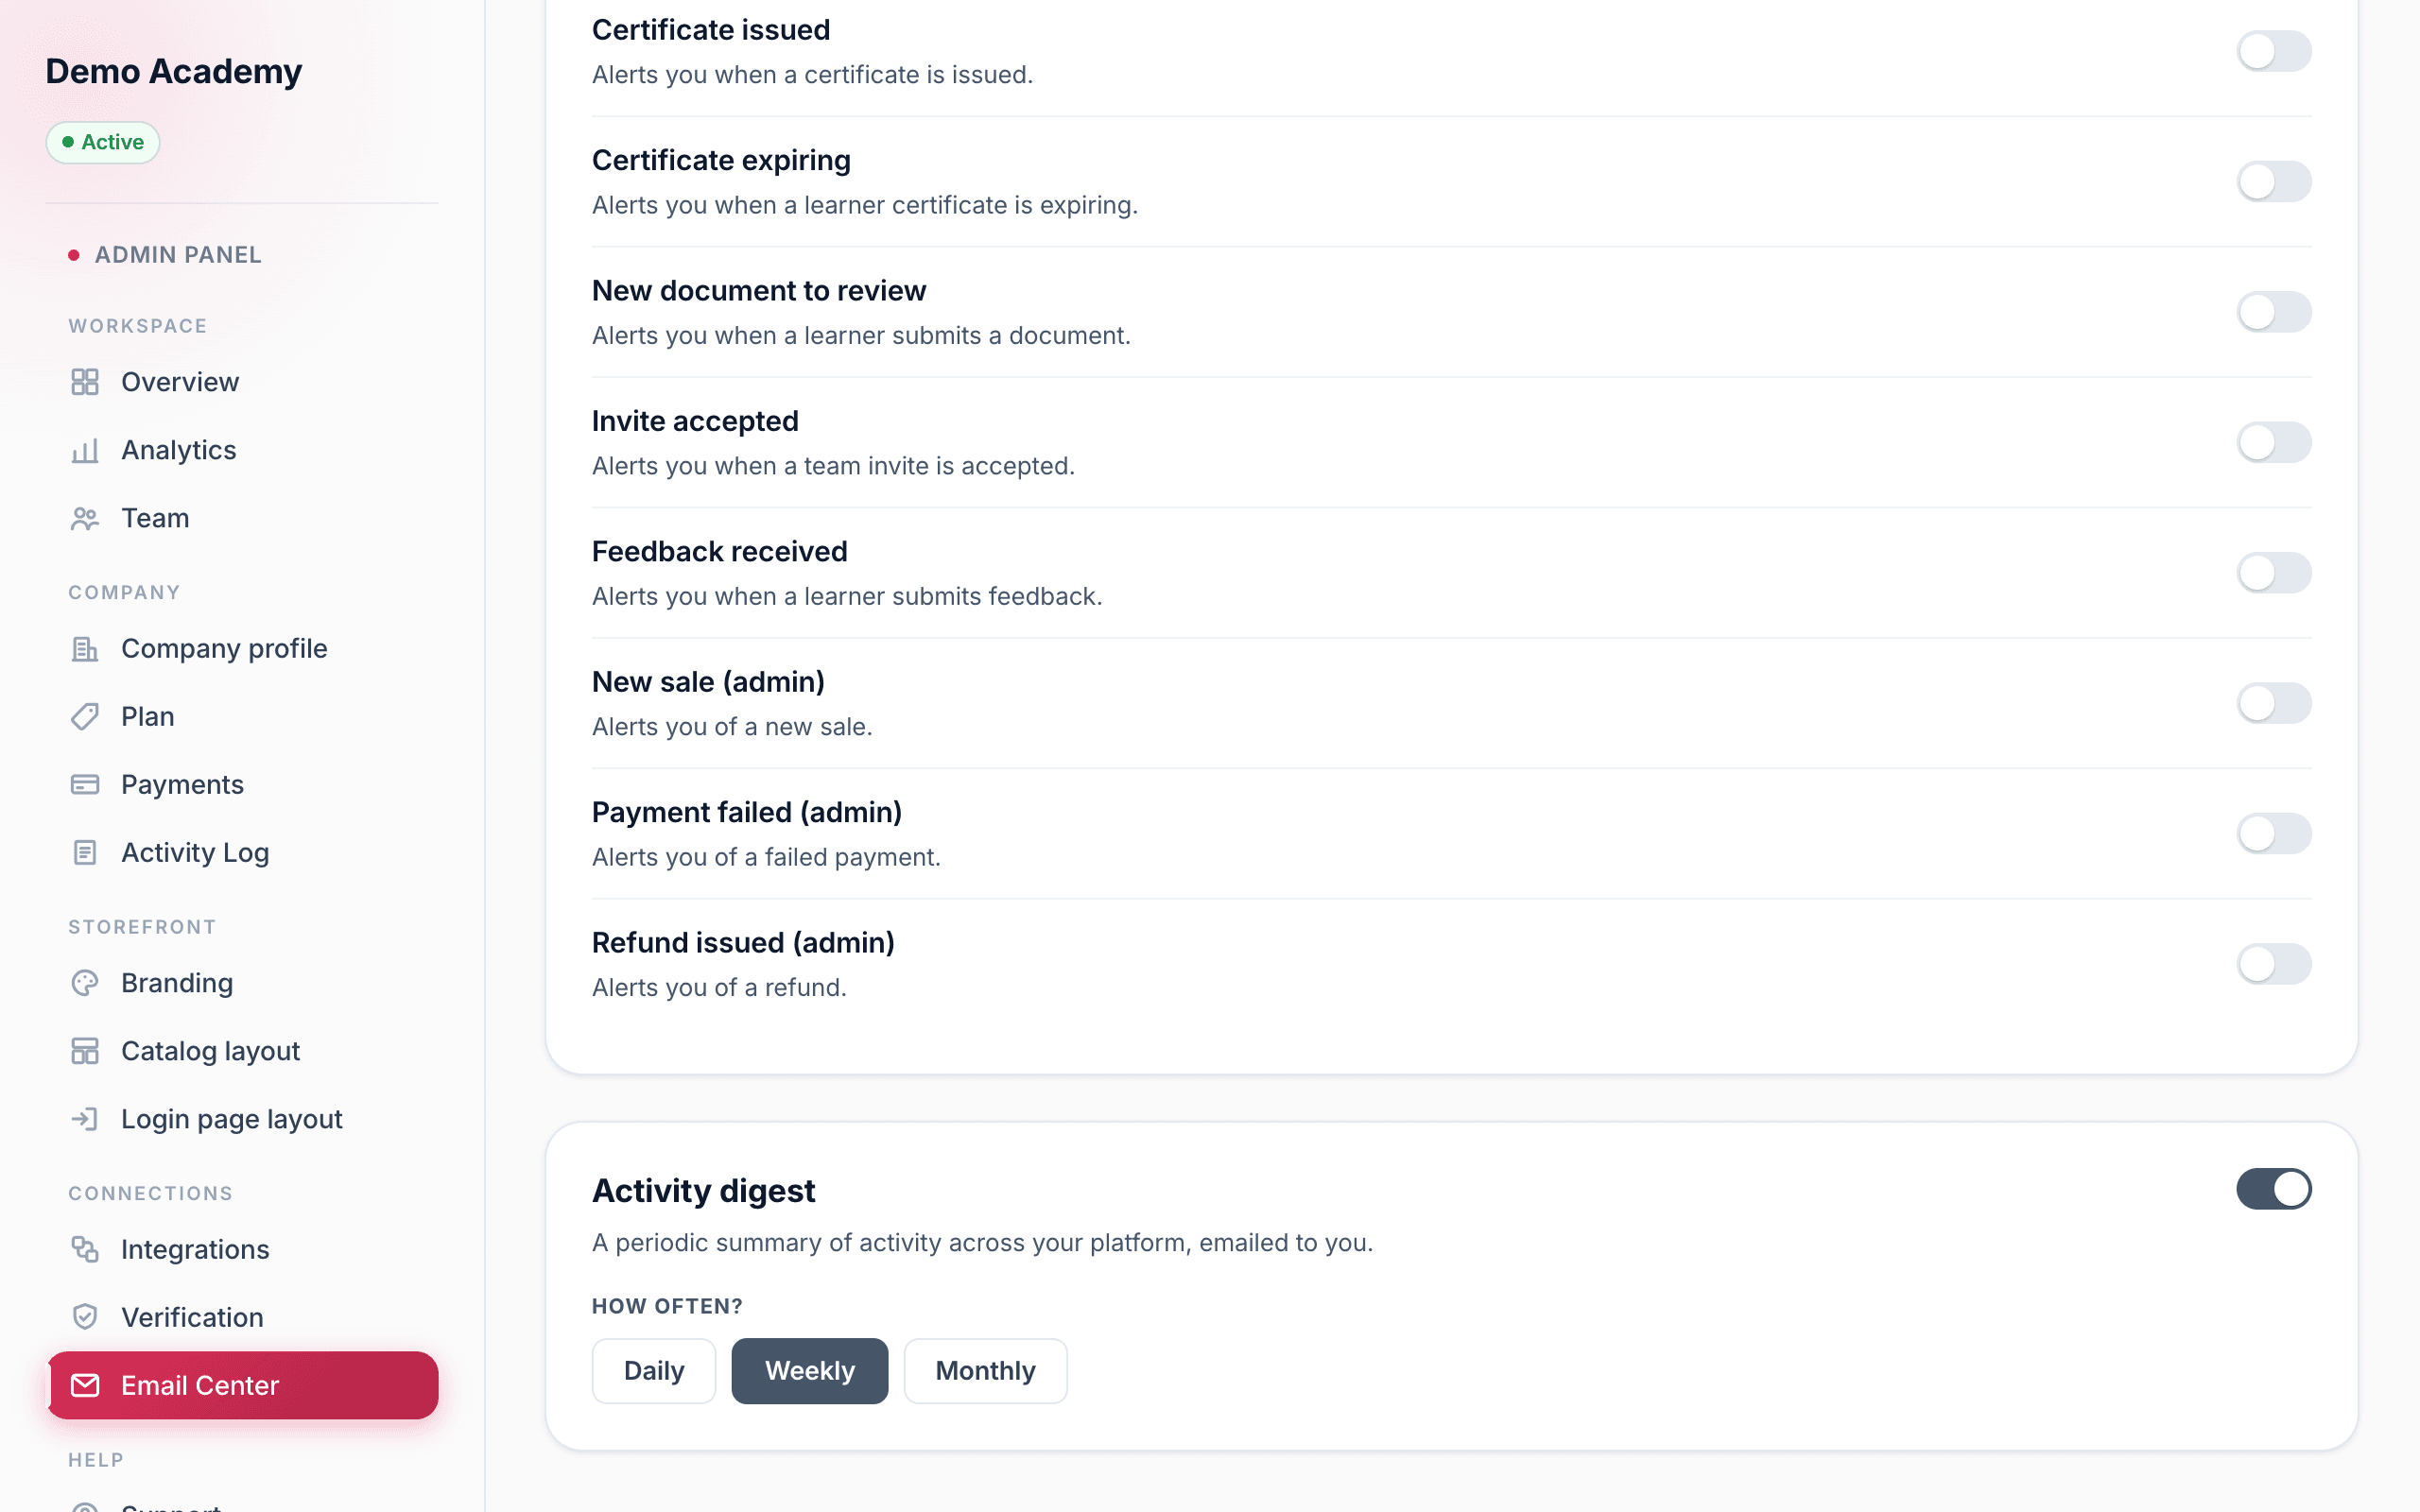
The My Alerts tab is personal to you. Every admin sets their own, so turning something off here doesn’t change what your teammates receive.
- Alerts you receive — toggle the activity you want emailed to you, like new sign-ups, purchases, a new document to review when a learner submits a verification file, or feedback received when a learner leaves feedback on a course.
- Activity digest — a rolled-up summary of everything happening across your platform. Turn it on and choose Daily, Weekly, or Monthly.
Sender
The Sender tab controls how your emails appear in a learner’s inbox.
- From name — the display name on every email, usually your academy’s name.
- Reply-to email — where replies go, e.g.
support@yourcompany.com. - Recipient email — an address to send a test to.
Click Save to store the identity, or Send test email to fire one to the recipient address. A Delivery diagnostics panel then reports the provider, status, the exact from / reply-to / to addresses, and any error — so you can confirm delivery is healthy.
Send from your own domain (Pro)
On Pro, two extra cards let you send from your own domain for full white-label branding:
- Owner sender email (easy setup) — the simplest route. Enter a sender address like
hello@mail.yourcompany.com, add the DNS records shown to your domain registrar, and click Verify domain. Once verified, flip the toggle to start sending from it. - Custom sending domain — the full setup. Add a sending domain such as
mail.yourcompany.com, add its DNS records, verify, and switch it on.
DNS changes can take a while to propagate (up to 48 hours), so if verification fails the first time, wait and retry. On the Free plan these cards show an Upgrade to Pro prompt instead.
Activity Log
The Activity Log tab is a running record of every email your platform has sent. Three counters up top show Delivered, Failed, and Total, and a dropdown filters by status — Sent, Sent (test), or Failed. Each row shows the subject, the email type, who it went to, a status badge, and when it was sent. Click any row to open the full sent email: the exact rendered message, the delivery provider, and the error text if it failed. Use Load more to page back through history.