Team is for the people who help you run your academy — a co-founder, an assistant, a course builder, a support person. They get their own login to your dashboard, and you decide exactly what each of them can touch. This is a completely different thing from your learners: teammates work behind the scenes; learners take your courses.
Open the Team page
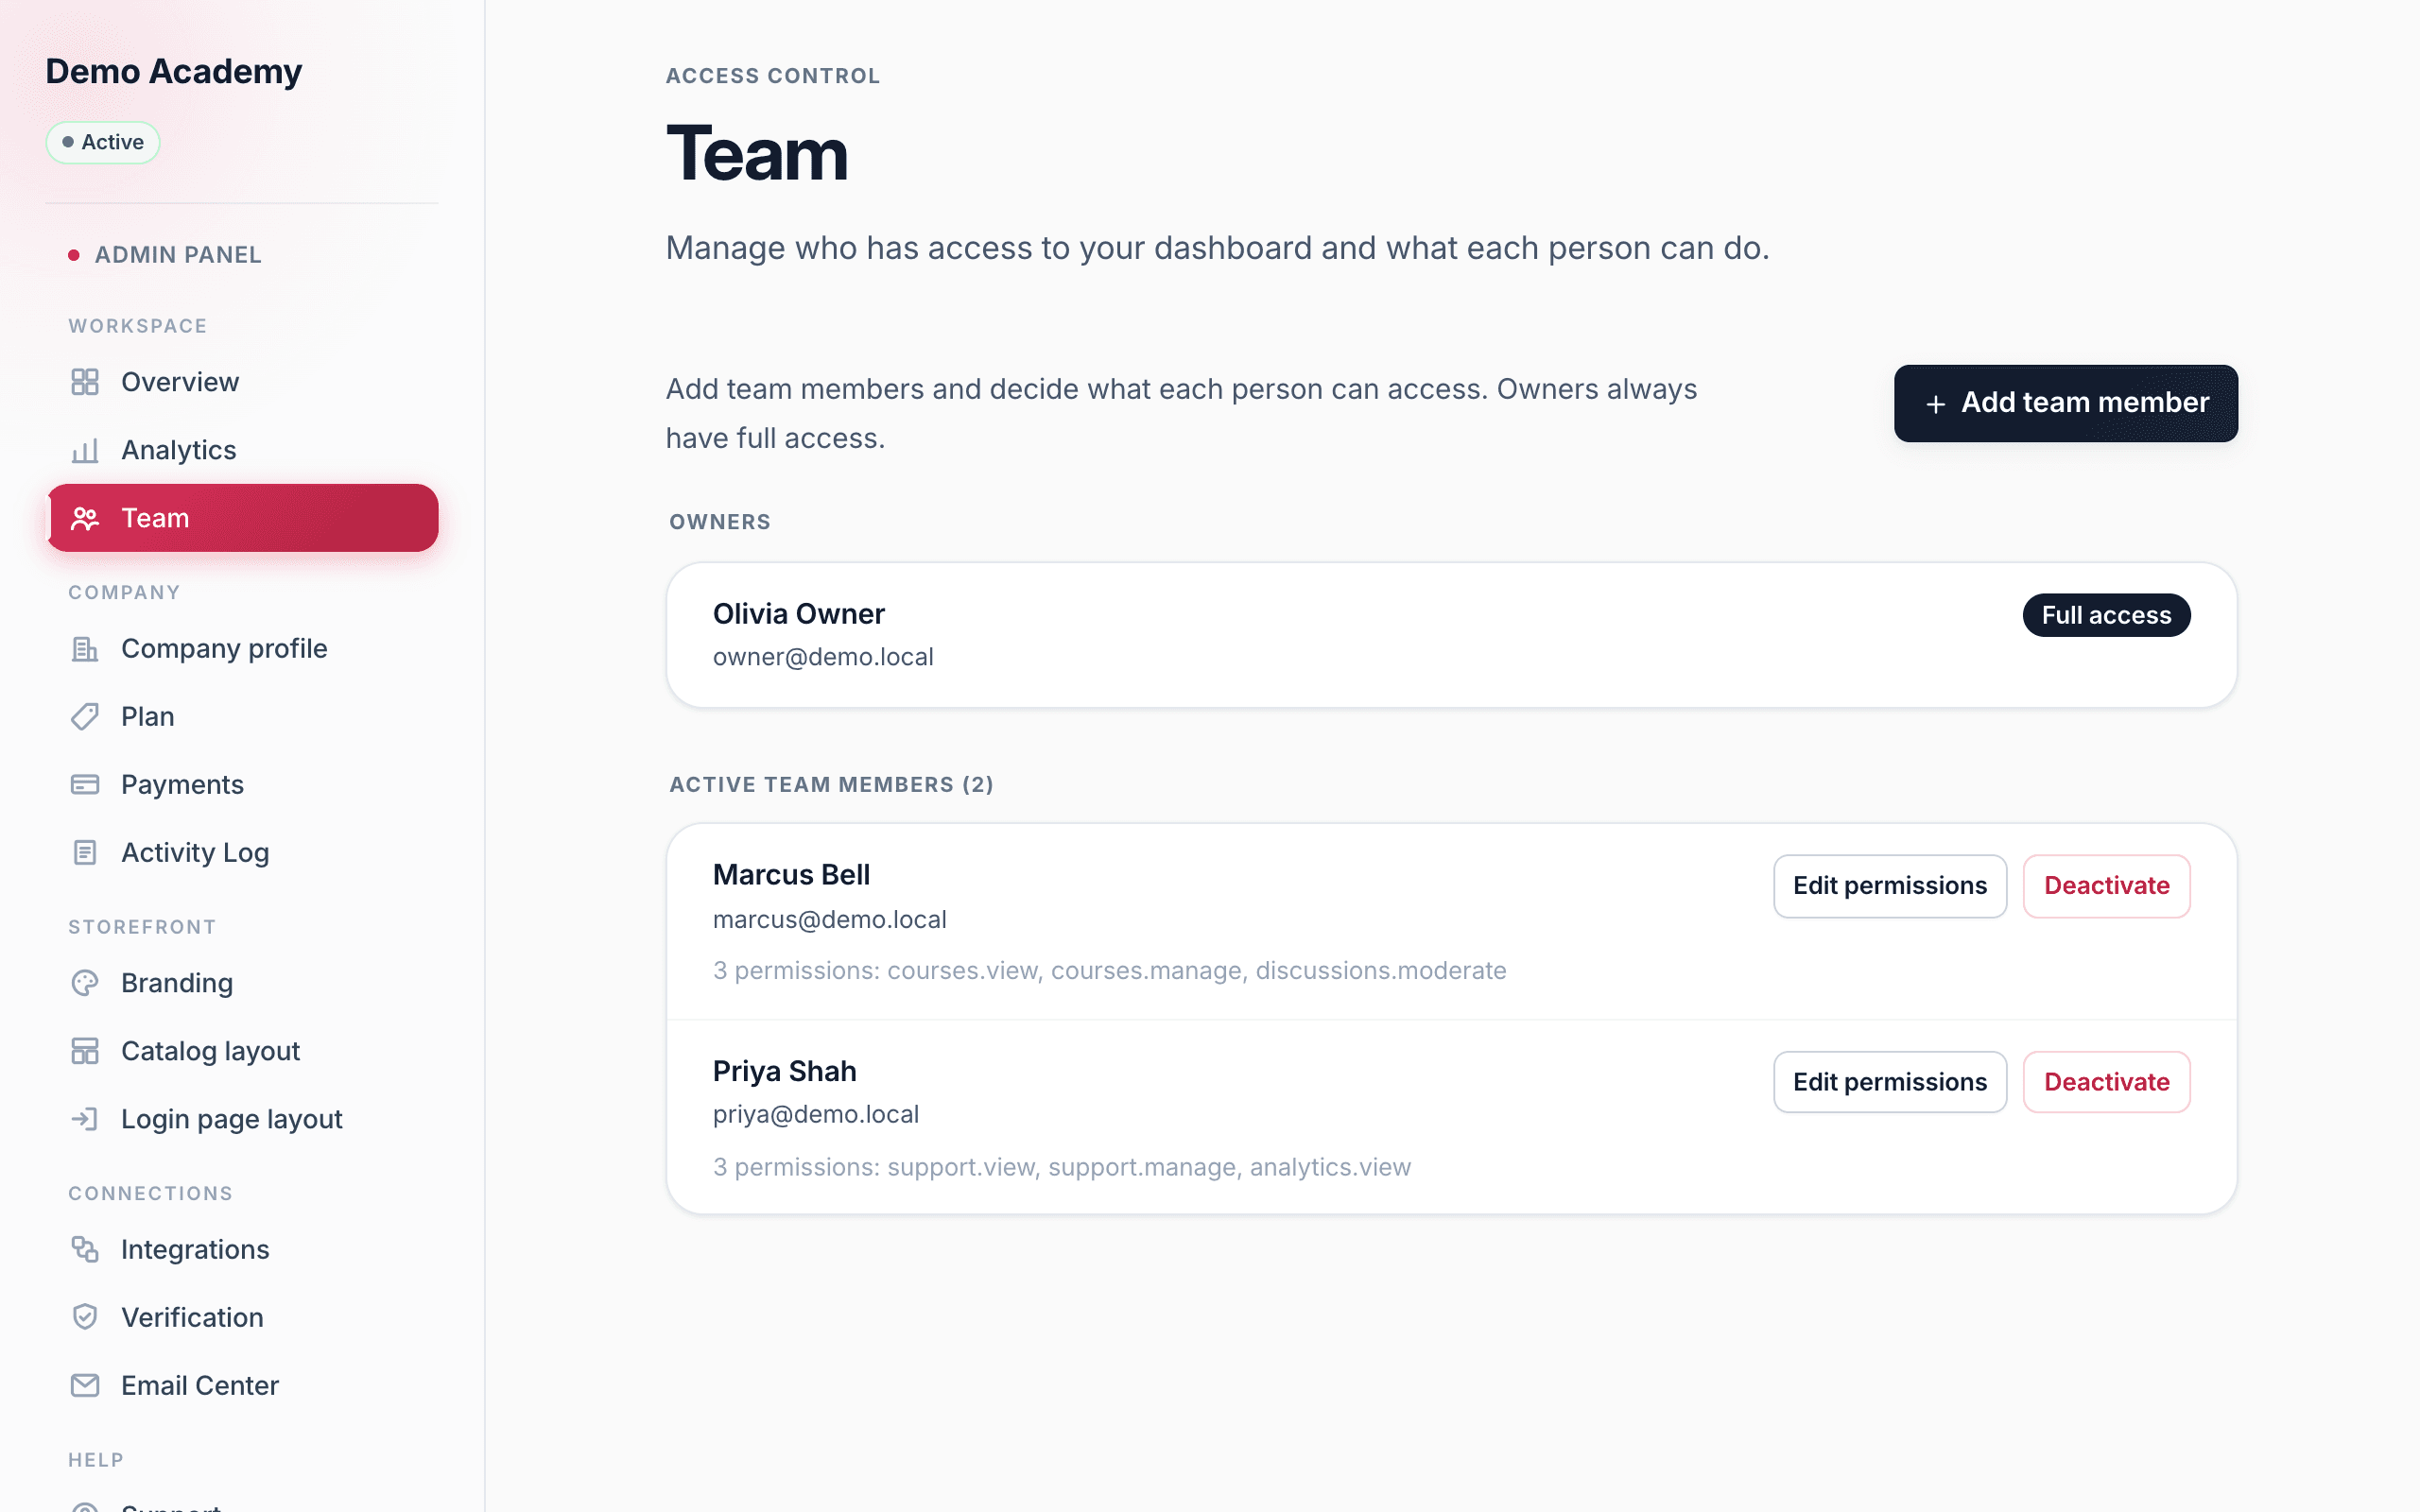
Go to Admin PanelTeam. The page is headed Team, with the line “Manage who has access to your dashboard and what each person can do.” It splits your people into clear sections:
- Owners — you, and anyone else with full access. Owners are marked with a Full access badge and can do everything; their permissions aren’t editable.
- Active team members — the staff you’ve added, each with the specific permissions you granted.
- Deactivated — former members who can no longer log in (this section only appears once you have some).
Add a team member
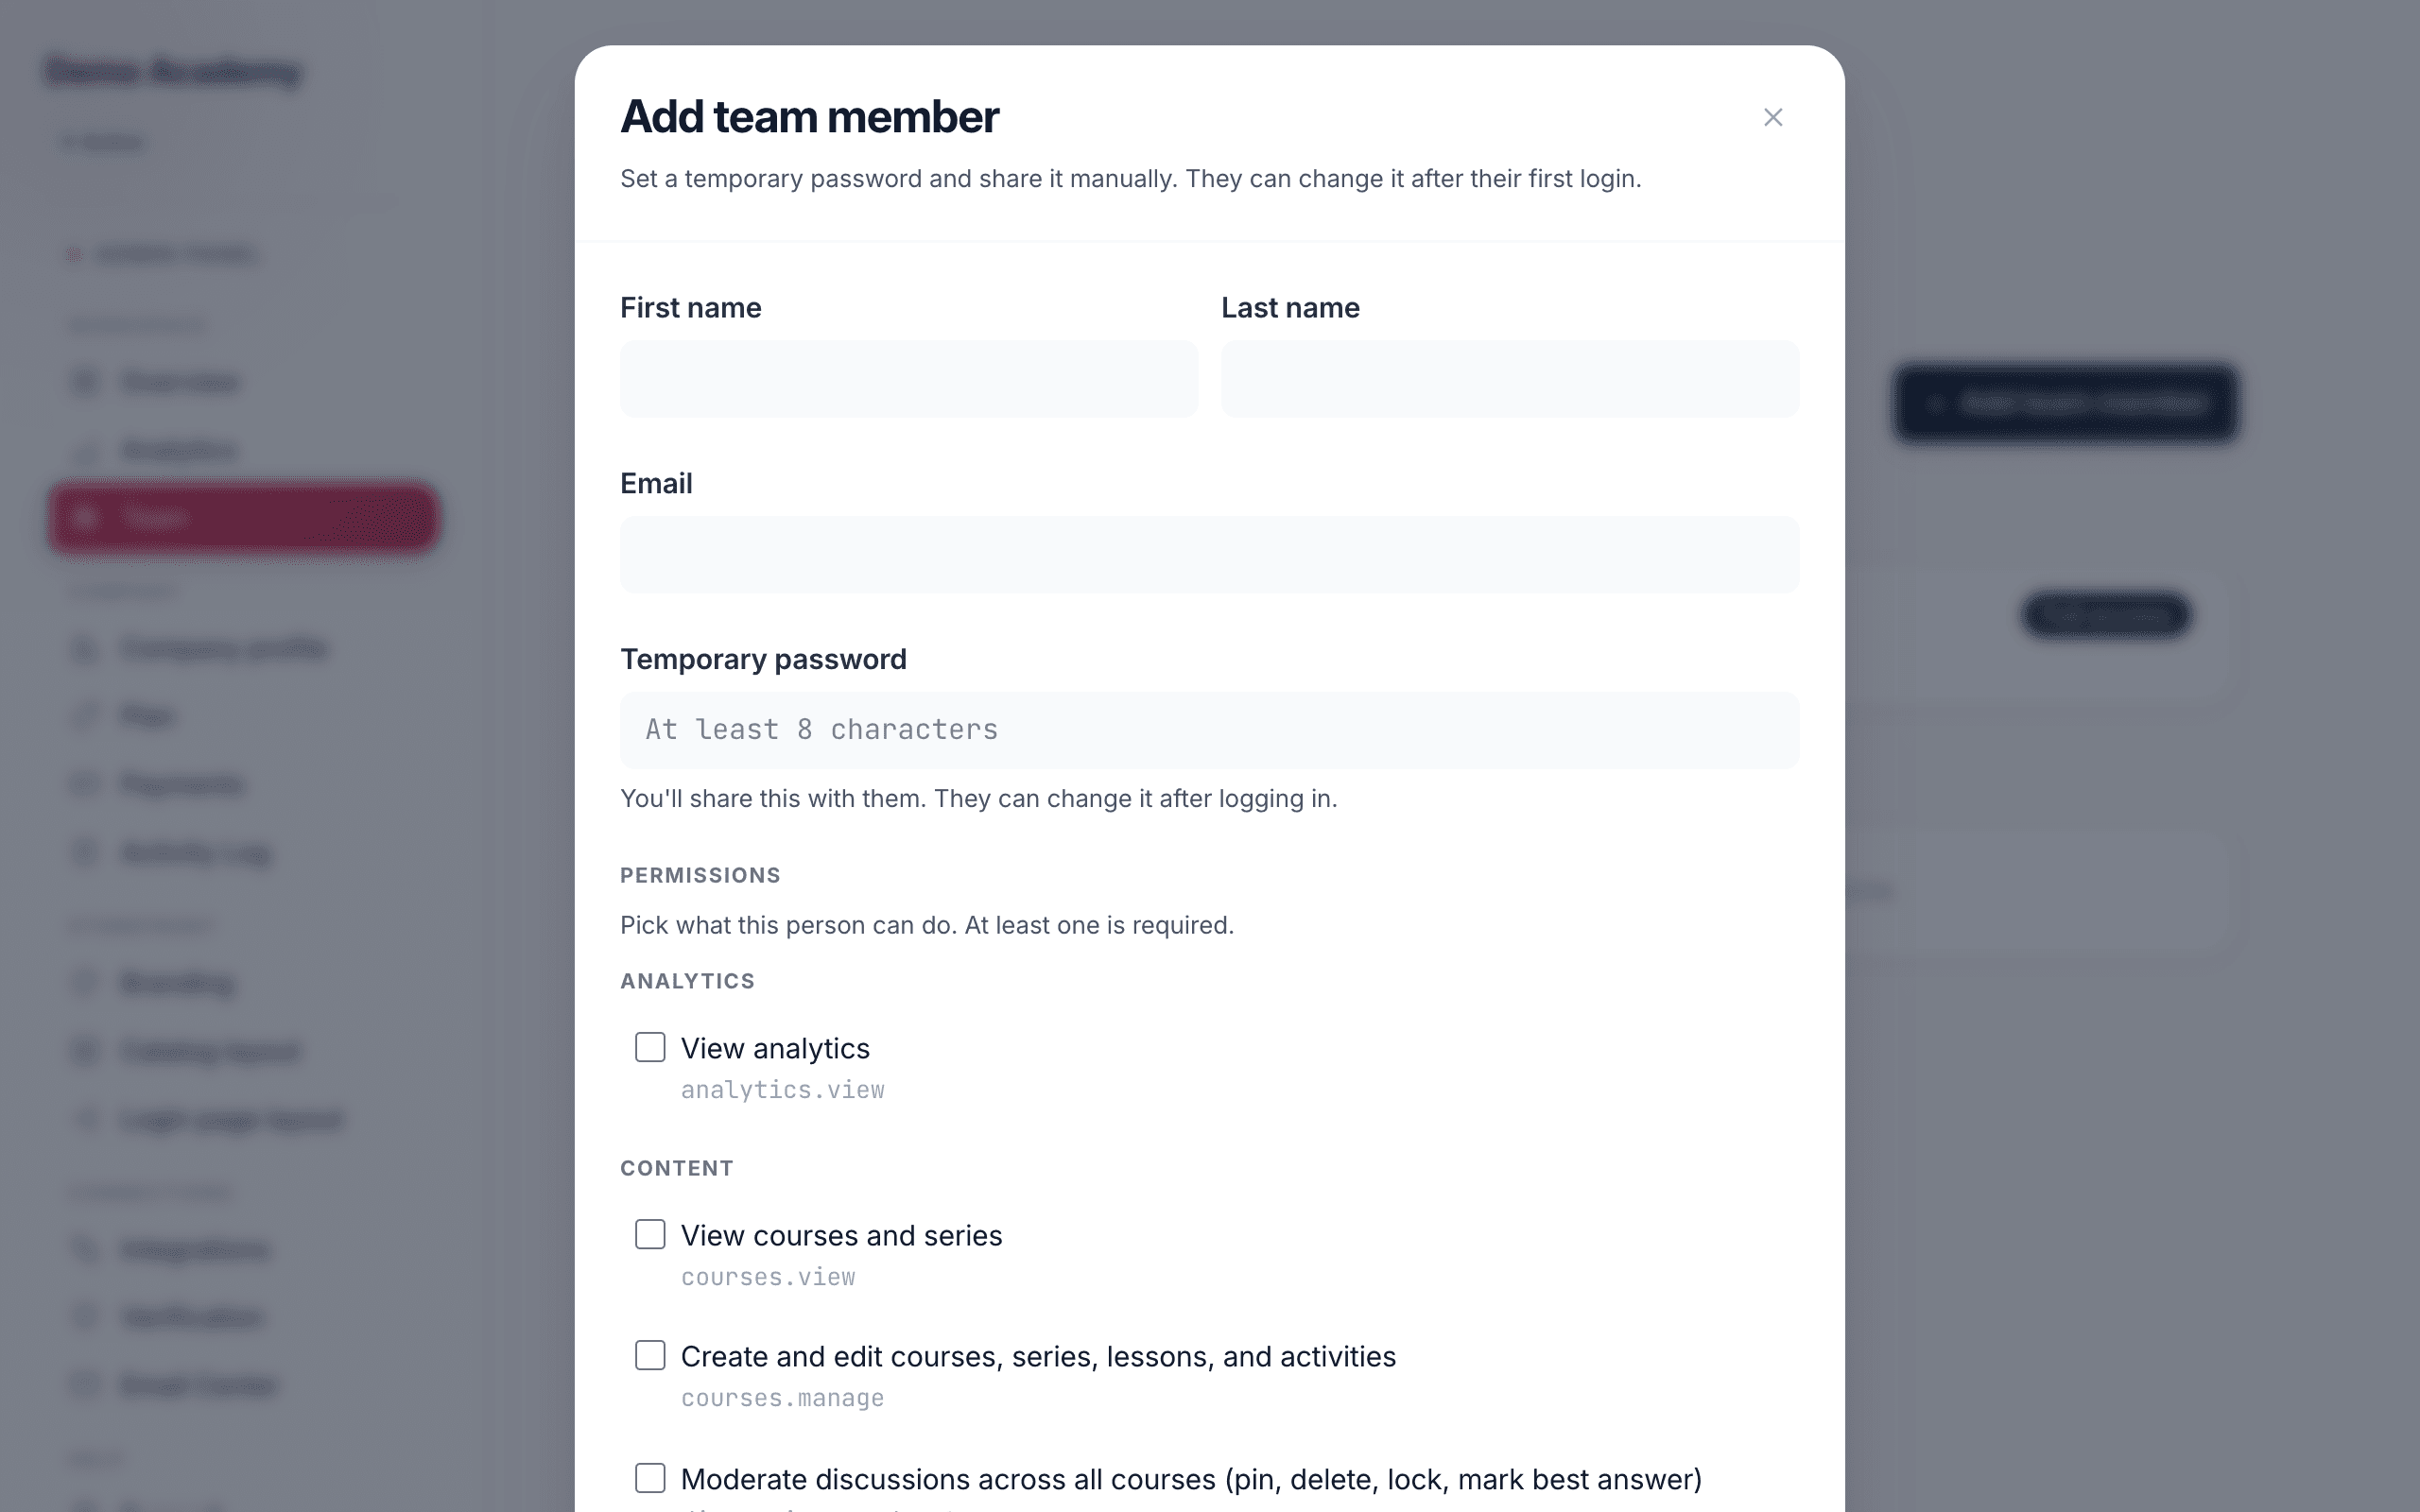
Click Add team member to open the form. You’ll fill in:
- First name and Last name.
- Email — the address they’ll log in with.
- Temporary password — at least 8 characters. You set this and share it with them yourself; they can change it after their first login.
- Permissions — tick what this person is allowed to do (at least one is required). More on the choices below.
When you click Create team member, Learn 360 shows a confirmation with their login URL, email, and temporary password, plus a Copy email + password button — so you can paste the credentials straight into a message to them.
Choosing permissions
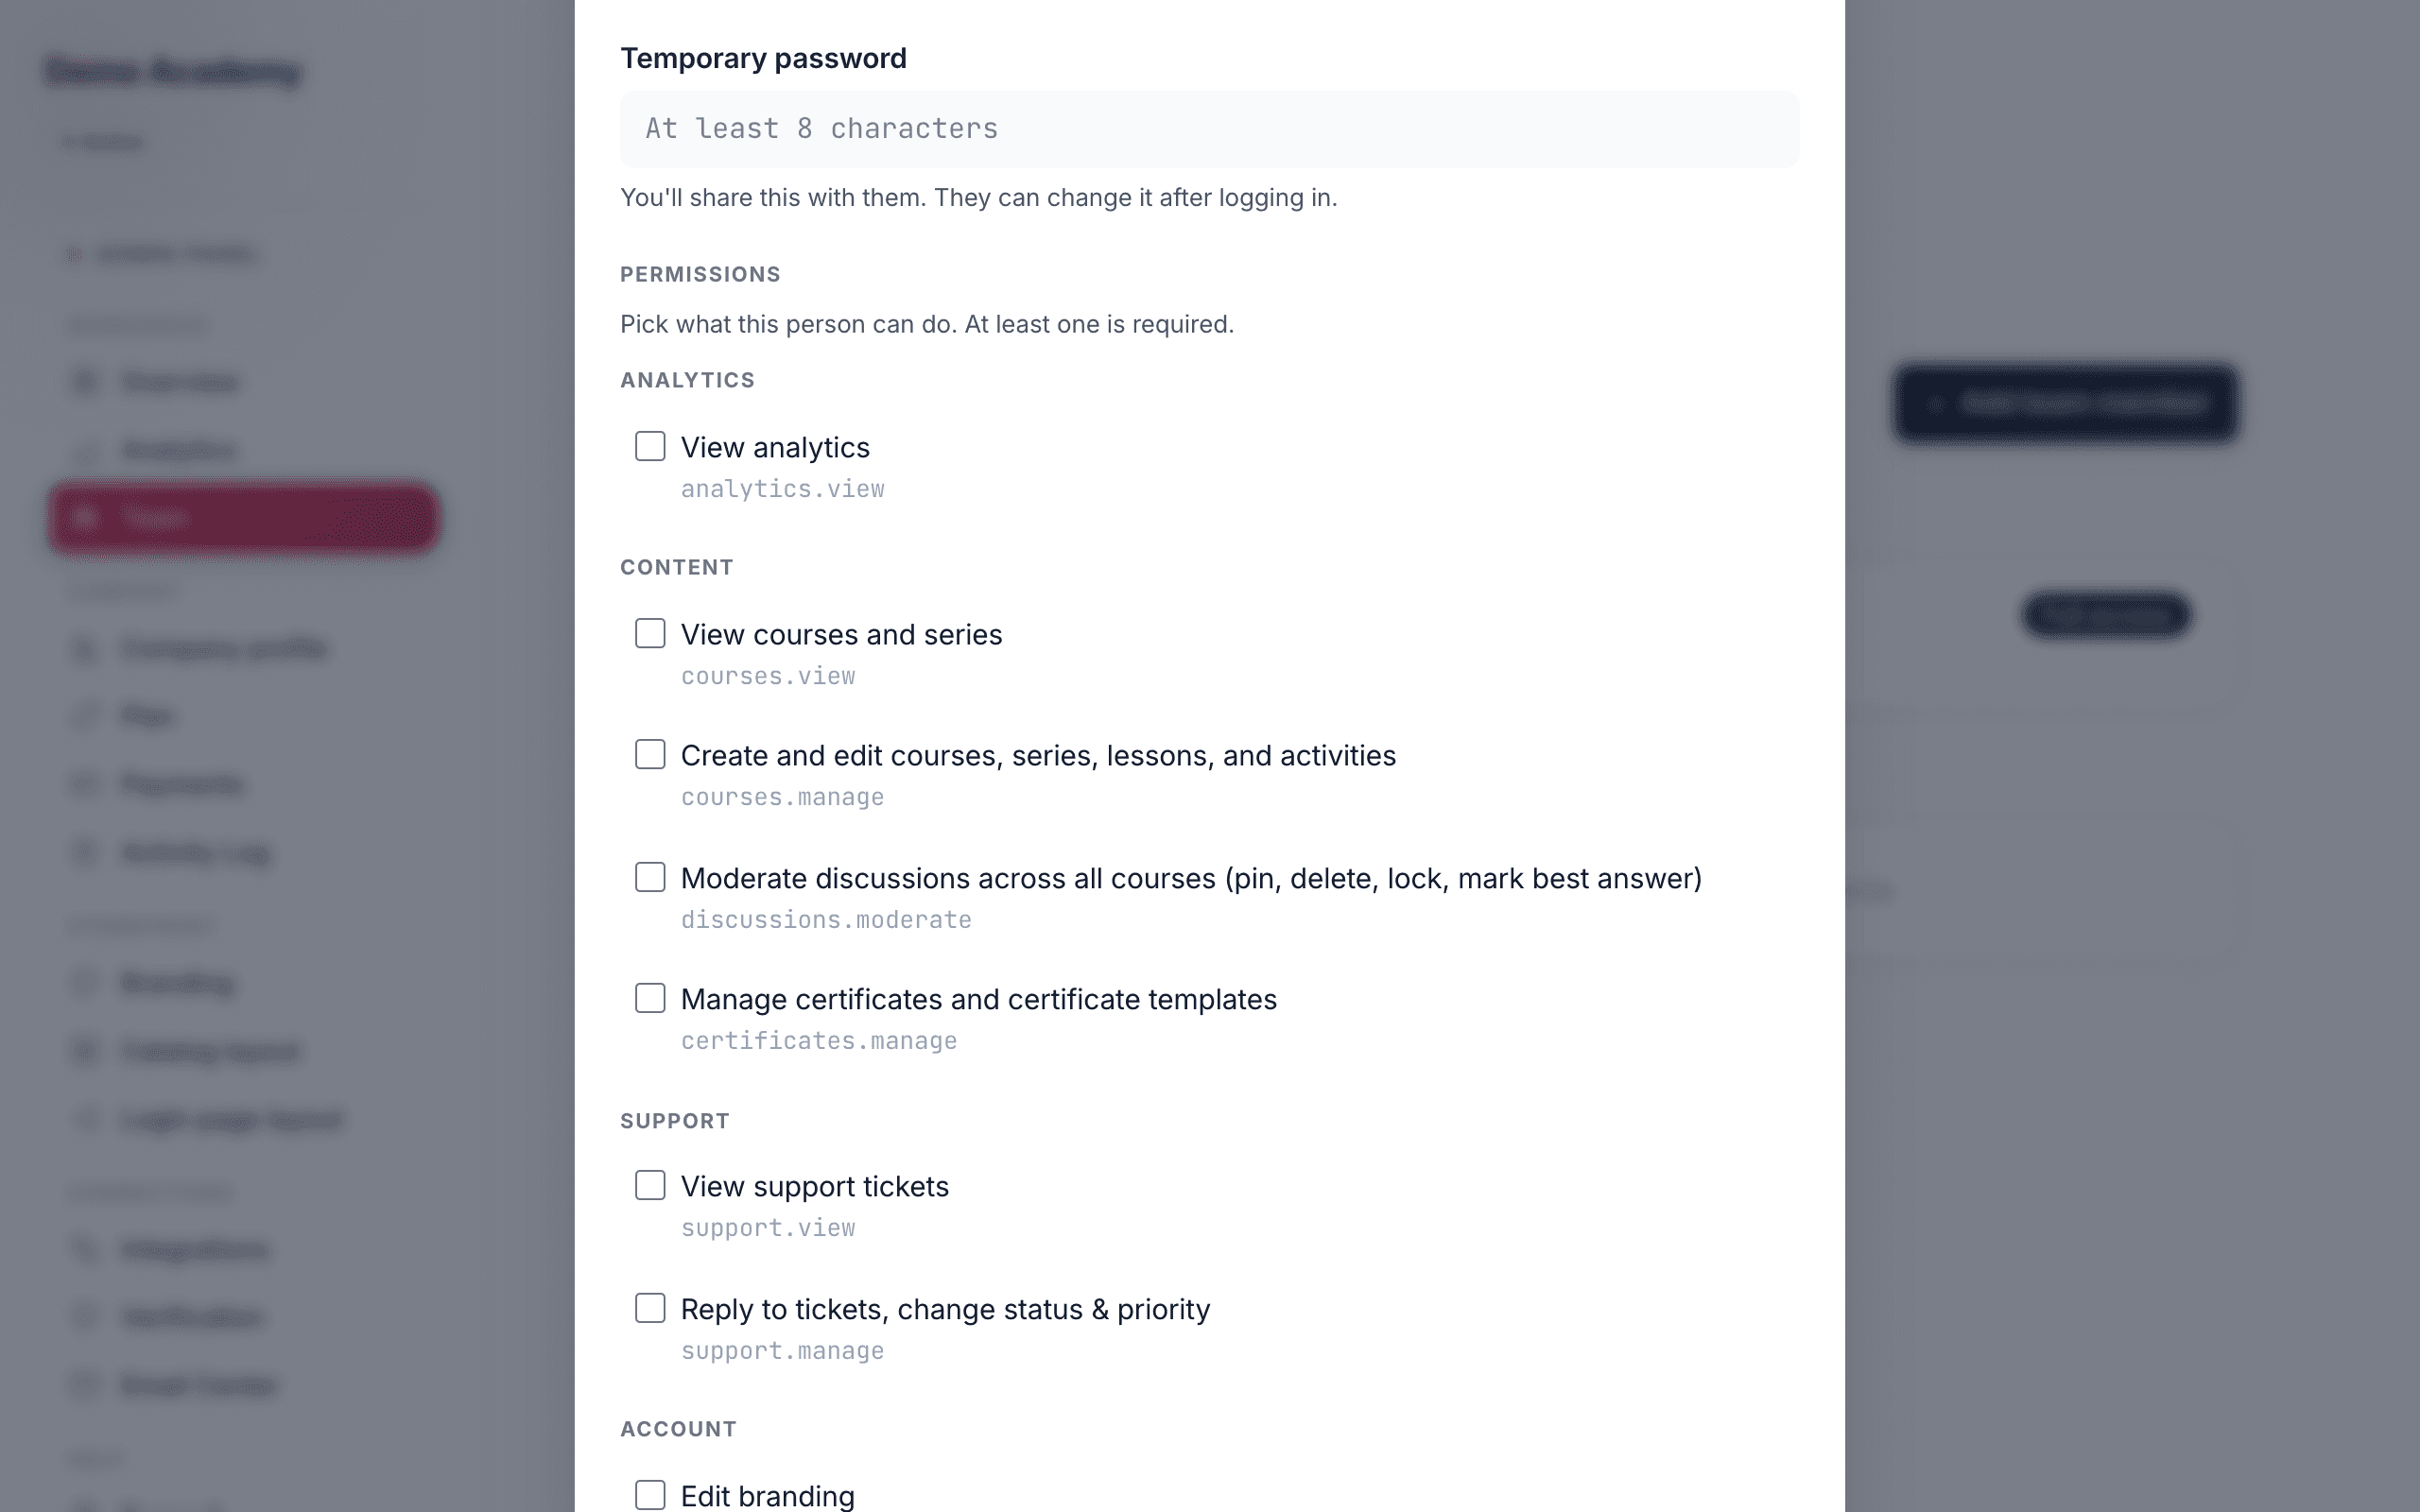
Permissions are grouped so you can hand over exactly as much as you want and no more. The choices are:
- Analytics — view your analytics.
- Content — view courses and series; create and edit courses, series, lessons, and activities; moderate discussions across all courses; and manage certificates and templates.
- Support — view support tickets, and reply to them (changing status and priority).
- Account — edit branding, edit the company profile, change the subscription plan, manage the email center, and manage integrations.
- Administration — add and manage team members, and view the company activity log.
Each permission has a plain-language label so it’s obvious what it unlocks. A course builder might get Content only; a support hire might get Support plus Analytics; a business partner might get nearly everything.
Edit, deactivate & reactivate
On each active member you have two controls:
- Edit permissions — open the same checklist any time to add or remove access.
- Deactivate — turn off their login. They can no longer sign in, but nothing is deleted — they move to the Deactivated section, where a Reactivate button brings them straight back. Use this instead of worrying about permanently removing someone.
Team members are not learners
This is the one thing worth being clear about. The Team page is only for staff who run the dashboard. To give someone access to your courses, you don’t add them here — you use enrollment or a learner invitation:
- How learners enroll — self-enrollment from your catalog.
- Invite specific learners — add a named person to a course by email.
The Free-plan user limit
On the Free plan, your workspace can have up to 5 users in total — and that count includes everyone: your team members and your learners, together. Once you hit the limit, new sign-ups pause — including learners trying to join — until you make room or upgrade. Upgrading to Pro removes the cap entirely (unlimited users).
For the full picture of what each plan includes, see Free vs Pro.