To charge for a course or series, you connect your own Stripe or PayPal account. Buyers pay you directly, the money lands in your balance, and Learn 360 never takes a cut — on every plan, you keep 100% of your sales. You use one processor at a time: cards and wallets run through your Stripe, or payments run through your PayPal.
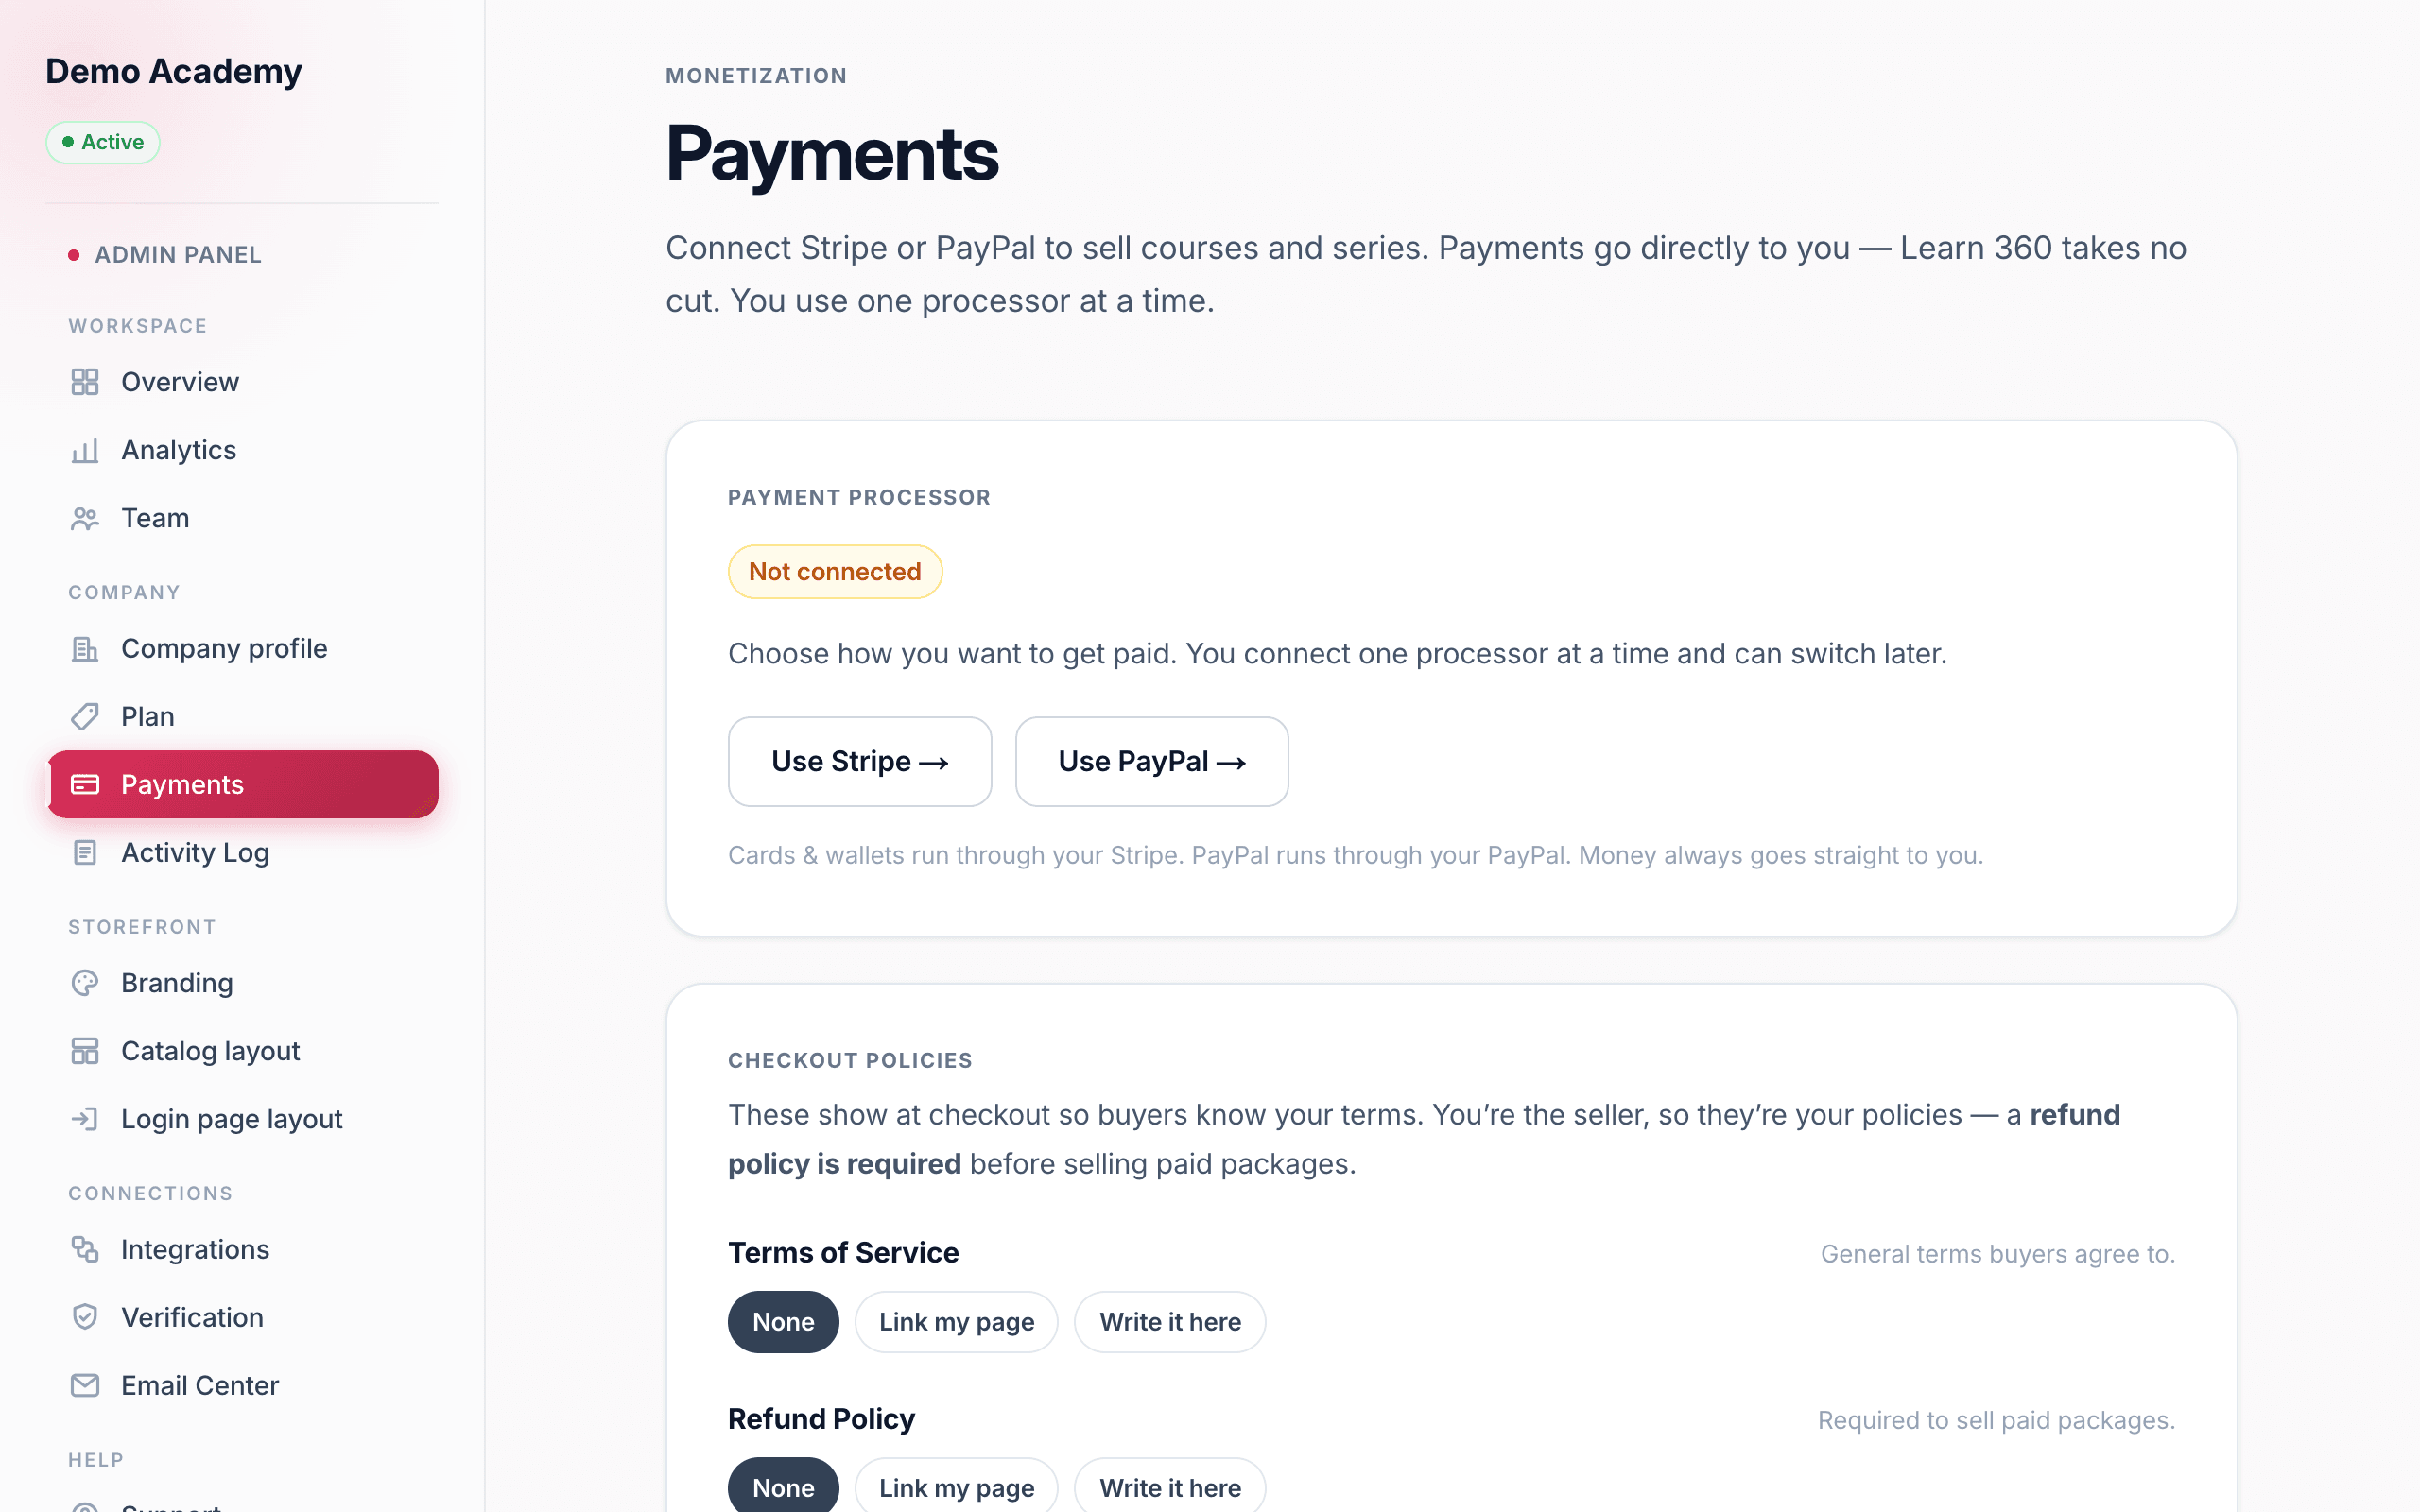
Everything lives under Admin PanelPayments. At the top is a Payment processor card. Until you connect, it shows a Not connected pill and a simple chooser: Use Stripe → or Use PayPal →.
Connect your own Stripe
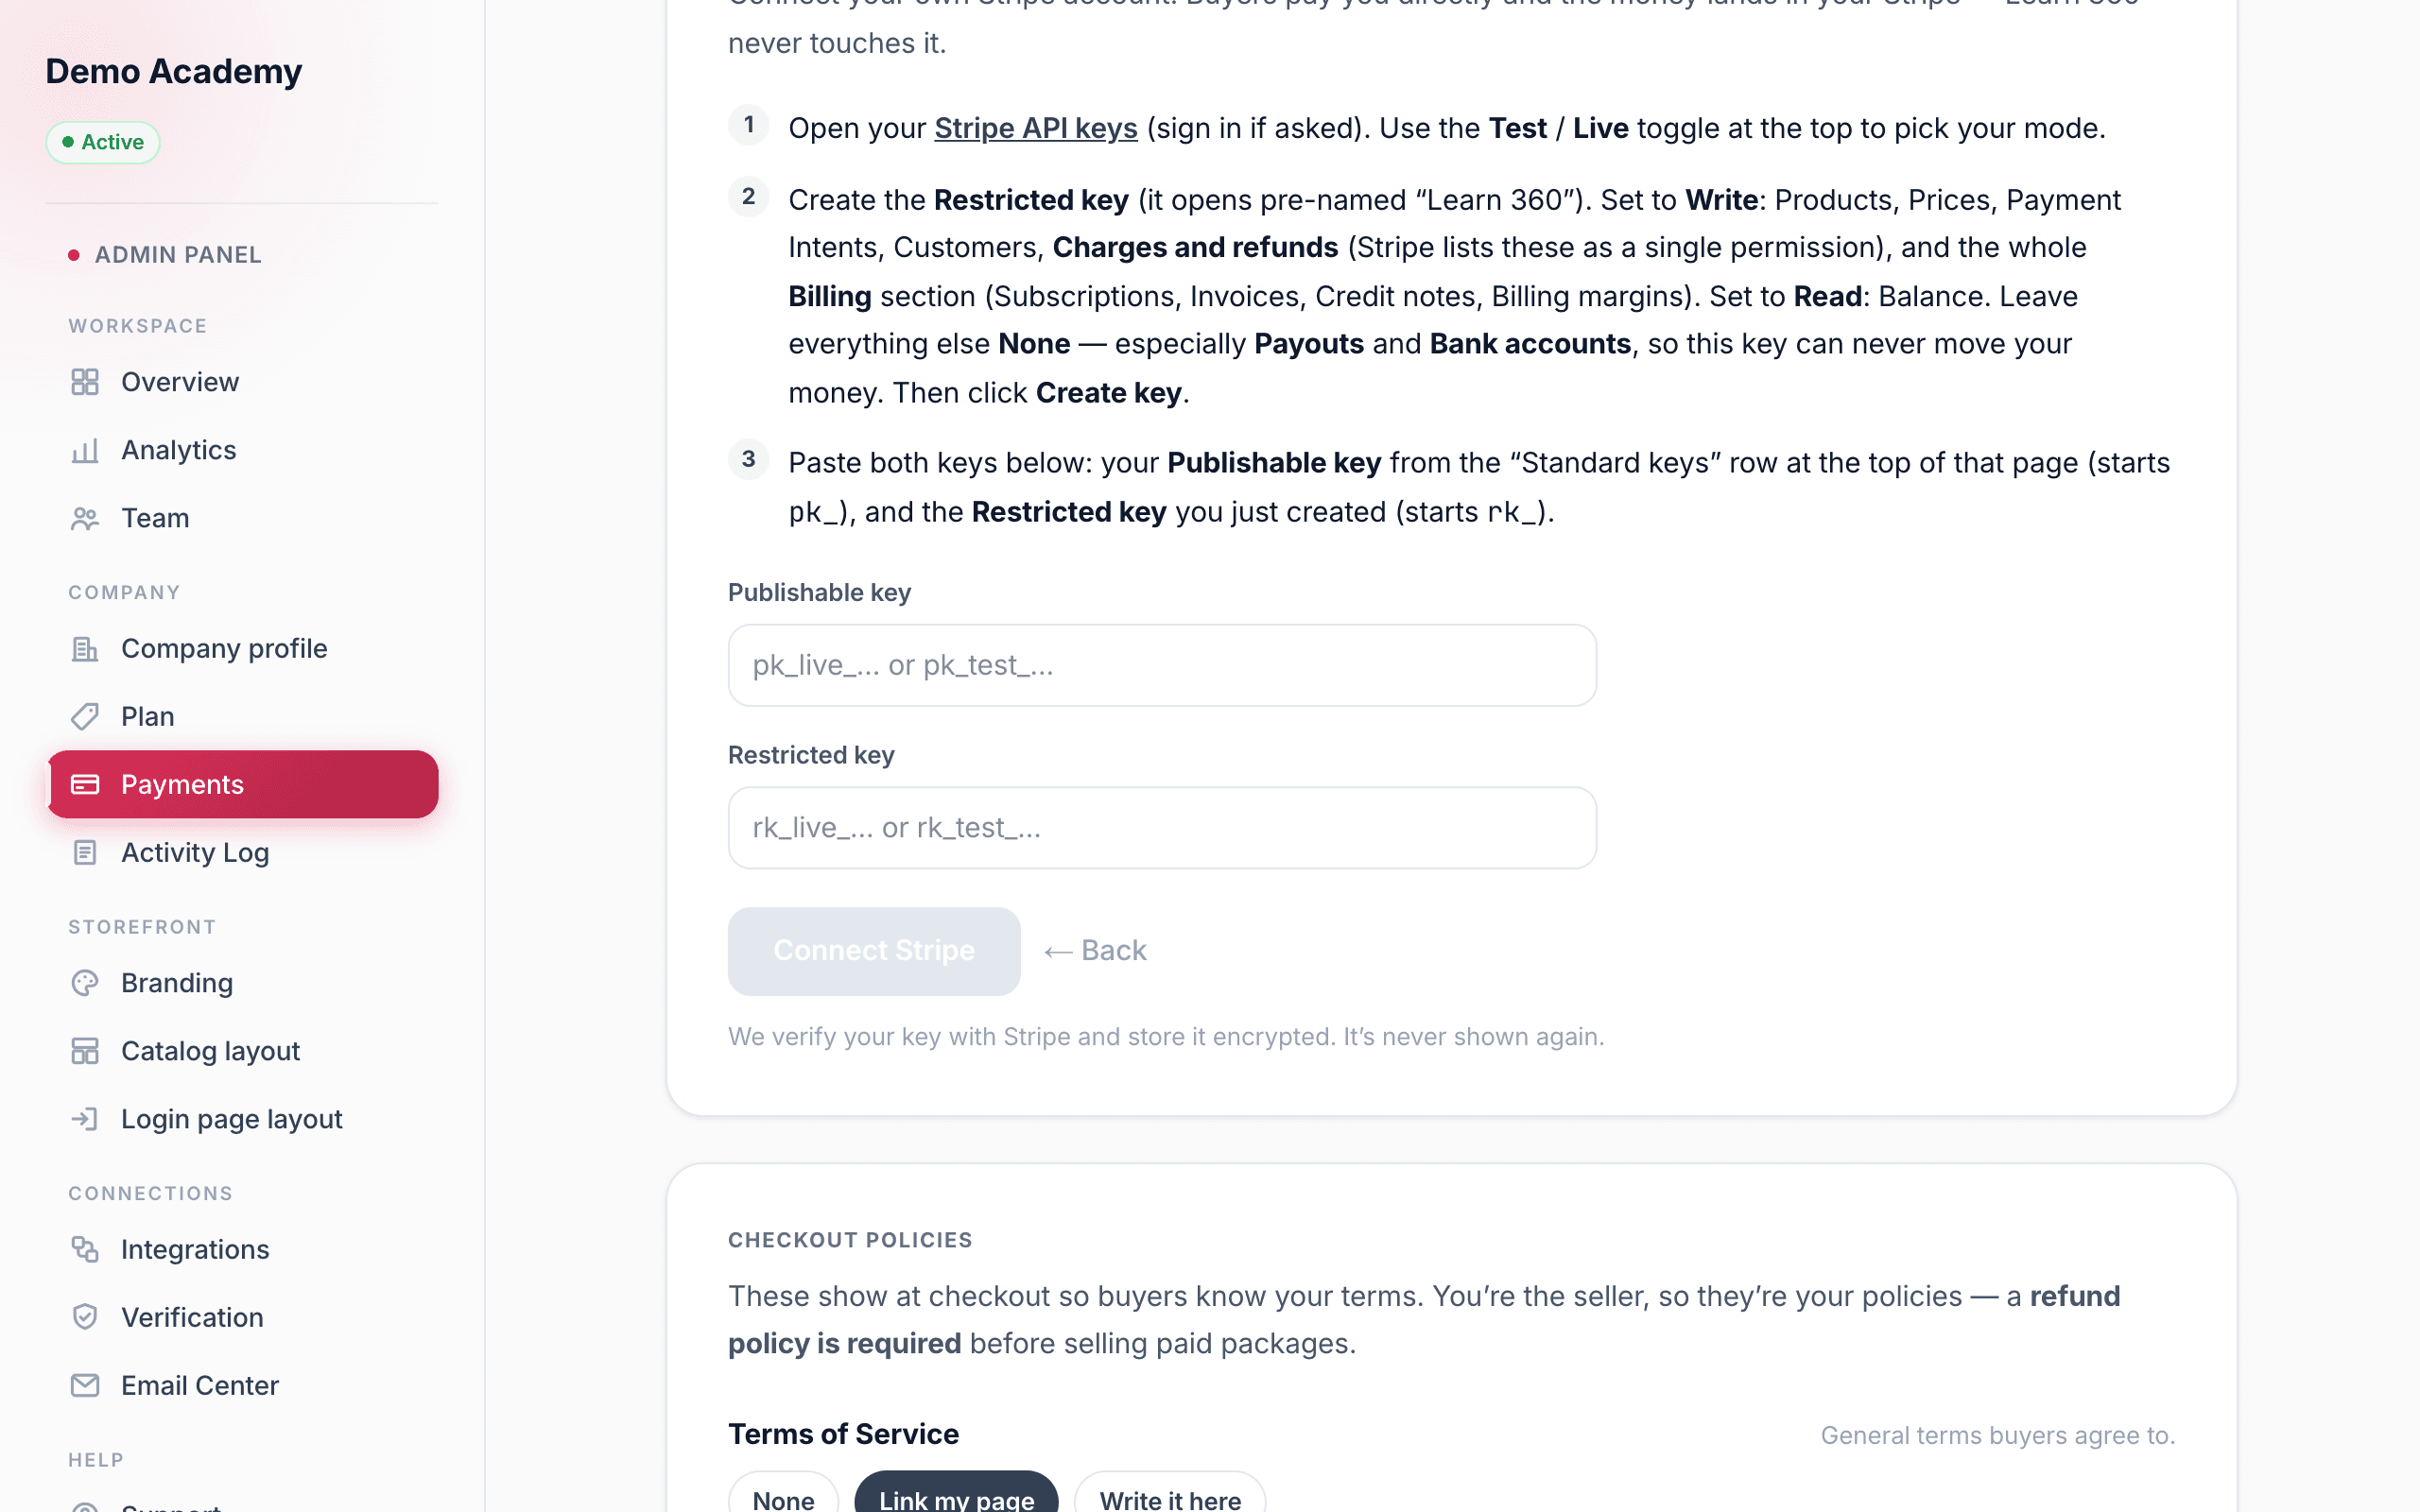
Choose Use Stripe →. Stripe uses two keys, and the screen walks you through both:
- A Publishable key — it starts with
pk_and is safe to share; it powers the card form buyers see. - A Restricted key — it starts with
rk_and does the actual work of creating products, prices, and charges. You create this one yourself in Stripe so you stay in full control.
In your Stripe dashboard, create a new Restricted key named Learn 360 and give it only the access it needs:
- Write access to: Products, Prices, Payment Intents, Customers, Charges (and refunds), and Billing.
- Read access to: Balance (so your income can show on the Payments page).
- None for Payouts and Bank accounts — this is what guarantees the key can never move your money.
Paste both keys, then click Connect Stripe (the button reads Checking… while it verifies). Learn 360 confirms the key with Stripe and stores it encrypted — for security it’s never shown back to you in full again.
Connect your own PayPal
Choose Use PayPal →. Buyers will approve payment in a PayPal window, and the funds settle to your PayPal balance. The screen guides you through creating a merchant app in the PayPal Developer dashboard, which gives you the two values you paste here:
- Environment — a Sandbox / Live toggle. Sandbox lets you test with fake money; Live takes real payments and uses a separate app with its own credentials.
- Client ID and Secret — the app credentials. The secret is stored encrypted, just like a Stripe key.
Click Connect PayPal to verify and save.
What the status pills tell you
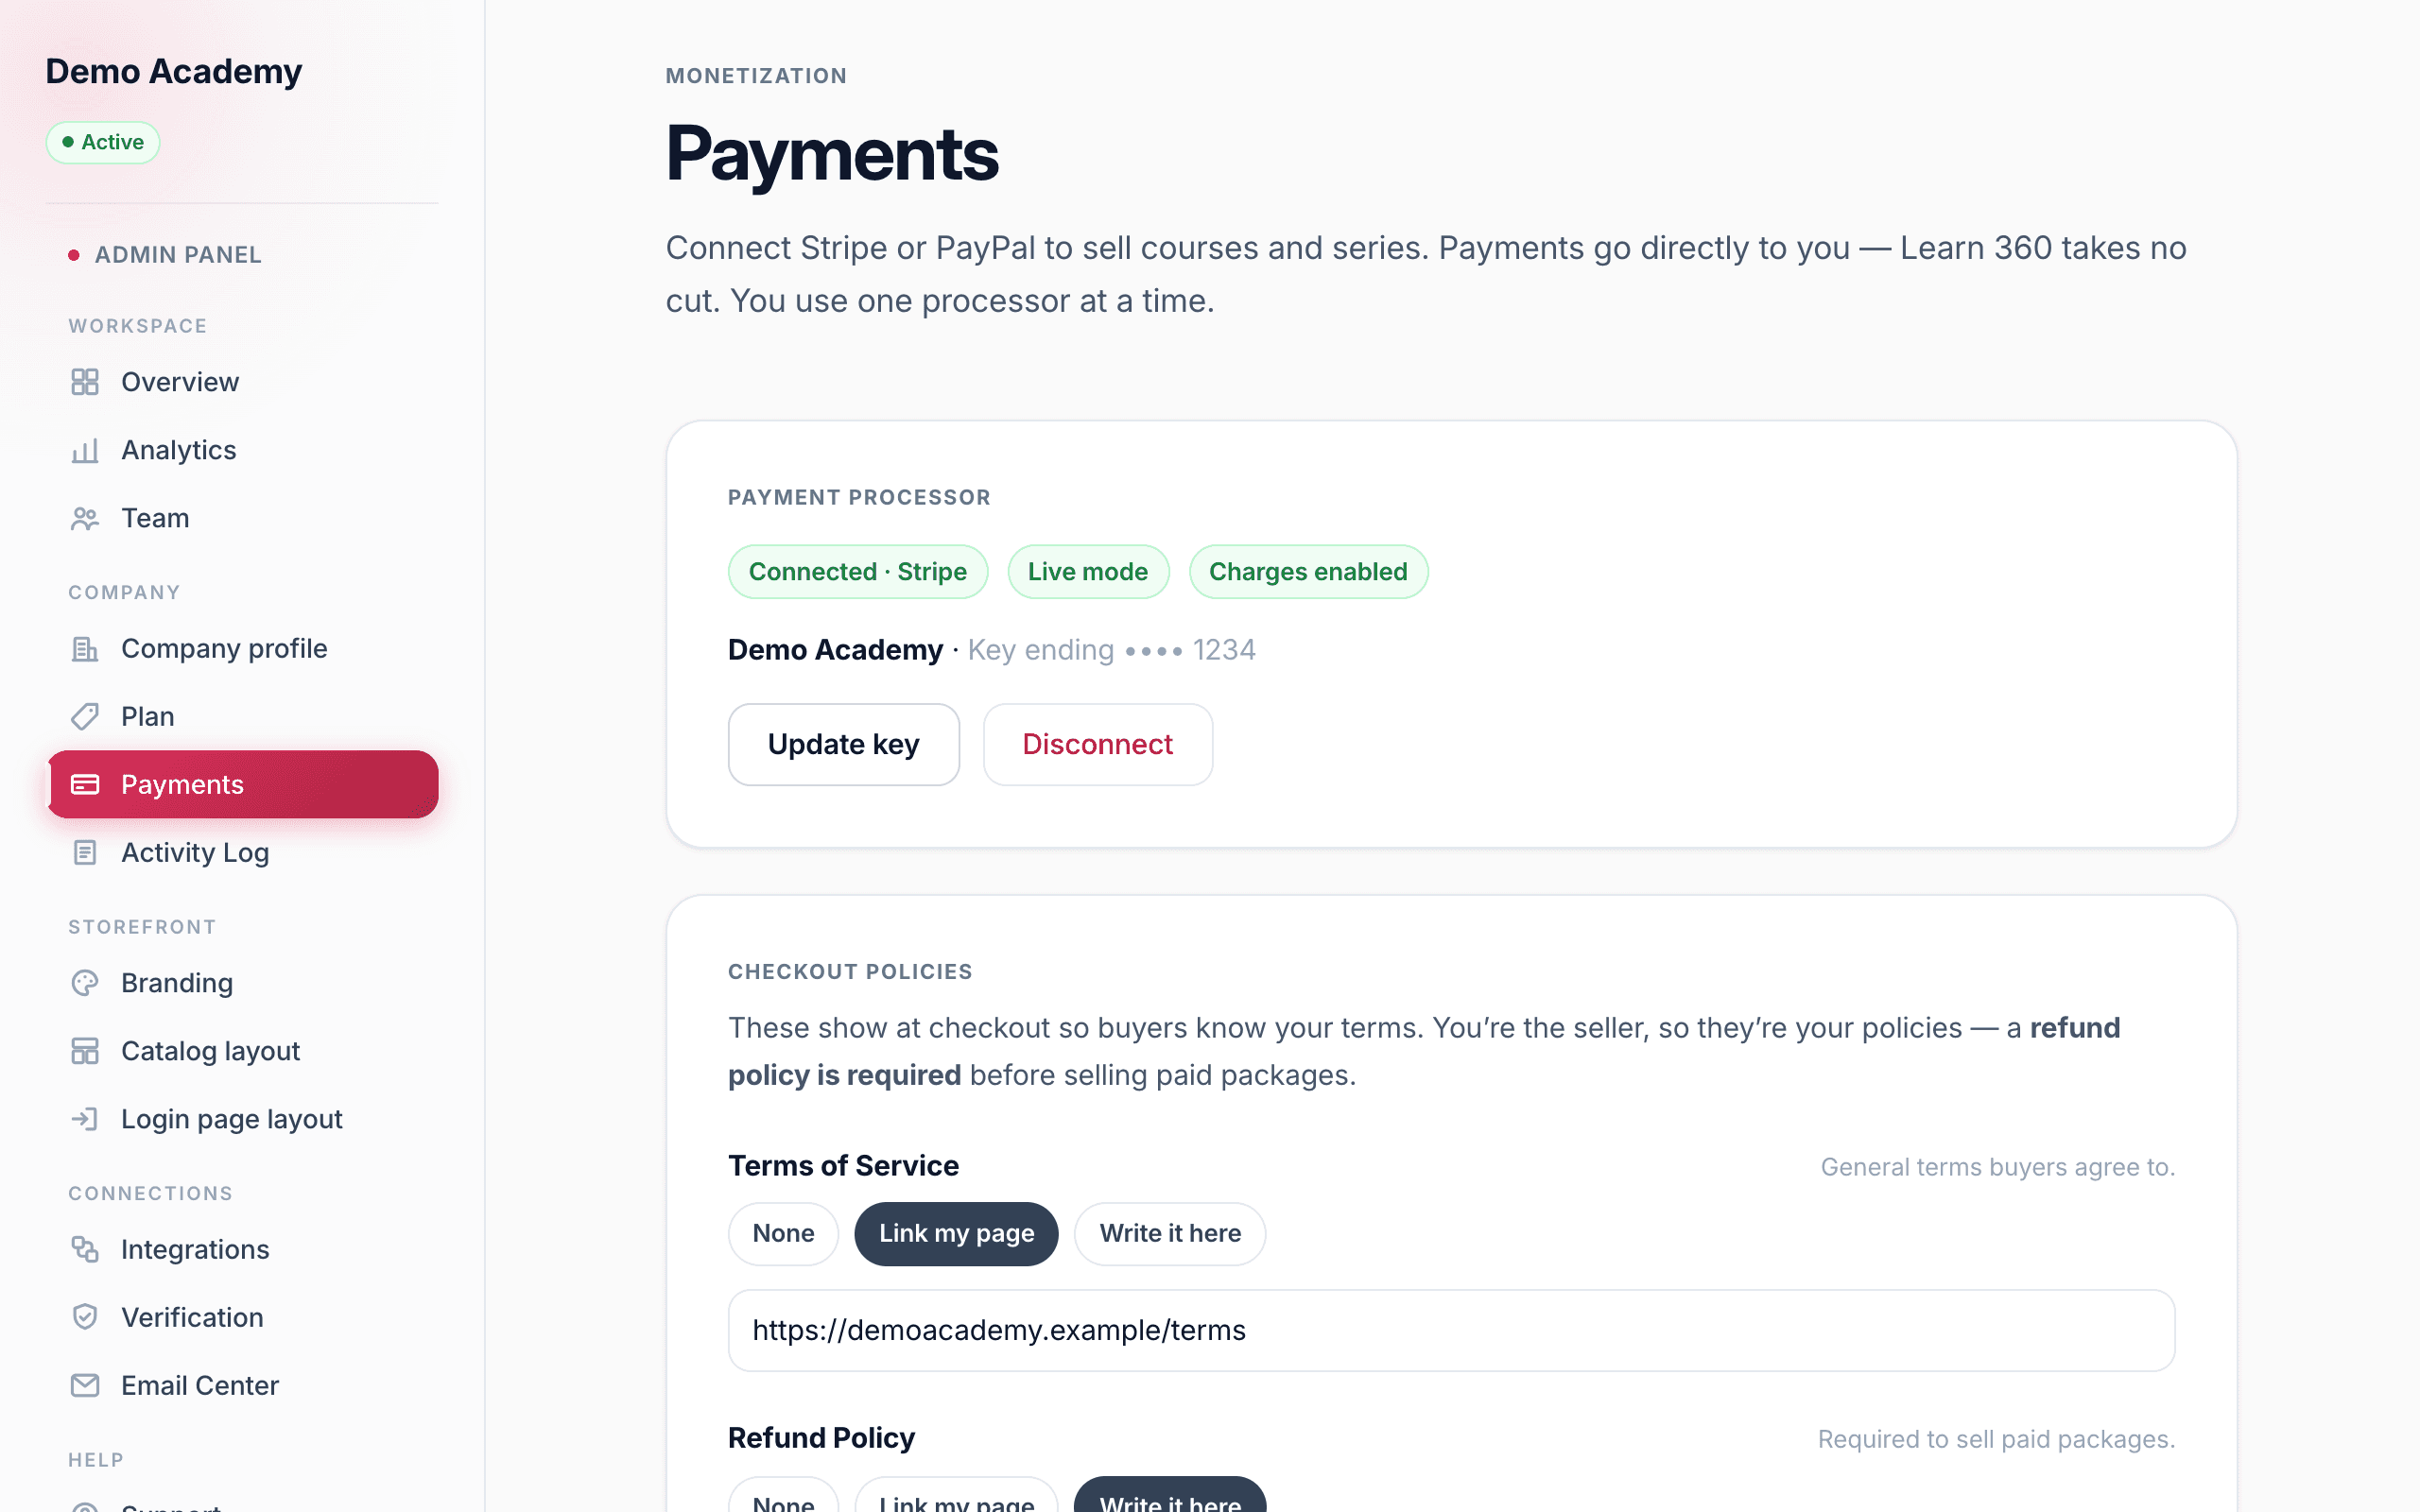
Once a processor is connected, the card shows a row of status pills so you always know where you stand:
- Connected · Stripe or Connected · PayPal — which processor is live.
- The mode — Live mode, Test mode (Stripe), or Sandbox mode (PayPal). Test and Sandbox won’t take real money, so switch to Live before you sell.
- For Stripe, Charges enabled or Charges pending. Pending means Stripe is still activating your account; the page checks again every 20 seconds, and there’s a Check again link if you don’t want to wait.
You’ll also see your account name and the last four characters of the key or secret (ending •••• 1234) so you can confirm which account is attached.
Update keys, disconnect, or switch
Update key (or Update keys for PayPal) lets you paste fresh credentials — handy when you rotate a key or move from Sandbox to Live. Disconnect removes the credentials from Learn 360; it asks you to confirm first: “Disconnect Stripe? This removes your key from here — your Stripe account and past sales are untouched.”
Set your checkout policies
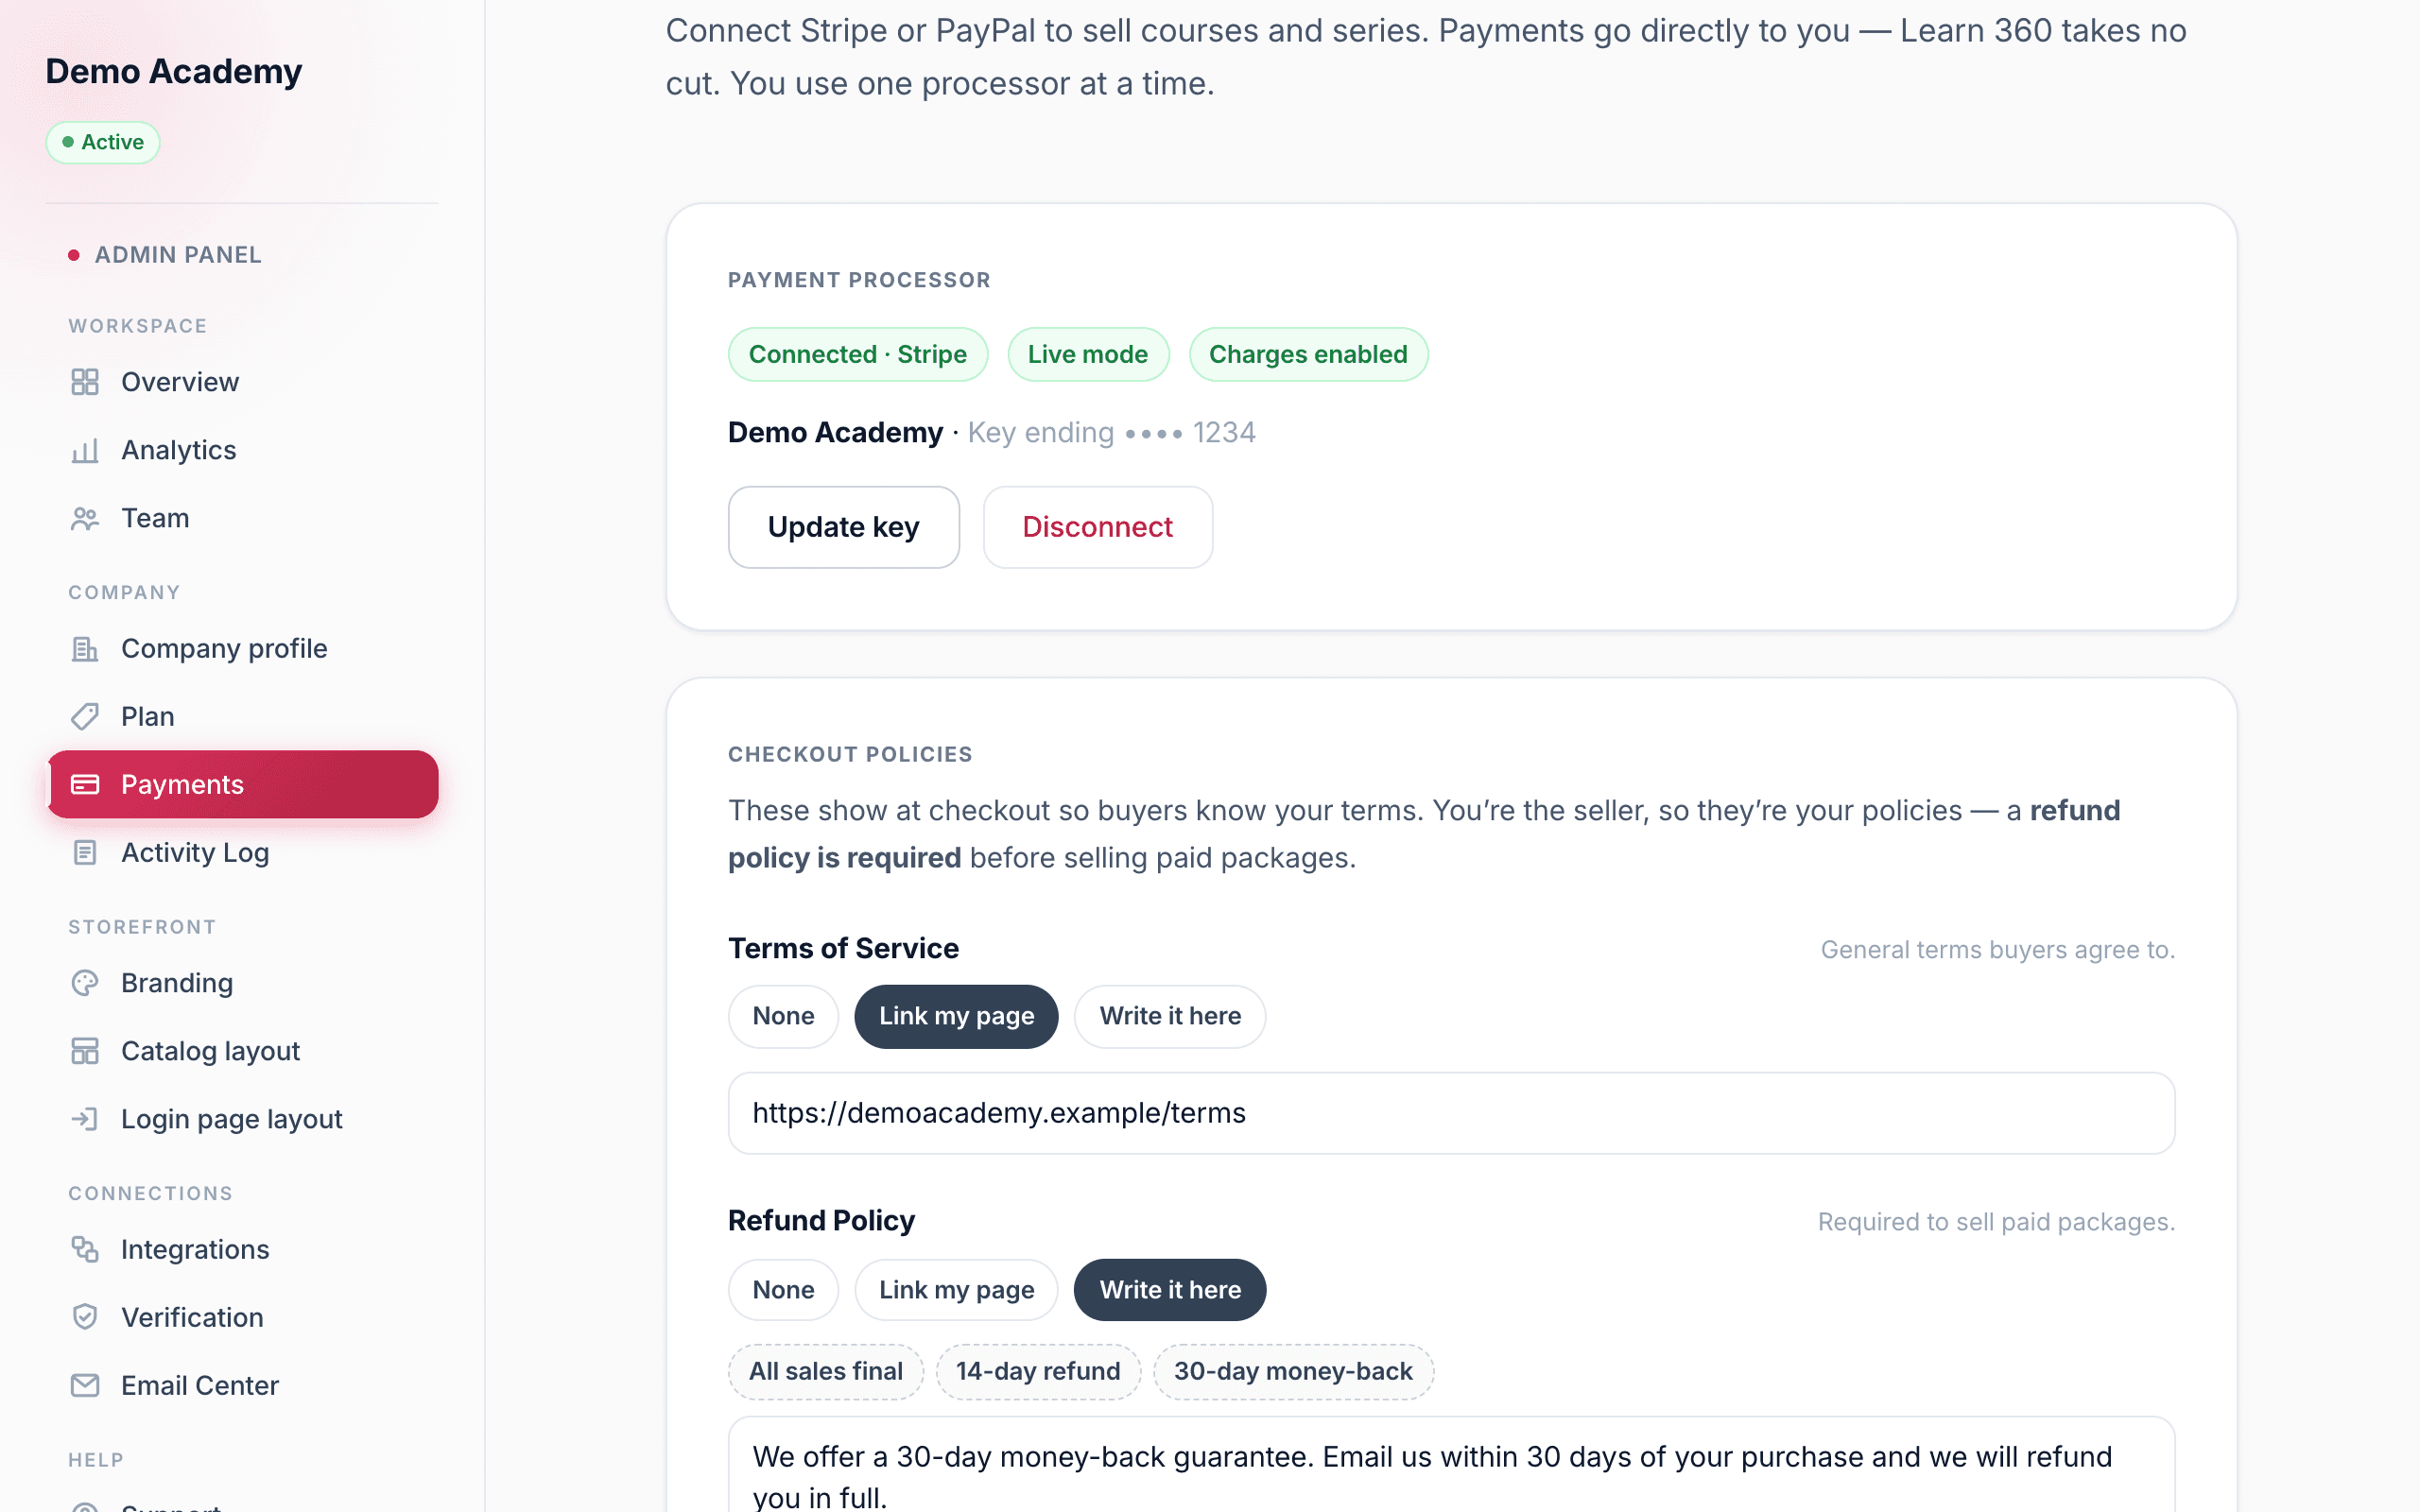
Just below the processor is a Checkout policies card. Because you are the seller, these are your policies — they show at checkout so buyers know your terms. There are three:
- Terms of Service — your general terms.
- Refund Policy — required before you can sell any paid package. Buyers need to know your refund terms before they pay.
- Cancellation Policy — shown for subscription packages, where a buyer needs to know how to cancel a recurring plan.
Each policy has three modes: None, Link my page (point to a page on your own site), or Write it here (type it inline, with one-click starter templates like “14-day refund,” “All sales final,” or “Cancel anytime”). Click Save policies when you’re done — a snapshot of these is recorded with every purchase, so buyers always have a copy of the terms they agreed to.
With a processor connected and your policies set, you’re ready to price your work: Set your prices with Packages. To watch the money come in and handle refunds, see Income, transactions & refunds.